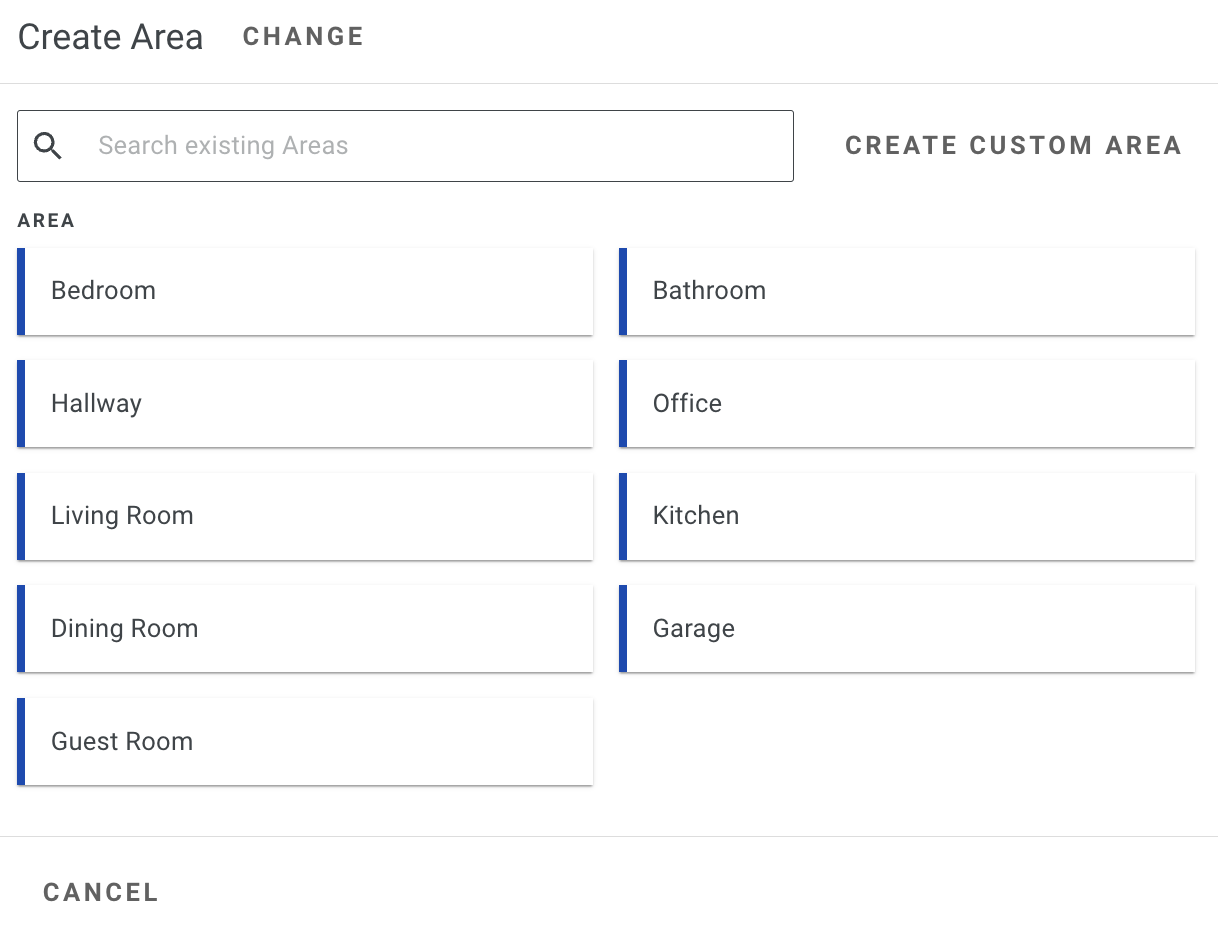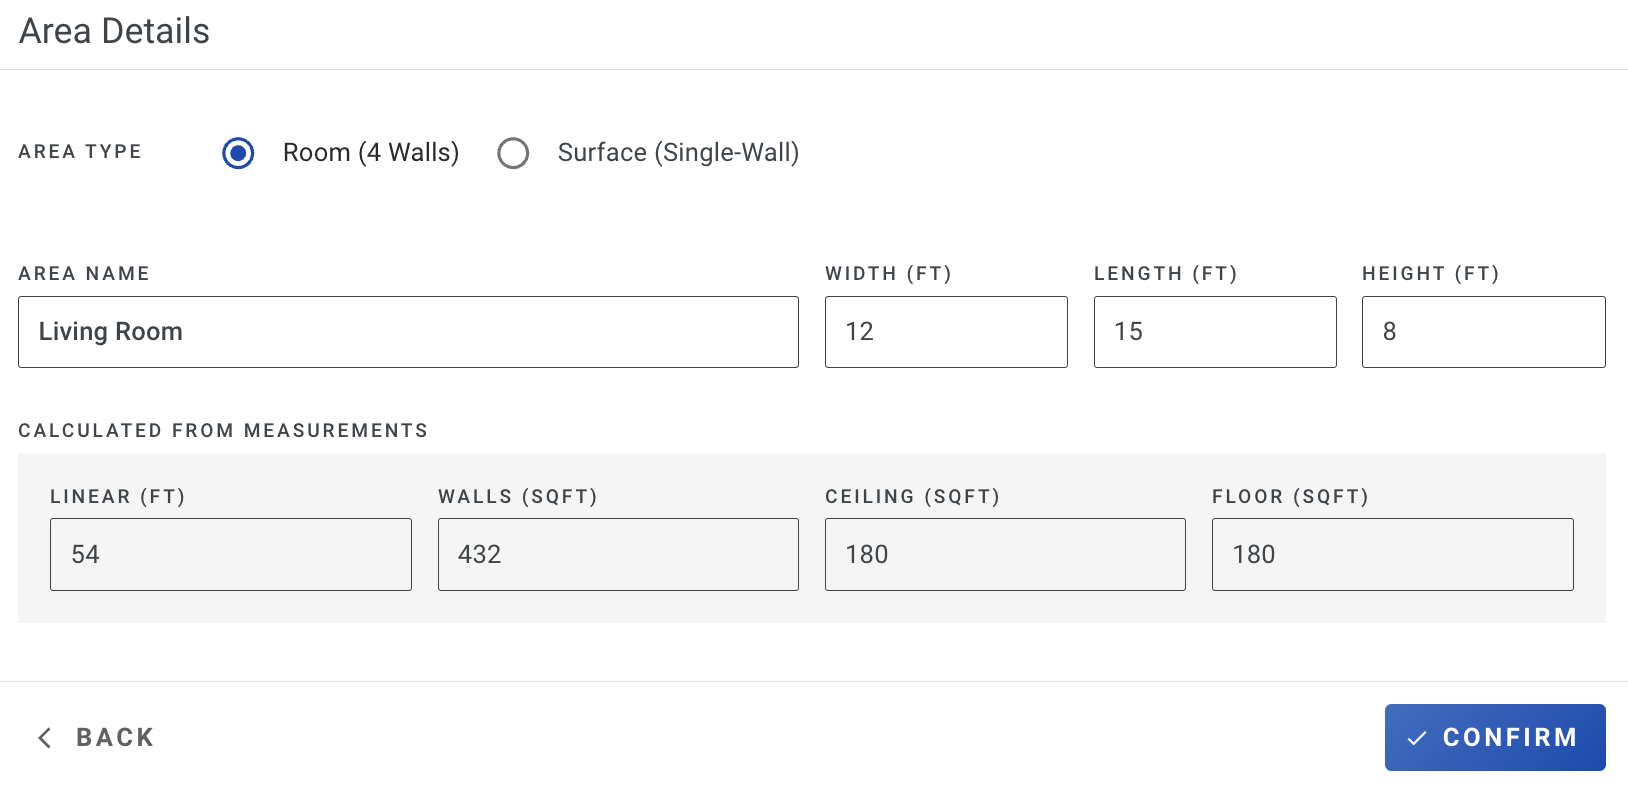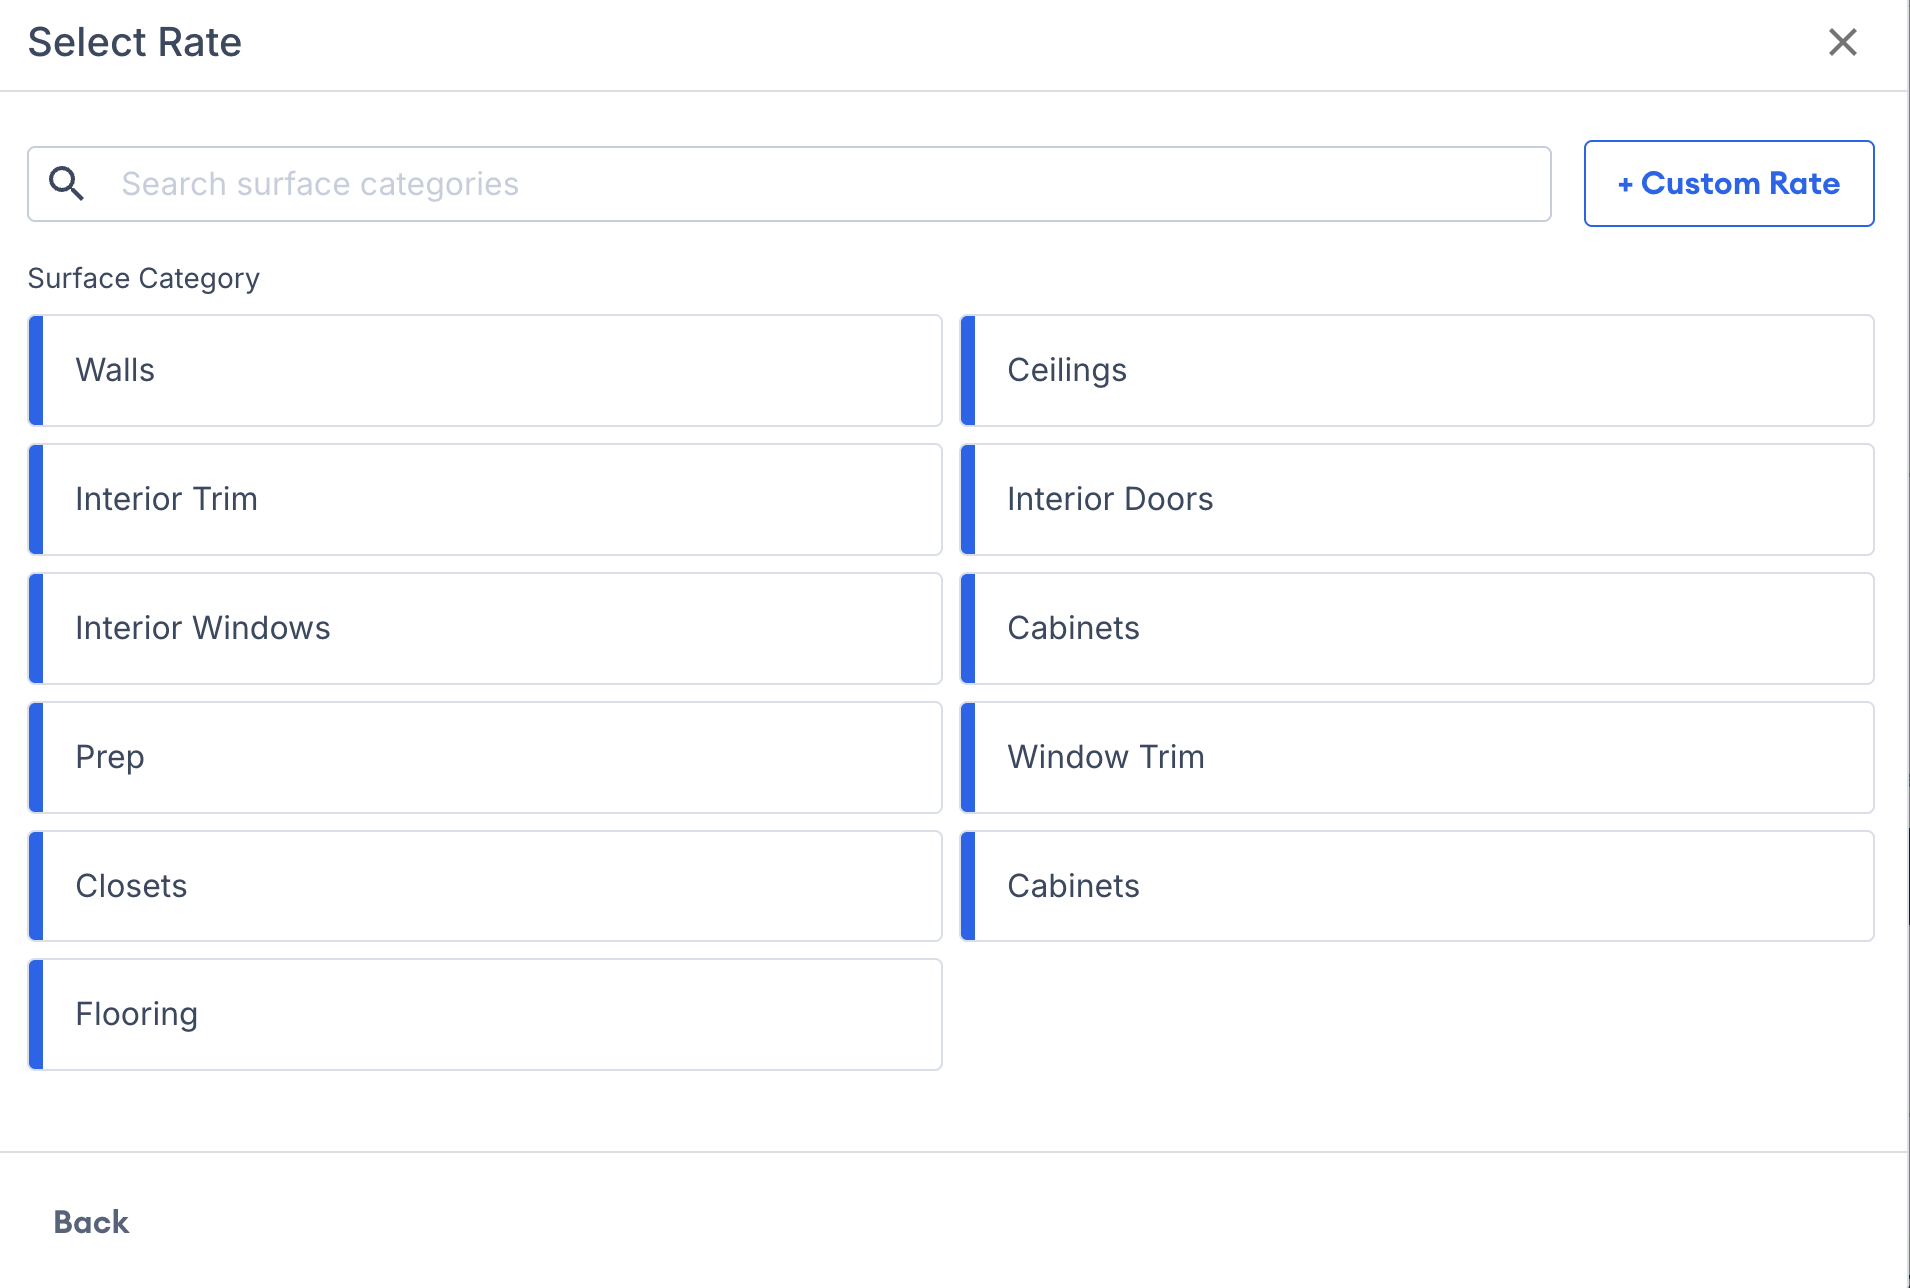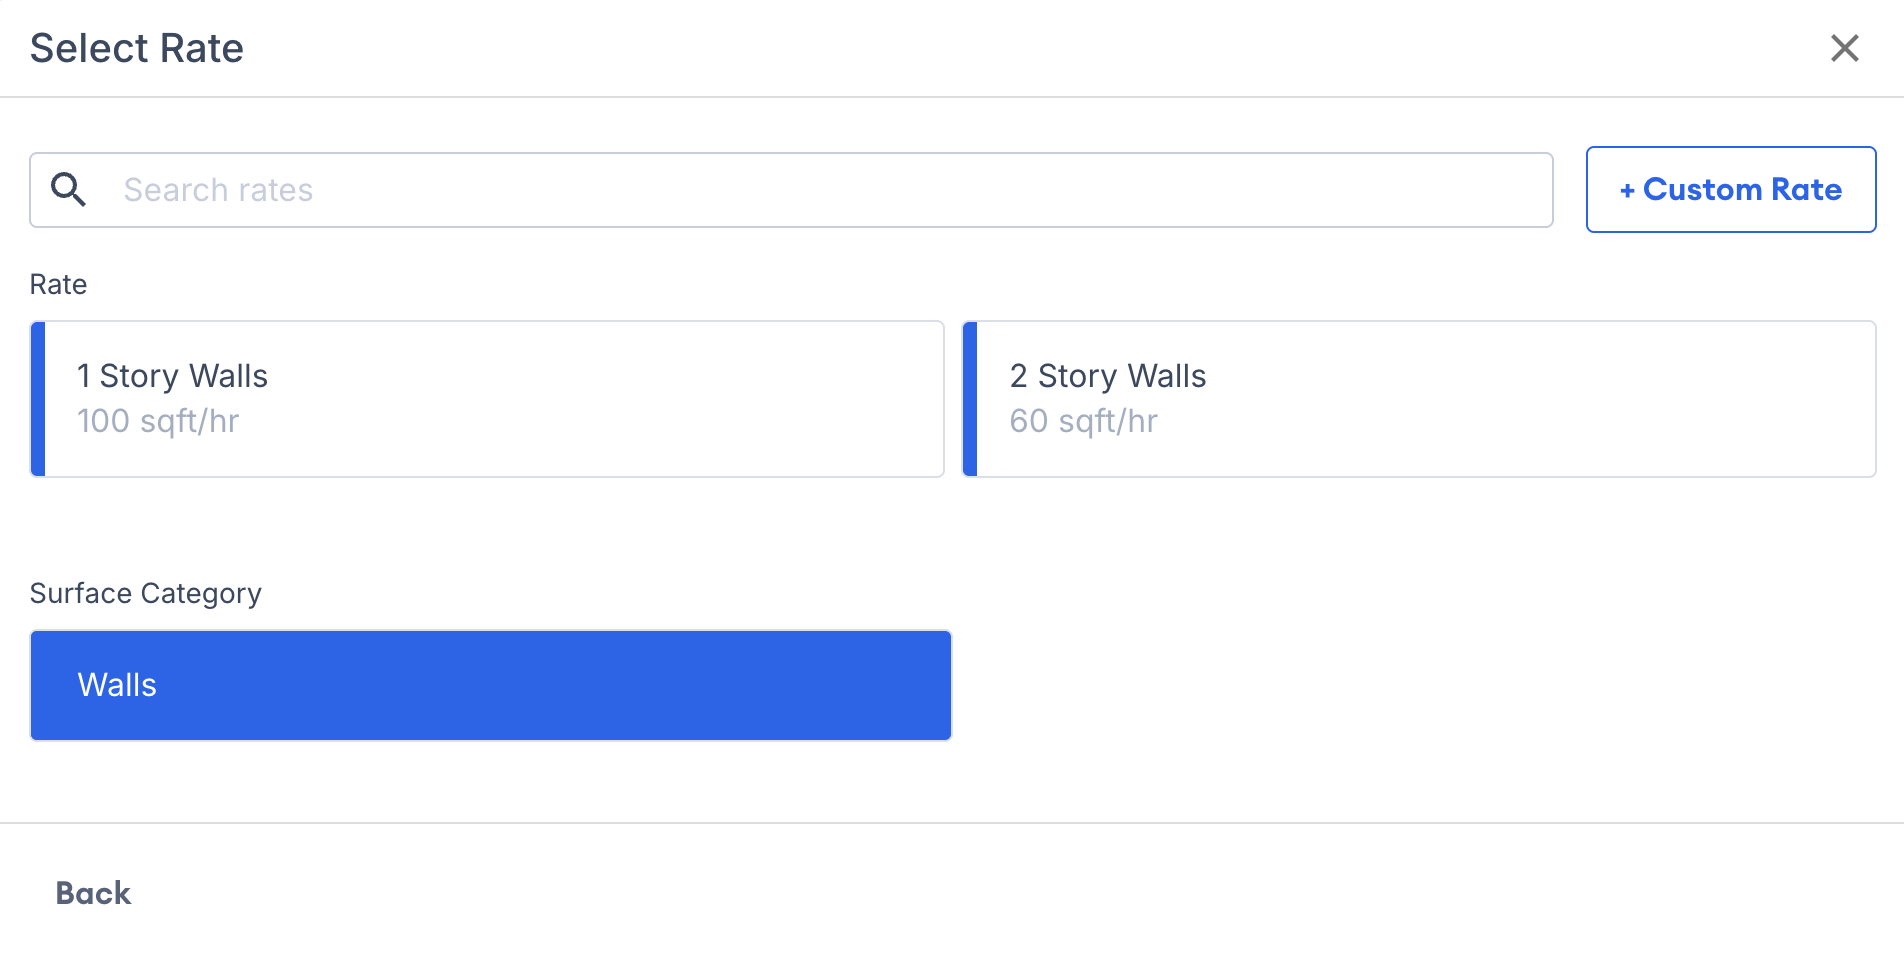




# Home

Welcome to the PaintScout Knowledge Base

<h2 align="center">How can we help you?</h2>

<p align="center">Find answers, guides, and everything you need to get the most out of PaintScout.</p>

<p align="center"><button type="button" class="button primary" data-action="ask" data-icon="gitbook-assistant">Ask a question…</button></p>

<table data-view="cards"><thead><tr><th></th><th></th><th data-hidden data-card-cover data-type="image">Cover image</th><th data-hidden data-card-target data-type="content-ref"></th></tr></thead><tbody><tr><td><h4><strong>Documentation</strong></h4></td><td>Step-by-step articles covering every feature in PaintScout.</td><td><a href="https://3877654747-files.gitbook.io/~/files/v0/b/gitbook-x-prod.appspot.com/o/spaces%2FlBETExHJYoT3jTIVFS7y%2Fuploads%2Fgit-blob-0729df4d9bcdfd43d4530413f817ad73dc063153%2Fdocumentation.png?alt=media">documentation.png</a></td><td><a href="https://paintscout.gitbook.io/paintscout/support-1">https://paintscout.gitbook.io/paintscout/support-1</a></td></tr><tr><td><h4><strong>Guides</strong></h4></td><td>Expert resources and tips to grow your painting business</td><td><a href="https://3877654747-files.gitbook.io/~/files/v0/b/gitbook-x-prod.appspot.com/o/spaces%2FlBETExHJYoT3jTIVFS7y%2Fuploads%2Fgit-blob-1af85ab7ef7688c64a3683de426155045db8fac2%2FGuides.png?alt=media">Guides.png</a></td><td><a href="https://www.paintscout.com/guides">https://www.paintscout.com/guides</a></td></tr><tr><td><h4><strong>Developers</strong></h4></td><td>API documentation, integrations, and developer resources.</td><td><a href="https://3877654747-files.gitbook.io/~/files/v0/b/gitbook-x-prod.appspot.com/o/spaces%2FlBETExHJYoT3jTIVFS7y%2Fuploads%2Fgit-blob-9b5d0c078148315562e627fe6bea14ff2841b436%2FDevelopers.png?alt=media">Developers.png</a></td><td><a href="https://paintscout.gitbook.io/paintscout/developers">https://paintscout.gitbook.io/paintscout/developers</a></td></tr><tr><td><h4><strong>Webinars</strong></h4></td><td>Watch expert-led sessions and level up your skills</td><td><a href="https://3877654747-files.gitbook.io/~/files/v0/b/gitbook-x-prod.appspot.com/o/spaces%2FlBETExHJYoT3jTIVFS7y%2Fuploads%2Fgit-blob-b96d103e599bda568495f39b11f200f3d56c01ea%2FWebinars.png?alt=media">Webinars.png</a></td><td><a href="https://www.youtube.com/playlist?list=PL94xw_u4z9z6KRYFuki1-rwDeoqbSJ3S1">https://www.youtube.com/playlist?list=PL94xw_u4z9z6KRYFuki1-rwDeoqbSJ3S1</a></td></tr><tr><td><h4><strong>Community</strong></h4></td><td>Join peers, share insights, and build your network.</td><td><a href="https://3877654747-files.gitbook.io/~/files/v0/b/gitbook-x-prod.appspot.com/o/spaces%2FlBETExHJYoT3jTIVFS7y%2Fuploads%2Fgit-blob-65b4a89ab6dc491a0146bfab35f94dd660352766%2FCommunity.png?alt=media">Community.png</a></td><td><a href="https://www.facebook.com/groups/pricingpaintingprojects">https://www.facebook.com/groups/pricingpaintingprojects</a></td></tr><tr><td><h4><strong>Success Stories</strong></h4></td><td>See the real-world impact on painting businesses.</td><td><a href="https://3877654747-files.gitbook.io/~/files/v0/b/gitbook-x-prod.appspot.com/o/spaces%2FlBETExHJYoT3jTIVFS7y%2Fuploads%2Fgit-blob-f3645c4dad6320a8ce422aafdfd0129fa08f645d%2FSuccess%20Stories.png?alt=media">Success Stories.png</a></td><td><a href="https://www.paintscout.com/success-stories">https://www.paintscout.com/success-stories</a></td></tr></tbody></table>


# Getting Started Overview

Learn the core setup steps, access basics, and first actions for getting started in PaintScout.

{% hint style="success" %}
**Start here:** Begin with [Implementation Guide](/support/getting-started/implementation-guide), then move to [Common Tasks](/support/getting-started/common-tasks).
{% endhint %}

Getting started in PaintScout is simple. Set up your account, learn how to access it, and complete the first tasks that get your team estimating faster.

## In This Section

* [What is PaintScout?](/support/getting-started/what-is-paintscout) — Learn what PaintScout does and how it helps painting contractors
* [Browser & Device Requirements](/support/getting-started/paintscout-browser-device-requirements) — Confirm the best browser and device setup for your team
* [Implementation Guide](/support/getting-started/implementation-guide) — Set up company details, rates, templates, terms, and integrations
* [Common Tasks](/support/getting-started/common-tasks) — Jump straight to the setup and estimating actions most teams do first
* [How to Log In](/support/getting-started/how-to-log-in) — Access your account from the web
* [Create a Home Screen Icon](/support/getting-started/how-to-create-a-home-screen-icon-on-your-mobile-device) — Add PaintScout to your phone or tablet for faster access
* [Using PaintScout Offline](/support/getting-started/how-do-i-use-paintscout-offline) — Keep estimating when you lose internet access

## Recommended first reads

* [Implementation Guide](/support/getting-started/implementation-guide) — Set up your account correctly from the start
* [Common Tasks](/support/getting-started/common-tasks) — Handle the first actions most new teams need
* [Estimating Overview](/support/estimating/estimating-with-paintscout) — Move into the full estimate workflow once setup is done

&#x20;&#x20;


# What is PaintScout?

Overview of PaintScout's painting contractor estimation platform, key features, and business benefits

If you work as a painting contractor, you understand the challenge of creating accurate estimates while maintaining professionalism. This is where PaintScout comes in – a transformative platform designed to make the estimation process easier and more efficient for painters.

{% embed url="<https://www.youtube.com/watch?v=JiDfpZTjk7Y>" %}

## What PaintScout Does

PaintScout is an all-inclusive tool that empowers painting contractors to craft precise and well-presented quotes for their clients. With its web-based platform, contractors can quickly and effectively generate estimates, improving their ability to secure new projects and keep clients satisfied.

## Key Features of PaintScout

1. **Estimate On The Go**: PaintScout is fully compatible with mobile devices. This means painting contractors can access the application from anywhere – whether at the office, home or on a project site. This flexibility allows for creating estimates on the move, saving time and enhancing responsiveness.
2. **Your Estimates, Your Way**: Every painting business is unique, and PaintScout understands that. The application is highly customizable, allowing you to set your own production rates, use your contracts, choose products, and apply estimate templates that match your business style. This customization ensures that each estimate showcases your expertise and aligns with the specifics of the project you're bidding on.
3. **Designed for you**: PaintScout has been designed with painting contractors in mind, making it intuitive and easy to learn. No matter your familiarity with technology, you can navigate the tool effortlessly and utilize its capabilities to create impressive estimates that make a lasting impact.

## Advantages for Painting Contractors

1. **Time Savings**: Thanks to the easy-to-use design and adaptable features, PaintScout makes estimating faster. In an industry where swift replies can make or break deals, this is vital.
2. **Enhanced Professionalism**: PaintScout generates well-crafted estimates that elevate the professionalism of painting contractors. These accurate and visually appealing proposals leave a positive mark on clients and set you apart from your competition, boosting the chances of project approval.
3. **Personalized Precision**: PaintScout's customization options empower your sales team to tailor estimates to fit each project's unique requirements. This personalized approach showcases attention to detail and a deep understanding of the client's needs, instilling confidence in your clientele.

&#x20;&#x20;

## Related articles

<table data-card-size="large" data-view="cards"><thead><tr><th></th><th></th><th data-hidden data-card-target data-type="content-ref"></th></tr></thead><tbody><tr><td><strong>Implementation Guide</strong></td><td>Set up your PaintScout account with core settings, estimate defaults, communication tools, and integrations.</td><td><a href="/support/getting-started/implementation-guide">Implementation Guide</a></td></tr><tr><td><strong>Best Practices</strong></td><td>Essential tips and best practices for getting the most out of PaintScout including saving, updates, and device usage</td><td><a href="/support/resources/paintscout-best-practices">Best Practices</a></td></tr></tbody></table>


# Browser & Device Requirements

Browser and device compatibility requirements for using PaintScout on desktop and mobile

PaintScout works on smartphones, tablets, and computers using modern browsers like Safari, Chrome, and Firefox. Apple devices require iOS 11 or higher. Avoid using private or incognito browser tabs.

***

## What devices and browsers can estimators use?

Estimators can access PaintScout on any **smartphone, tablet, or computer** with an up-to-date browser. Supported browsers include **Safari, Chrome, and Firefox**. Do not use private or incognito tabs.

***

## What do my customers need to view estimates?

Your customers have the same browser and device requirements for viewing estimates. If they cannot meet these requirements, you can copy an estimate link or download a PDF to share.

### Estimate Link

Click the drop-down arrow beside the send button and **Copy Estimate Link** (make sure to copy the tracking link so you can still see when they view it!)

<div align="left"><figure><img src="https://231248629-files.gitbook.io/~/files/v0/b/gitbook-x-prod.appspot.com/o/spaces%2FPyUbJF1GXLjxdJqm89IQ%2Fuploads%2Fgit-blob-9cfe257e66c8b406da73269494725e7abe41a7da%2FScreenshot%202026-03-31%20at%202.24.13%E2%80%AFPM.png?alt=media" alt="Screenshot showing the estimate actions menu with the Copy Estimate Link option"><figcaption></figcaption></figure></div>

### Download PDF

Click the drop-down arrow beside the send button and **Download Estimate**.

<div align="left"><figure><img src="https://231248629-files.gitbook.io/~/files/v0/b/gitbook-x-prod.appspot.com/o/spaces%2FPyUbJF1GXLjxdJqm89IQ%2Fuploads%2Fgit-blob-ccec76a00b03543ffab5a6e2b8884cd4760c0aab%2FScreenshot%202026-03-31%20at%202.24.51%E2%80%AFPM.png?alt=media" alt="Screenshot showing the estimate actions menu with the Download Estimate option"><figcaption></figcaption></figure></div>

It's important to note that if you do download the PDF and send it to them manually, it will not trigger the tracking (i.e. you won't be able to see when customers view the estimate).

We hope this information helps you understand the browser and device requirements for using PaintScout!

&#x20;&#x20;

## Related articles

<table data-card-size="large" data-view="cards"><thead><tr><th></th><th></th><th data-hidden data-card-target data-type="content-ref"></th></tr></thead><tbody><tr><td><strong>Create a Home Screen Icon</strong></td><td>How to add PaintScout as a home screen shortcut on iOS and Android devices for quick access</td><td><a href="/support/getting-started/how-to-create-a-home-screen-icon-on-your-mobile-device">Create a Home Screen Icon</a></td></tr><tr><td><strong>Using PaintScout Offline</strong></td><td>How to create estimates in PaintScout without internet connection using offline mode</td><td><a href="/support/getting-started/how-do-i-use-paintscout-offline">Using PaintScout Offline</a></td></tr></tbody></table>


# Implementation Guide

Set up your PaintScout account with core settings, estimate defaults, communication tools, and integrations.

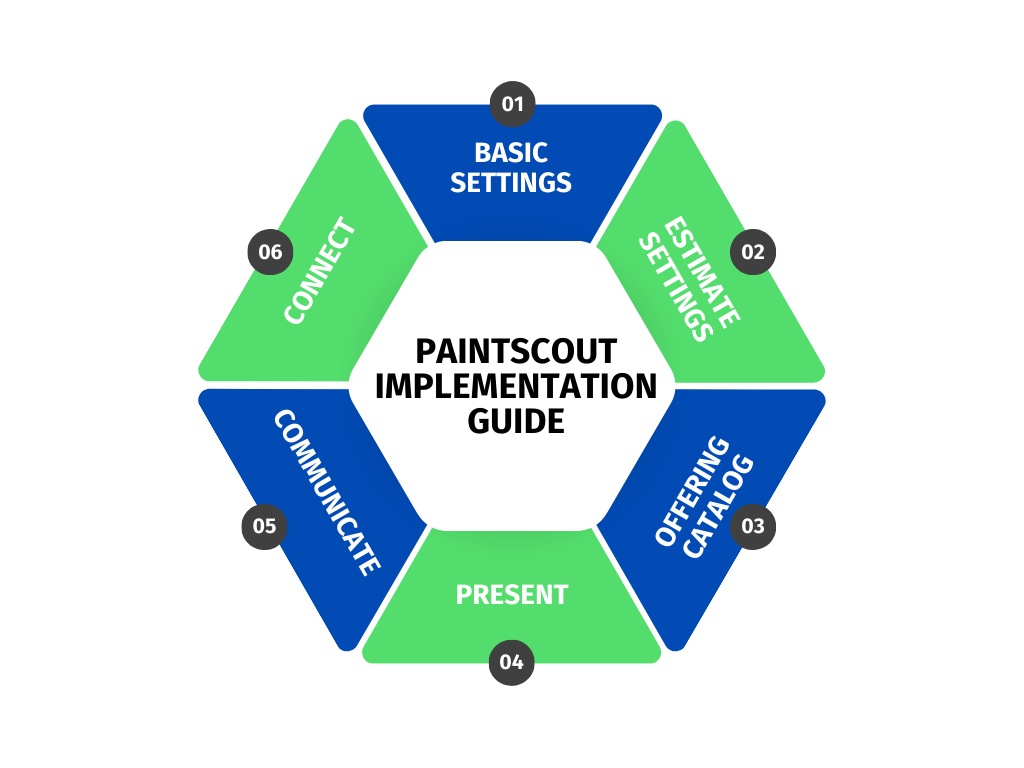
Welcome to the PaintScout Implementation Guide! This guide will walk you through setting up your account so you can make the most out of our platform. Let's get started!

<figure><img src="https://231248629-files.gitbook.io/~/files/v0/b/gitbook-x-prod.appspot.com/o/spaces%2FPyUbJF1GXLjxdJqm89IQ%2Fuploads%2Fgit-blob-3b77c690b294e357917f0636578febc0c8aa553d%2FImplementation%20Guide.png?alt=media" alt="Illustration for the PaintScout Implementation Guide"><figcaption></figcaption></figure>

***

## Basic Settings <a href="#h_a04de9461a" id="h_a04de9461a"></a>

### Add Company Information: <a href="#h_8e9cb74c55" id="h_8e9cb74c55"></a>

* Click on the person icon and select Account Settings.
* Navigate to **Account Details > Company Information**
* Fill in your company name, address, phone number, and other details in the provided spaces. This info will be visible on every estimate you send.
* [Learn More](/support/account-settings/account-settings/account-details-overview)\
  ​

### Add Branding: <a href="#h_7e2847c1b4" id="h_7e2847c1b4"></a>

* Still in the Account Details section, go to **Branding**.
* Upload your company logo and pick a color that represents your brand.
* This will update the platform's appearance and customize the button colors in emails, ensuring a fully branded experience for your customers.\
  ​

### Add Team Members: <a href="#h_cb9add4e3f" id="h_cb9add4e3f"></a>

* Move to the **Billing** section in Account Settings and choose **User Management.**
* Add any additional users who will be joining you on PaintScout for seamless collaboration in the setup process!
* [Learn More](/support/account-settings/users-and-permissions/how-to-add-a-new-user)\
  ​

### Configure Your Profile: <a href="#h_77495539b3" id="h_77495539b3"></a>

* Click on the person icon again and select **Your Profile.**
* Enter your name, and contact details as you'd like them to appear on estimates.
* Sign or upload your signature. We'll automatically populate this on accepted estimates.
* [Learn More](/support/account-settings/your-profile)\
  ​

### Clear Demo Data: <a href="#h_0cf4c3c7cc" id="h_0cf4c3c7cc"></a>

* If you've noticed some demo estimates in your account, let's tidy up so you can start with a clean slate!
* Open the **Estimates** tab and select the checkbox beside each estimate you would like to remove. Choose **Delete** from the bottom toolbar. Repeat this process on the Invoices tab.\
  ​

***

## Estimate Settings <a href="#h_19898110b1" id="h_19898110b1"></a>

### Set Hourly Rate: <a href="#h_3fff01a9c6" id="h_3fff01a9c6"></a>

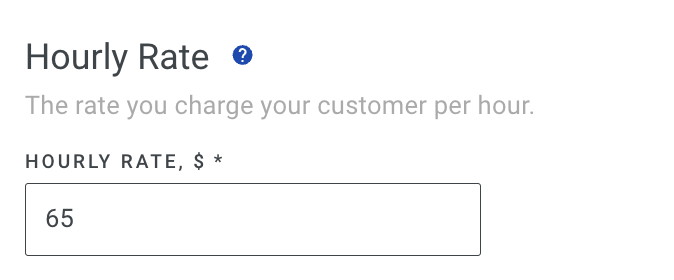
* Head back to your Account Settings, navigate to the Estimates section and open **Settings**. In the provided space, enter your general hourly rate.
* Don’t worry you can customize your hourly rate for different projects (*Interior v Exterior)* later on.
* [Learn More](/support/customization/templates-and-presets/estimate-settings)

### Create Taxes & Discounts: <a href="#h_a491b0cdc1" id="h_a491b0cdc1"></a>

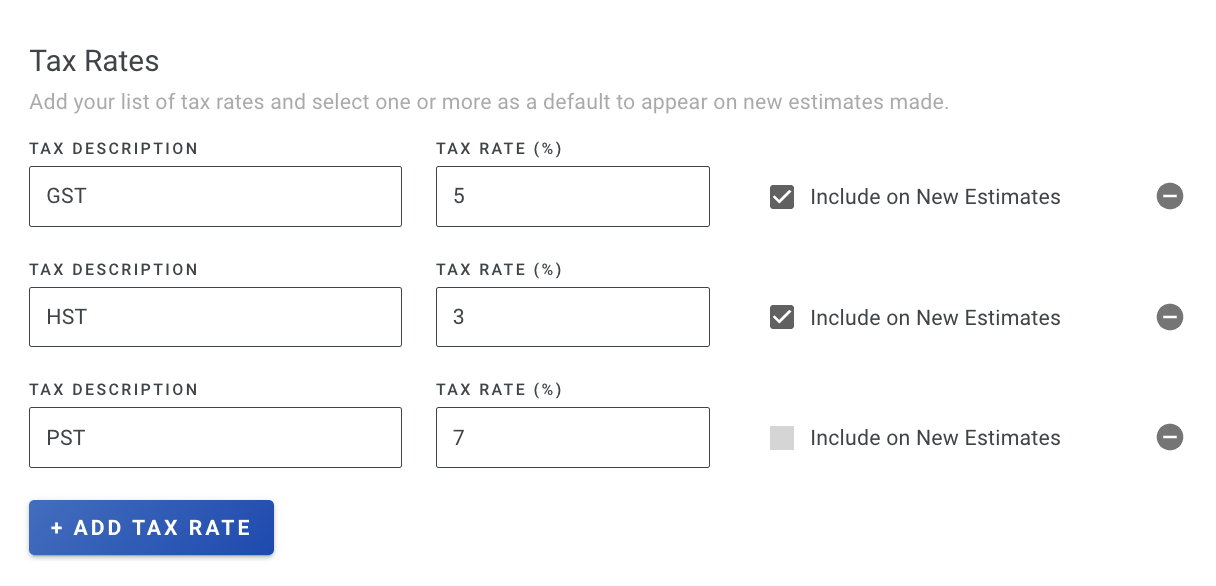
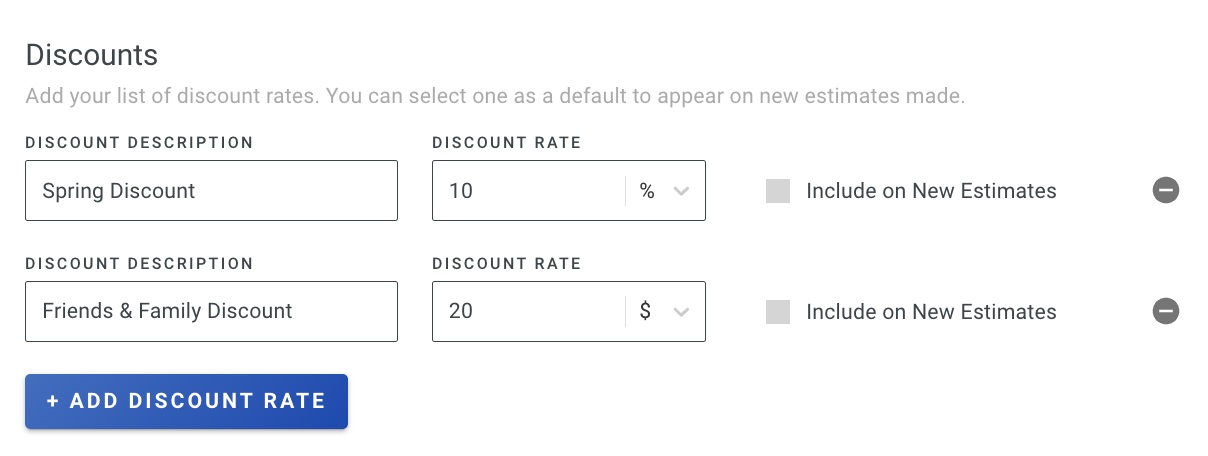
* Scroll down and input your tax rates and discounts that will apply to new empty estimates.​
* Click the +add new button to create multiple entries.
* To ensure they are included on *all* empty estimates, check the **Default on empty estimates box**. Everything else will be available for selection on a per-estimate basis.
* If you want your taxes and discounts to also apply to your estimate templates, be sure to set them on the template itself.

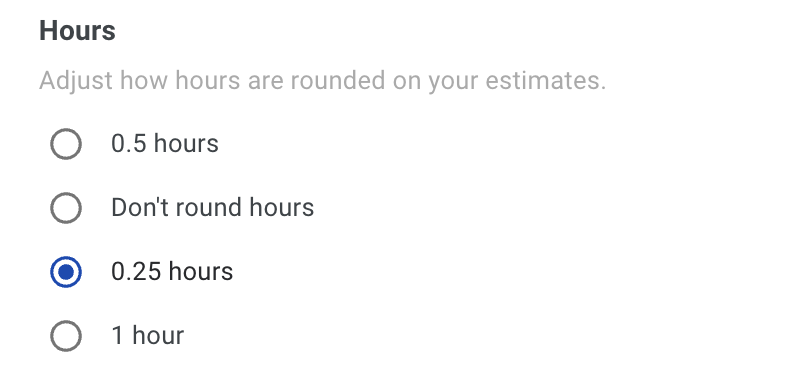
### Set Rounding Preferences: <a href="#h_07c92438fe" id="h_07c92438fe"></a>

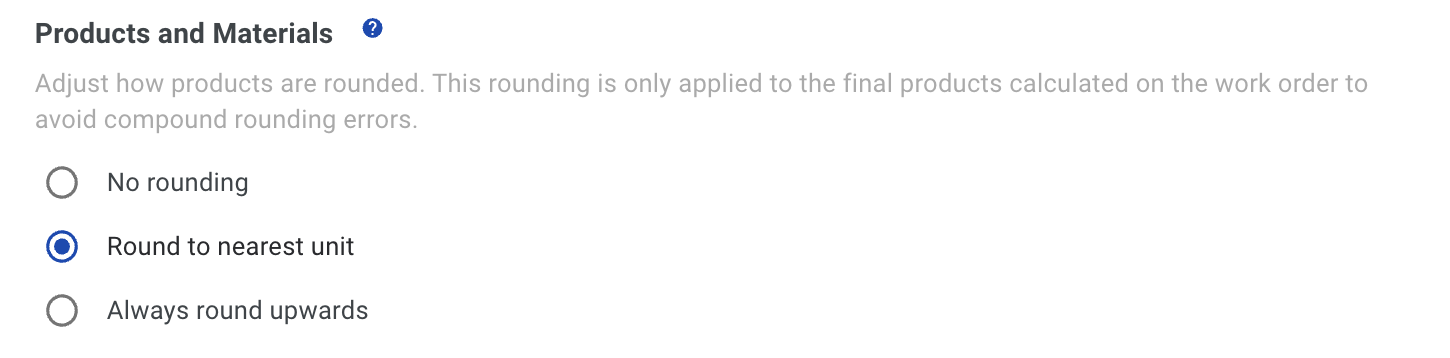
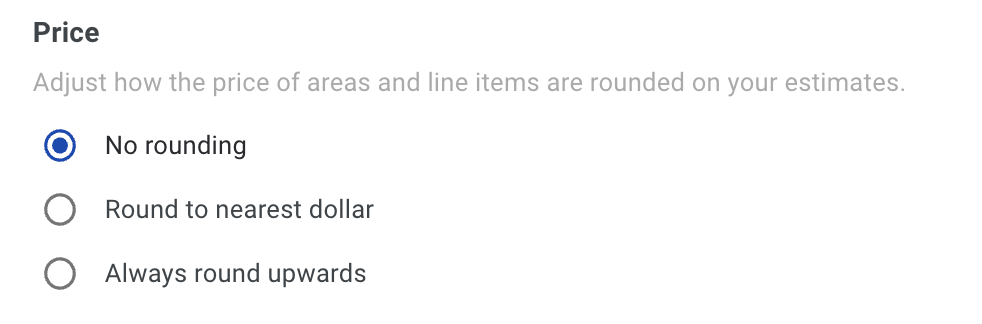
* The following section defines your preferences for rounding on hours, products, and pricing.

### Enable Customer Accepted Options: <a href="#h_5ae3cc6145" id="h_5ae3cc6145"></a>

* Toggle on the Customer Accepted Options if you want customers to effortlessly add available options on their own, making upselling a breeze!
* [Learn More](/support/estimating/line-items-and-options/customer-accepted-options)

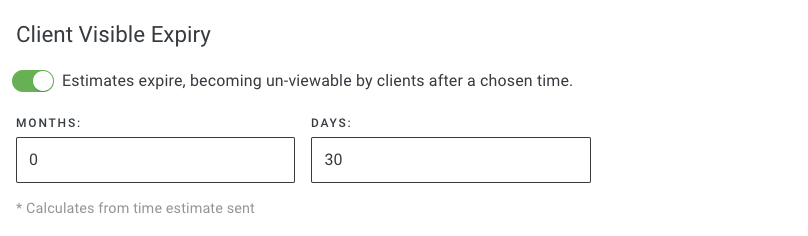
### Set Estimate Expiry Date: <a href="#h_29ae9f5b5a" id="h_29ae9f5b5a"></a>

* Specify an expiration date for your estimates.
* If customers attempt to view the estimate after the expiry date, they'll receive a message to reach out to you. This allows for adjustments due to product price changes or other considerations.\
  ​

***

## Offering Catalog <a href="#h_b2250c9db3" id="h_b2250c9db3"></a>

### Define Estimate Types: <a href="#h_b4752c38e2" id="h_b4752c38e2"></a>

* Easily outline different project categories like *Interior, Exterior, Cabinets, Commercial, etc*.
* Head to **Estimates > Estimate Types** in your Account Settings to configure each type with a unique hourly rate and default Terms and Presentation.
* [Learn More](/support/customization/templates-and-presets/what-are-estimate-types)

### Product Information: <a href="#h_236599f692" id="h_236599f692"></a>

* Input all important details about your products, including coverage rates and prices, in the **Products** section of your Account Settings.
* [Learn More](/support/customization/products/adding-products)

### Customize Production Rates: <a href="#h_01b660e214" id="h_01b660e214"></a>

* In the **Production Rates** section, fine-tune the default rates to align with your specifications or create entirely new categories and rates.
* [Learn More](/support/customization/pricing-and-rates/production-rates-section-overview)

### Incorporate Line Items: <a href="#h_87d30d0ecd" id="h_87d30d0ecd"></a>

* Enhance communication about processes, payment policies, etc., using Line Items.
* Line items can also include prices and multiple products that do not utilize dimensions, making them a great fit for one-off charges.
* [Learn More](/support/customization/templates-and-presets/line-items-overview)

***

## Present <a href="#h_7b85fe4b77" id="h_7b85fe4b77"></a>

### Establish Terms: <a href="#h_6d45820bf7" id="h_6d45820bf7"></a>

* Tailor contracts in the **Terms** section of your Account Settings.
* If you do not have a contract, feel free to modify the Default Terms found in your account.
* [Learn More](/support/customization/presentations-and-terms/updating-estimate-terms)

### Design Presentations: <a href="#h_ae0a8ab3ee" id="h_ae0a8ab3ee"></a>

* Think of presentations as an extension of your website, allowing you to create additional pages like *About Us* and a *Portfolio* that will accompany the estimate you send.
* Customize how your presentation looks in the **Presentation** section of your account settings.
* Take a look at this example for inspiration: [Example 1](https://app.paintscout.com/view/?\&view=quote\&u=B1Dd2yEfM)
* [Learn More](/support/customization/presentations-and-terms/presentations-overview)

### Set Default Terms and Presentations: <a href="#h_863a3338a7" id="h_863a3338a7"></a>

* Designate defaults for each Estimate Type to automatically include the right Presentation and Terms on all new estimates.
* [Learn More](/support/customization/presentations-and-terms/setting-default-terms)

***

## Communicate <a href="#h_3f90d3eb3b" id="h_3f90d3eb3b"></a>

### Customize Email Templates: <a href="#h_5417dfbb22" id="h_5417dfbb22"></a>

* Navigate to the **Communications** section and access the **Email Template** section.
* Configure email templates for both manual and automated emails to ensure consistent and streamlined communications.
* [Learn More](/support/email-and-communication/email-settings/how-to-create-an-email-template)

### Follow-ups: <a href="#h_18f4316a6f" id="h_18f4316a6f"></a>

* Create a series of emails and text messages in the **Follow-ups** section to automatically follow up on estimates, based on how your customers are interacting with their estimate.
* [Learn More](/support/email-and-communication/email-settings/auto-follow-ups)

***

## Connect <a href="#h_3f48ca8822" id="h_3f48ca8822"></a>

### Enable Stripe Integration: <a href="#h_745123c840" id="h_745123c840"></a>

* Head to the **Integrations** section in your Account Settings to connect with **Stripe** for in-app credit card payments.
* [Learn More](/support/invoicing-and-payments/payments/payment-processing-with-stripe)

### Explore Additional Integrations: <a href="#h_135e0472d4" id="h_135e0472d4"></a>

* While in the **Integrations** section, connect with other tools like CompanyCam or Pipeline to enhance your end-to-end workflow.
* [Learn More](/support/integrations/integrations)

### Streamline with Zapier: <a href="#h_b3fc5b2914" id="h_b3fc5b2914"></a>

* If your favorite apps aren't on our integration list, no worries! Use Zapier to connect directly with PaintScout and automate your workflow.
* [Learn More](/support/integrations/crm-and-automation/zapier-integration)

&#x20;&#x20;


# Common Tasks

Jump to the first setup, estimating, and customer-facing actions most teams handle in PaintScout.

Use this page when you want the fastest path to the tasks most teams complete first.

## Common tasks

1. [Set up your account](/support/getting-started/implementation-guide) — Configure company details, team access, estimate settings, and integrations
2. [Update your hourly rate](/support/customization/pricing-and-rates/how-to-update-your-hourly-rate) — Set the core rate behind your estimate pricing
3. [Build your production rates](/support/customization/pricing-and-rates/production-rates-section-overview) — Define how PaintScout calculates labor and price
4. [Add products](/support/customization/products/adding-products) — Create your material library and coverage settings
5. [Create a new estimate](/support/estimating/creating-estimates/how-to-create-a-new-estimate) — Start your first quote from scratch or from a template
6. [Send an estimate](/support/estimating/sending-and-acceptance/sending-estimates) — Share the estimate with the customer by email or text
7. [Create and send an invoice](/support/invoicing-and-payments/invoices/creating-invoices) — Turn sold work into a bill and request payment

## Recommended next steps

* [Getting Started Overview](/support) — Review the full onboarding section
* [Customization Overview](/support/customization/customization-overview) — Set up pricing, templates, and customer-facing defaults
* [Estimating Overview](/support/estimating/estimating-with-paintscout) — Learn the full estimate workflow

&#x20;&#x20;


# How to Log In

Step-by-step guide to logging into your PaintScout account through the web browser

PaintScout is a web-based platform accessed through your browser. There is no app store download required. Visit the login page to sign in.

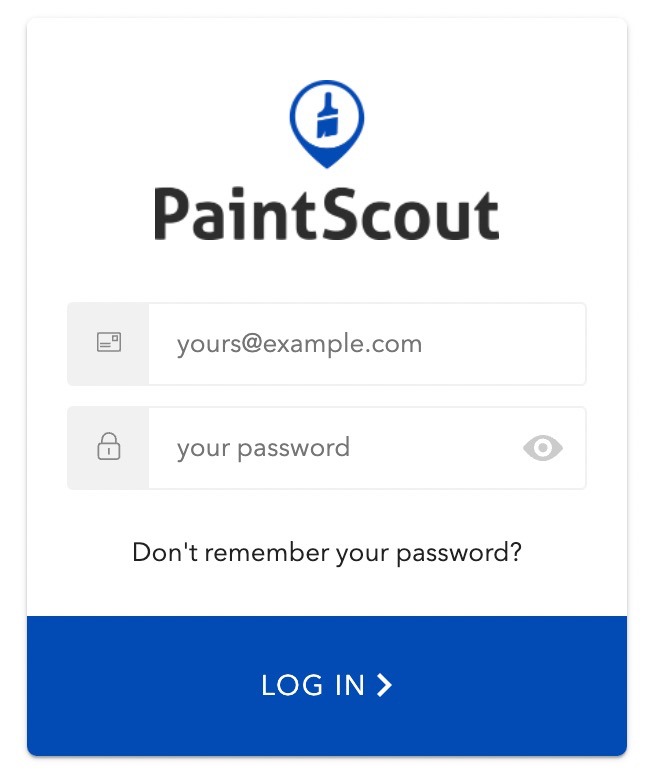
1. Go to <https://app.paintscout.com/login>.
2. Input your email address and password.
3. Click **Log in**.

{% hint style="info" %}
Once you're logged in, you can create a Home Screen Icon to easily access your account, just like an app! Learn how in the article [How to Create a Home Screen Icon](/support/getting-started/how-to-create-a-home-screen-icon-on-your-mobile-device).
{% endhint %}

<figure><img src="https://231248629-files.gitbook.io/~/files/v0/b/gitbook-x-prod.appspot.com/o/spaces%2FPyUbJF1GXLjxdJqm89IQ%2Fuploads%2Fgit-blob-944e723761f23e21c13bc32a1b5bcb4d2ca49a85%2Fd18bb998e95f02cc147d3ca8_Image_2022-06-28_at_9.59.39_AM.jpg?alt=media" alt="Screenshot showing the PaintScout login page with email and password fields and the Log in button"><figcaption></figcaption></figure>

&#x20;&#x20;

## Related articles

<table data-card-size="large" data-view="cards"><thead><tr><th></th><th></th><th data-hidden data-card-target data-type="content-ref"></th></tr></thead><tbody><tr><td><strong>How to Change Your Password</strong></td><td>Guide to resetting or changing your PaintScout password, including forgotten password recovery</td><td><a href="/support/resources/frequently-asked-questions/how-to-change-your-password">How to Change Your Password</a></td></tr><tr><td><strong>Multi-Factor Authenticator (MFA) setup</strong></td><td>Step-by-step guide to setting up Multi-Factor Authentication (MFA) on your PaintScout account using SMS or an authenticator app.</td><td><a href="/support/resources/frequently-asked-questions/multi-factor-authenticator-mfa-setup">Multi-Factor Authenticator (MFA) setup</a></td></tr></tbody></table>


# Create a Home Screen Icon

How to add PaintScout as a home screen shortcut on iOS and Android devices for quick access

Add PaintScout to your mobile device's home screen for quick, app-like access without downloading from an app store. This also enables offline access when you stay logged in.

1\. Launch your browser of choice and navigate to <https://app.paintscout.com>.

2\. Login to your account.

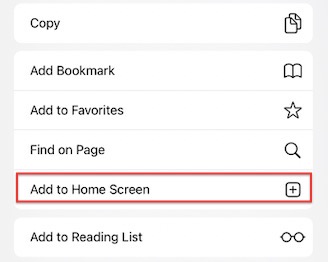
3\. Tap the share icon to open a dropdown menu.

<figure><img src="https://231248629-files.gitbook.io/~/files/v0/b/gitbook-x-prod.appspot.com/o/spaces%2FPyUbJF1GXLjxdJqm89IQ%2Fuploads%2Fgit-blob-99641e68ed07c59b39b0081d99c313e98abb6e37%2F4a6681c09e16dfdd10b90610_Shortcut_1_Annotated.jpg?alt=media" alt=""><figcaption></figcaption></figure>

4\. Tap 'Add to Home Screen.'

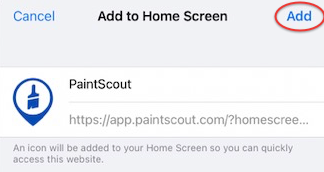
<figure><img src="https://231248629-files.gitbook.io/~/files/v0/b/gitbook-x-prod.appspot.com/o/spaces%2FPyUbJF1GXLjxdJqm89IQ%2Fuploads%2Fgit-blob-e61ea0d9377fc843d90d80d21967f80aeb615dee%2F6aaf3b9701d2d392b4535a31_Shortcut_2_annotated.jpg?alt=media" alt=""><figcaption></figcaption></figure>

5\. The Add to Home dialog box will appear, with the icon that will be used for this website on the left of the dialog box. Enter the name for the shortcut using the on-screen keyboard and tap 'Add.'

<figure><img src="https://231248629-files.gitbook.io/~/files/v0/b/gitbook-x-prod.appspot.com/o/spaces%2FPyUbJF1GXLjxdJqm89IQ%2Fuploads%2Fgit-blob-0fcaa86e00489a55c79ce07cfd35ec2661f40f70%2Fff690460d61112dd9764a730_Shortcut_3_Annotated.png?alt=media" alt=""><figcaption></figcaption></figure>

6\. Your web browser will close automatically and you will be taken to where the icon is located on your device's desktop.

{% hint style="info" %}
By creating this link and staying logged in you will be able to access your PaintScout application without internet access.
{% endhint %}

&#x20;&#x20;

## Related articles

<table data-card-size="large" data-view="cards"><thead><tr><th></th><th></th><th data-hidden data-card-target data-type="content-ref"></th></tr></thead><tbody><tr><td><strong>Browser &#x26; Device Requirements</strong></td><td>Browser and device compatibility requirements for using PaintScout on desktop and mobile</td><td><a href="/support/getting-started/paintscout-browser-device-requirements">Browser &amp; Device Requirements</a></td></tr><tr><td><strong>Using PaintScout Offline</strong></td><td>How to create estimates in PaintScout without internet connection using offline mode</td><td><a href="/support/getting-started/how-do-i-use-paintscout-offline">Using PaintScout Offline</a></td></tr></tbody></table>


# Using PaintScout Offline

How to create estimates in PaintScout without internet connection using offline mode

PaintScout's offline mode lets you create estimates on-site without an internet connection. Your work saves locally and syncs automatically when you reconnect.

## What does 'offline' mean?

When you use PaintScout online, your data is stored in the cloud. In offline mode, your information is stored locally in your device's browser. It syncs back to the system when you regain an internet connection.

***

## How do I use PaintScout offline?

1. Login to PaintScout **before** you leave internet connection.
2. Pull up PaintScout and create new estimates.
3. Ensure that you are fully offline when on-site.
4. Build your estimate as normal. Save frequently throughout the process.
5. Reconnect to the internet and your estimate will sync to the system.

{% hint style="info" %}
Offline mode only supports *building* estimates. You cannot send, search, or download while offline.
{% endhint %}

***

## What if I am in spotty service?

Enable airplane mode on your device when coverage is intermittent. This ensures you are fully offline and prevents sync conflicts between online and offline states.

You can then save your estimate properly without interruption.

&#x20;&#x20;

## Related articles

<table data-card-size="large" data-view="cards"><thead><tr><th></th><th></th><th data-hidden data-card-target data-type="content-ref"></th></tr></thead><tbody><tr><td><strong>Browser &#x26; Device Requirements</strong></td><td>Browser and device compatibility requirements for using PaintScout on desktop and mobile</td><td><a href="/support/getting-started/paintscout-browser-device-requirements">Browser &amp; Device Requirements</a></td></tr><tr><td><strong>Create a Home Screen Icon</strong></td><td>How to add PaintScout as a home screen shortcut on iOS and Android devices for quick access</td><td><a href="/support/getting-started/how-to-create-a-home-screen-icon-on-your-mobile-device">Create a Home Screen Icon</a></td></tr></tbody></table>


# Customization Overview

Configure pricing, products, templates, presentations, and defaults so PaintScout matches your business.

Customization is where PaintScout starts to feel like your system. Set your pricing logic, product library, estimate defaults, and customer-facing presentation so every quote stays consistent.

{% hint style="info" %}
Most teams should complete [Implementation Guide](/support/getting-started/implementation-guide) first, then return here to refine their setup.
{% endhint %}

## In This Section

* [Pricing & Rates](/support/customization/pricing-and-rates) — Configure hourly rate, production rates, and coverage logic
* [Products](/support/customization/products) — Build your product library and assign materials to rates
* [Templates & Presets](/support/customization/templates-and-presets) — Set estimate types, templates, defaults, area names, and line items
* [Presentations & Terms](/support/customization/presentations-and-terms) — Control how proposals look and what contract language they include

## Recommended first reads

* [Update Your Hourly Rate](/support/customization/pricing-and-rates/how-to-update-your-hourly-rate) — Set the pricing baseline used across estimates
* [Production Rates Overview](/support/customization/pricing-and-rates/production-rates-section-overview) — Organize the rates your team uses every day
* [Estimate Types](/support/customization/templates-and-presets/what-are-estimate-types) — Create project-specific defaults for rates, terms, and presentations

&#x20;&#x20;


# Pricing & Rates

Configure your hourly rate, production rates, and coverage rates for accurate estimate pricing.

Your pricing setup drives accurate estimate totals. Set your hourly rate, build production rates, and define coverage rates so PaintScout can calculate labor time, material quantities, and price consistently.

## In This Section

* [Understanding Production Rates](/support/customization/pricing-and-rates/introduction-to-production-rate-estimation) — See how rates convert measurements into labor hours and pricing
* [How Production Rates are Calculated](/support/customization/pricing-and-rates/how-production-rates-are-calculated) — Understand the math behind production rate pricing
* [Calculate Your Hourly Rate](/support/customization/pricing-and-rates/how-to-calculate-your-hourly-rate) — Build an hourly rate that covers costs and profit
* [Update Your Hourly Rate](/support/customization/pricing-and-rates/how-to-update-your-hourly-rate) — Set the hourly labor rate used in calculations
* [Production Rates Overview](/support/customization/pricing-and-rates/production-rates-section-overview) — Create, organize, and manage rate categories, rates, defaults, and products
* [Production Rate Descriptions](/support/customization/pricing-and-rates/production-rate-descriptions) — Add default area, substrate, and crew notes to your rates
* [Advanced Production Rate Options](/support/customization/pricing-and-rates/advanced-production-rate-options) — Control customer visibility, coats, price display, and custom hourly rates
* [Deleting Production Rates](/support/customization/pricing-and-rates/deleting-production-rates) — Remove outdated rate categories or individual rates
* [Exporting Production Rates](/support/customization/pricing-and-rates/exporting-production-rates) — Download your rates as a CSV for backup or review
* [Coverage Rates](/support/customization/pricing-and-rates/coverage-rates) — Set product coverage so PaintScout can calculate gallons and material cost

&#x20;&#x20;


# Understanding Production Rates

Understand how PaintScout uses production rates (sqft/hr, lnft/hr) to calculate project hours and pricing, with a step-by-step example showing the full estimation process.

Production rate estimation (also called time-based estimation) is PaintScout's core pricing method. It calculates project cost by multiplying the hours needed to complete the work by your hourly rate, then adding materials.

Check out the video below for an introduction to time-based estimation:

{% embed url="<https://www.youtube.com/watch?v=ca-9vGG2EIE>" %}

## What is time-based estimation?

Time-based estimation is the total project hours multiplied by your hourly rate, plus materials. This method produces predictable profits and consistent pricing across your team.

{% hint style="info" %}
**What is a time-based rate?**

A time-based rate is the average time to complete a task, expressed as sqft/hr, lnft/hr, or hrs/item.
{% endhint %}

***

## How do you estimate a project using time-based rates?

### 1. Count and measure

* Measure your space – when you enter a room, use a laser measurer to determine the space's length, width, and height. These dimensions will make up your wall square footage, ceiling square footage, and linear footage.
* Count the number of items in the area, grouping like items together (windows, doors, etc).

### 2. Determine how long things take

* Next, you’ll need to figure out how long your team takes on ***average*** to paint these different surfaces – your time-based rates.

[Learn how to calculate your time-based rates here >](/support/customization/pricing-and-rates/how-production-rates-are-calculated)

### 3. Determine your hourly rate

* Now, figure out how much to charge for your time.
* Your hourly rate is your business broken down into one number. Knowing exactly what you need to charge will give you confidence in how you value your business.

[Learn how to calculate your hourly rate here >](/support/customization/pricing-and-rates/how-to-calculate-your-hourly-rate)

### 4. Add it all up

* After you've followed all the steps above, you have everything you need to make your calculations.
* Make sure to add on any materials, if you price them separately.

Let’s put this into practice with an example:

The bedroom being estimated is 12ft x 15ft, with an 8ft high ceiling. The customer wants the walls, ceiling, baseboards, two window frames, one door, and frame on one side painted with two coats. No patching and no setup time will be taken into account.

**How many hours will this project take?**

| Bedroom (12ft x 15ft x 8ft) | Surface area / # of items | Time Rate    | Hours (rounded) |
| --------------------------- | ------------------------- | ------------ | --------------- |
| Walls                       | 432 sqft                  | 85 sqft/hr   | 5.5             |
| Ceiling                     | 180 sqft                  | 60 sqft/hr   | 3               |
| Baseboards                  | 54 lnft                   | 25 lnft/hr   | 2.5             |
| Window Frames               | 2                         | 0.5 hrs/item | 1               |
| Door & Frame 1 side         | 1                         | 1.5 hrs/item | 1.5             |

Using time-based rates, you can then calculate the total number of hours it will take to paint this bedroom: **13.5 hours**

**So what does this bedroom actually cost?**

Once you have the total number of hours, you simply charge by your hourly rate to get your price, plus materials.

{% hint style="success" %}
**Hourly rate:** $67/hr\
**Labor:** 13.5 hours x $67/hr = $904.50\
**Materials:** $155.71

**Total:** $904.50 + $155.71 = **$1060.21 for the bedroom**
{% endhint %}

***

## How are time-based rates calculated?

Calculate time-based rates from time tracking data on past jobs. If you are just starting out, begin tracking your time now to build accurate rates.

You'll need to consider:

* The size of the space
* The length of time it took you to paint the space
* The number of coats

{% hint style="warning" %}
Make sure to check these rates periodically to ensure that they are accurate.
{% endhint %}

If you’re working in a room with 425 sqft of previously painted walls and it took you 5 hours to paint two coats, the calculation would be:

**425 sqft ÷ 5 hrs = 85 sqft/hr**

Therefore, you can paint two coats across 85 sqft per hour on this surface.

This will become your time-based rate going forward.

***

## Commonly Asked Questions

### What if my team paints at different speeds?

In your business, you might find that, as you calculate time-based rates, some employees paint faster than others, some produce better quality, and others move slower to achieve perfection.

If this is the case, you’ll want to calculate your time-based rates at an average level.

### What do you mean by “average level?”

The average level is the speed at which an experienced employee can paint a given surface at a comfortable and natural speed. To offset the difference in speed among employees, you should be paying them different wages to account for their varying skill levels.

### How can I create and customize my production rates in PaintScout?

{% hint style="info" %}
Once you're ready to use time-based rates in your business, [learn how to set them in your PaintScout account here >](/support/customization/pricing-and-rates/how-production-rates-are-calculated)
{% endhint %}

&#x20;&#x20;


# How Production Rates are Calculated

Understand how production rate calculations work using variables like sqft/hour, hours/item, and dollars/sqft for accurate estimate pricing.

Production rates in PaintScout calculate estimate pricing by combining rate variables (like sqft/hour or $/sqft) with substrate dimensions and coat counts. Understanding these calculations helps you set accurate rates.

## How do rate values and coats work?

Each coat box value represents the rate for painting that many **full** coats. For example, "2 coats" means 2 full coats, not 1 coat plus an additional coat. The rate uses either the item quantity (e.g., 3 doors) or the sqft/lnft of the area, depending on your rate type.

{% hint style="info" %}
Rates with Hours as a variable use your company hourly rate to calculate cost.
{% endhint %}

Many contractors adjust the rate as coat count increases, charging more or less per unit depending on efficiency.

## Example 1: Sqft/Hour

The value under each coat number is the square feet you can paint per hour.

**Example:** 400 sqft substrate at 100 sqft/hour = 4 hours.

400 sqft / 100 sqft/hr = 4 hrs

The rate **decreases** as coats increase because you paint fewer square feet per hour with multiple coats.

## Example 2: Hours/Item

The value under each coat number is the hours needed to paint each item.

**Example:** 3 items at 1 hour/item = 3 hours.

3 items x 1 hr/item = 3 hrs

The rate **increases** as coats increase because each item takes longer with multiple coats.

## Example 3: $/Sqft

The value under each coat number is the cost to paint 1 square foot.

**Example:** 400 sqft at $1/sqft = $400.

400 sqft x $1/sqft = $400

The rate **increases** as coats increase because more paint is used per square foot.

&#x20;&#x20;

## Related articles

<table data-card-size="large" data-view="cards"><thead><tr><th></th><th></th><th data-hidden data-card-target data-type="content-ref"></th></tr></thead><tbody><tr><td><strong>Production Rates Overview</strong></td><td>Comprehensive guide to creating and organizing production rates, rate categories, variables, coats, products, descriptions, and advanced options.</td><td><a href="/support/customization/pricing-and-rates/production-rates-section-overview">Production Rates Overview</a></td></tr><tr><td><strong>Understanding Production Rates</strong></td><td>Understand how PaintScout uses production rates (sqft/hr, lnft/hr) to calculate project hours and pricing, with a step-by-step example showing the full estimation process.</td><td><a href="/support/customization/pricing-and-rates/introduction-to-production-rate-estimation">Understanding Production Rates</a></td></tr></tbody></table>


# Calculate Your Hourly Rate

Calculate your all-in hourly rate for painting estimates by combining labor wages, materials, overhead costs, and profit margin with step-by-step examples.

{% embed url="<https://www.youtube.com/watch?v=WUYYdCncWmk>" %}

## Guide to determining your hourly rate

There is not a one-size-fits-all solution when it comes to pricing a painting project. Your company is unique, and therefore you need to understand what price is right for **your** business.

To do this, you would need to know what costs your business has and how much profit you would like to make. One of the easiest and most accurate ways of doing this is by:

* Understanding the **hourly rate** you need to charge (including or excluding materials)
* Using this with a **production rate estimating system**. [Learn more >](/support/customization/pricing-and-rates/introduction-to-production-rate-estimation)

When you follow this approach, you'll gain valuable insights into the project's duration, ensuring accurate production planning. It'll also help you set the right pricing to ensure consistent profitability for your company.

$$
\text{Your Hourly Rate} = \frac{\text{Average hourly direct labor wage} + \text{P\&S (Paint & Sundries) average hourly rate} + \text{Overhead average hourly rate}}{1 - \text{your desired profit margin %}}
$$

{% stepper %}
{% step %}
**Average hourly direct labor wage**

The average hourly direct labor wage is the average price paid per hour to your production team. Include employer contributions for payroll taxes, employment insurance, paid time-off, and other benefits.

**Do not** include staff not directly producing the project (sales, admin, management).

1. List all your painters and how much you pay them per hour.
2. Take the average of these rates to find your **average hourly rate**.

As an example, your company has 3 painters with varying skills, responsibilities, and wages:

| Name      | Wage/hour  |
| --------- | ---------- |
| Jake      | $18.50     |
| Sam       | $22.00     |
| Anna      | $24.00     |
| **Total** | **$64.50** |

$$
\text{Average Wage} = \frac{$64.50}{3 \text{ painters}} = $21.50/\text{hr}
$$

The average wage for this company is $21.50 per hour
{% endstep %}

{% step %}
**Average paint and sundries (P\&S) spend per hour**

This is the amount you are paying per hour on average for paint and sundries (small tools, supplies etc). You can include this in your hourly wage or add paint and sundries on a project-to-project basis.

To get this number, you will need to consult your financial statements.

1. Take your P\&S spend for the longest period you have accurate historical financial information for.
2. Divide that by the number of hours worked by your painting team (only painters producing projects) in that same period.

For example, in the last 3 months, you spent $13,932 on P\&S. Your painters worked 1,440 hours in that period.

$$
\text{Average P\&S per hour} = \frac{$13{,}932}{1{,}440 \text{ hours}} = $9.68/\text{hr}
$$
{% endstep %}

{% step %}
**Average overhead cost per hour**

{% hint style="info" %}
To do this calculation, refer to your financial statements for the same period you used to calculate your paint and sundries average hourly rate.
{% endhint %}

This calculation will give you the total cost per hour you need to charge to cover your overhead.

1. Start by combining all of your overhead costs - including payroll for all staff that are not directly involved in the production of the projects (management, sales, admin), and everything *but* painters’ wages, paint, and materials. This could be insurance premiums, rent, loan payments, marketing, vehicles, owner pay, etc.
2. Divide that number by the total hours your painters worked in that period.

Using the example above, this is what the calculation will look like over a 3 month span - *the same period used in the previous calculation.*

3 Months Overhead Spend Expenses: $32,508

$$
\text{Hourly Overhead Rate} = \frac{$32{,}508}{1{,}440 \text{ hours}} = $22.58/\text{hr}
$$

Your overhead hourly rate is $22.58 per hour
{% endstep %}

{% step %}
**Profit margin %**

The profit markup refers to the amount of profit you would like to make from your work. This is an important number as every business must make a profit to operate successfully.

1. Decide on the amount of profit you would like to make.
2. Find your all-in hourly rate by adding all of the hourly rates you’ve calculated so far.
3. Then, subtract the percentage of profit you wish to make.

In this example, we will use a 10% profit margin.

$$
\text{All-in Hourly Rate} = \frac{$21.50 + $9.67 + $22.58}{1 - 0.10} = \frac{$53.75}{0.90} = $59.72/\text{hr}
$$

Your all-in hourly rate is $59.72 per hour
{% endstep %}
{% endstepper %}

## Final Thoughts

Pricing painting projects can feel tricky since, ultimately, it’s both an art and a science. However, once you understand the basis for your hourly rate, you can start to feel confident with the prices you charge for your projects.

Now that you have broken down your hourly rate from your company’s historical information, it will give you the chance to make adjustments as your business grows, seasons change, and for any other factors that affect your business.

Pair this hourly rate with a [production rate estimation system](/support/customization/pricing-and-rates/introduction-to-production-rate-estimation) and PaintScout, and you will be able to build consistently priced painting estimates you can trust and get the profit you deserve.

&#x20;&#x20;


# Update Your Hourly Rate

Set your company hourly rate that covers labor, overhead, materials, and profit margin for calculating estimate pricing.

Your hourly rate in PaintScout determines how all production rate pricing is calculated on estimates. Update it in Account Settings under Estimates > Settings.

## What is an hourly rate?

Your hourly rate is the amount you charge customers per hour for your painting services. It typically includes **labor, overhead, materials, and your profit margin.**

Some contractors itemize material costs separately. If you add product prices in the Products section of your Account Settings, you should not include those costs in your hourly rate to avoid double-counting.

**▶️ Want to figure out your hourly rate? Watch this video!**

{% embed url="<https://www.youtube.com/watch?v=WUYYdCncWmk>" %}

## How to Update Your Hourly Rate

1\. Navigate to your Person icon and select **Account Settings > Estimates > Settings.**

<figure><img src="https://231248629-files.gitbook.io/~/files/v0/b/gitbook-x-prod.appspot.com/o/spaces%2FPyUbJF1GXLjxdJqm89IQ%2Fuploads%2Fgit-blob-0dfcfbc085ac09e47355a007c16beb165d1a2fb4%2Fac4de67ec365d87213ec8077_PaintScout_Settings_2024-01-17_at_2.30.25_PM.jpg?alt=media" alt="Screenshot showing the Account Settings Estimates Settings page with the hourly rate input field"><figcaption></figcaption></figure>

2\. Input your custom hourly rate into the provided space.

3\. Ensure to press the **Save Changes** button. This change will be effective for new estimates.

&#x20;&#x20;

## Related articles

<table data-card-size="large" data-view="cards"><thead><tr><th></th><th></th><th data-hidden data-card-target data-type="content-ref"></th></tr></thead><tbody><tr><td><strong>Calculate Your Hourly Rate</strong></td><td>Calculate your all-in hourly rate for painting estimates by combining labor wages, materials, overhead costs, and profit margin with step-by-step examples.</td><td><a href="/support/customization/pricing-and-rates/how-to-calculate-your-hourly-rate">Calculate Your Hourly Rate</a></td></tr><tr><td><strong>What is a Sales Rate?</strong></td><td>Understand sales rate as total project price divided by total hours to determine project profitability and discount flexibility.</td><td><a href="/support/estimating/creating-estimates/what-is-a-sales-rate">What is a Sales Rate?</a></td></tr></tbody></table>


# Production Rates Overview

Comprehensive guide to creating and organizing production rates, rate categories, variables, coats, products, descriptions, and advanced options.

{% embed url="<https://www.youtube.com/watch?v=jnBGUDdoH_0>" %}

Production rates in PaintScout define how long it takes to paint a surface or how much it costs per unit. Configuring your rates in account settings lets PaintScout automatically calculate labor time and pricing when you build estimates.

You can also save a custom rate while creating an estimate. Saved rates become available in **Account Settings** for future estimates. See [Adding Rates](/support/estimating/areas-and-rates/adding-rates-to-an-estimate) for the estimate workflow.

{% hint style="info" %}
New to using production rates in your estimations? Check out this helpful [introduction >](https://youtu.be/ca-9vGG2EIE)
{% endhint %}

***

## Rate Categories

### What is a Rate Category?

Rate Categories are a great way to organize your production rates. You can group multiple production rates within each category.

<figure><img src="https://231248629-files.gitbook.io/~/files/v0/b/gitbook-x-prod.appspot.com/o/spaces%2FPyUbJF1GXLjxdJqm89IQ%2Fuploads%2Fgit-blob-2f84cfa2a8fd1116b6b6d417d05bf552a63fdfb8%2F1782387307_5c40d6845bb6faef5ff01b3fb329?alt=media" alt="Screenshot showing the Rate Categories section with grouped production rates"><figcaption></figcaption></figure>

**Example:**

* **Rate Category:** Exterior Siding
* **Rates (surfaces) within the category:** Stucco, Vinyl, Brick, etc.

***

### Adding a Rate Category

1\. Go to your **Account Settings** > **Production Rates** > **Rate Categories** section. Click the **+Add New Rate Category** button.

<figure><img src="https://231248629-files.gitbook.io/~/files/v0/b/gitbook-x-prod.appspot.com/o/spaces%2FPyUbJF1GXLjxdJqm89IQ%2Fuploads%2Fgit-blob-88b08165b9dde0fdee1db733bb3e5662faf1184e%2F1782414657_55ef39a3348216f7d43be57c4989?alt=media" alt="Screenshot showing the Add New Rate Category button in the Production Rates settings"><figcaption></figcaption></figure>

2\. A window will pop up, allowing you to enter a **Label** for the category. You can use the drop-down arrow to select the **estimate types** that the rate category should be associated with.

<figure><img src="https://231248629-files.gitbook.io/~/files/v0/b/gitbook-x-prod.appspot.com/o/spaces%2FPyUbJF1GXLjxdJqm89IQ%2Fuploads%2Fgit-blob-ce4db15a1e5e82e7cff8696b24151cafe0cd6f0d%2F1782416064_f3ef962bdef27472fb6ea84bb34b?alt=media" alt="Screenshot showing the rate category creation window with label and estimate type selection"><figcaption></figcaption></figure>

***

### Find your Rates Faster

When creating an estimate, the order in which the rate categories (and therefore your rates!) appear is determined by their arrangement in the settings.

{% hint style="info" %}
**Pro tip**: To optimize your workflow, we recommend rearranging the rate categories so that **the ones you frequently use are at the top of the page**. This is particularly helpful when working on smaller screens like an iPad or phone, as it allows for easier access to your preferred options.
{% endhint %}

To rearrange the categories, simply use the "drag & drop" functionality. Click on a category, hold it for a moment, and then move it to the desired spot.

<figure><img src="https://231248629-files.gitbook.io/~/files/v0/b/gitbook-x-prod.appspot.com/o/spaces%2FPyUbJF1GXLjxdJqm89IQ%2Fuploads%2Fgit-blob-1bad94ed1332c16b803808b7504cf7e6315bf371%2F1864112792_131c68f957abb380dfaaea33229a?alt=media" alt="Animated screen recording showing drag and drop reordering of rate categories"><figcaption></figcaption></figure>

***

## Production Rates

### What Is a Production Rate?

A production rate is a calculation that estimates the **time or cost to paint a specific surface**.

* Time-based rates use variables like sqft/hr, lnft/hr, or hr/item
* Price-based rates use variables like $/sqft, $/lnft, or $/item.

PaintScout uses these rates to automatically calculate labor and pricing on estimates

***

### How Do I Add a New Rate?

1\. First, choose your desired Rate Category. Once selected, click on **+Add New Rate**.

<figure><img src="https://231248629-files.gitbook.io/~/files/v0/b/gitbook-x-prod.appspot.com/o/spaces%2FPyUbJF1GXLjxdJqm89IQ%2Fuploads%2Fgit-blob-952c7370cf81352bd7269a5eb6456906a002440c%2F1815455761_42154f521b4a2d55e03ee08c9d28?alt=media" alt="Screenshot showing the Add New Rate button within a rate category"><figcaption></figcaption></figure>

2\. Now, you can enter all of the information related to your new rate. Let's break this down:

<details>

<summary><strong>Naming Your Rate</strong></summary>

<figure><img src="https://231248629-files.gitbook.io/~/files/v0/b/gitbook-x-prod.appspot.com/o/spaces%2FPyUbJF1GXLjxdJqm89IQ%2Fuploads%2Fgit-blob-25882546773484f175f6e235a792035c43335f5a%2F1815469930_aad7002008831b46628af2f6db3b?alt=media" alt="Screenshot showing the Internal Label and Client Label fields for naming a production rate"><figcaption></figcaption></figure>

* **Internal Label:** The name you and your team see when building an estimate. This appears only on the work order and is not visible to customers.
* **Client Label:** The name shown to customers on the estimate and work order. If left blank, PaintScout uses the Internal Label instead. This is useful when your internal name differs from what customers should see.

**Example:**\
Internal Label: 6x1 Window\
Client Label: Window Frame

<figure><img src="https://231248629-files.gitbook.io/~/files/v0/b/gitbook-x-prod.appspot.com/o/spaces%2FPyUbJF1GXLjxdJqm89IQ%2Fuploads%2Fgit-blob-a37d9462b0aeab4fcb653259e35377522e662406%2F1815464348_7e1f0a80bee29fedcad06645696b?alt=media" alt="Screenshot showing how Internal Label and Client Label appear differently on an estimate versus the editor"><figcaption></figcaption></figure>

When your customer views the estimate, they will only see "**Window Frame.**" However, when you're in the process of creating the estimate, you'll see the specific details - "**6 x 1 Window**."

</details>

<details>

<summary><strong>Rate Calculation</strong></summary>

<figure><img src="https://231248629-files.gitbook.io/~/files/v0/b/gitbook-x-prod.appspot.com/o/spaces%2FPyUbJF1GXLjxdJqm89IQ%2Fuploads%2Fgit-blob-b1794fed9a88d43b78c7b8d547299b6b372522cb%2F1815472258_9721cbe1a565005c2350f75ba7ca?alt=media" alt="Screenshot showing the rate calculation section with variable selection and coats configuration"><figcaption></figcaption></figure>

* **Variables**: Input the two variables that will determine the time or price for a surface to be painted (it's also possible to use one variable, though two is most common). We recommend using **hours** as one of the variables as you can easily figure out the number of hours needed for a particular surface. [Learn more about time-based estimating here >](https://youtu.be/ca-9vGG2EIE)
* **Coats:** You can set different rates for different numbers of coats, but keep in mind that the rate you input will be for the **total** number of coats, not just the additional coat. So if you have a 2-coat rate, that covers both the first and second coat. [Learn more here >](/support/customization/pricing-and-rates/how-production-rates-are-calculated)
* **Default Coats:** Select a default number of coats for the rate. When creating an estimate, this coat number will automatically appear, but you're able to adjust this directly within the estimate. [Learn more here >](/support/customization/pricing-and-rates/how-production-rates-are-calculated)

As an example, let's say that you're focusing on Walls, and you've set it up as **sqft (walls) per hr***.*

If you can paint 125 sqft (1 coat) per hour on walls, when it comes to 2 coats, the rate adjusts to 85 sqft/hr since you'll be covering a bit less surface while using the same amount of time (1 hr).

For an Item Rate like a window or door, the rate will increase as the number of coats increases since it will take you longer to paint the surface as you add more coats.

**1 coat:** 0.5 hr/item (30 min)

**2 coats:** 1 hr/item (1 hour)

**3 coats:** 1.5 hr/item (1.5 hours)

**4 coats:** 2 hr/item (2 hours)

<figure><img src="https://231248629-files.gitbook.io/~/files/v0/b/gitbook-x-prod.appspot.com/o/spaces%2FPyUbJF1GXLjxdJqm89IQ%2Fuploads%2Fgit-blob-09cb925f71d595095f5117fc45e01fa8becf977a%2F1815641550_ee3d6ba0c63b42a4b4b981a3604a?alt=media" alt="Screenshot showing coat rate examples with different rates for 1-coat, 2-coat, 3-coat, and 4-coat configurations"><figcaption></figcaption></figure>

If you're working with **rates that don't use coats**, such as prep work or installing hardware, all you need to do is uncheck the "Use coats to calculate rate" checkbox.

<figure><img src="https://231248629-files.gitbook.io/~/files/v0/b/gitbook-x-prod.appspot.com/o/spaces%2FPyUbJF1GXLjxdJqm89IQ%2Fuploads%2Fgit-blob-64f83e39c72cbfff8697d3a22a46965b8583653c%2F1815647864_74139adb32c94076aa99734f0359?alt=media" alt="Screenshot showing the Use coats to calculate rate checkbox unchecked for rates without coats"><figcaption></figcaption></figure>

</details>

<details>

<summary><strong>Default Products</strong></summary>

<figure><img src="https://231248629-files.gitbook.io/~/files/v0/b/gitbook-x-prod.appspot.com/o/spaces%2FPyUbJF1GXLjxdJqm89IQ%2Fuploads%2Fgit-blob-2b488e84c725198bf1e1aa593990e016e2e67893%2F1815652544_7390e2d50ae9663703c9af472792?alt=media" alt="Screenshot showing the Default Products section for associating paint products with a production rate"><figcaption></figcaption></figure>

Add a **Default Product** to have PaintScout automatically calculate gallons needed and material cost for each surface on an estimate. This is essential if you price materials separately from labor.

{% hint style="info" %}
**Pro tip**: Associate your most commonly used products with your production rates. Remember that you can always select a different product within a particular estimate.
{% endhint %}

* **Product Name:** The list of products you can choose from is taken from the [Products](https://app.paintscout.com/settings?section=products) section in your Account Settings.
* **Coverage:** If you have entered coverage rates for your products in your Settings, this will populate. If the rate you are working with requires a different coverage rate on this particular estimate, enter it in the box. [Learn more about coverage rates here >](/support/customization/pricing-and-rates/coverage-rates)

{% hint style="warning" %}
Changing a rate's measurement variables clears its custom product coverage. Enter a new coverage amount if the updated rate needs one.
{% endhint %}

For instance, let's say you have different rates for painting siding - one for brush and roll, and another for spray. These methods may have different product coverage rates.

By specifying the appropriate coverage rate, you can ensure accurate calculations.

</details>

<details>

<summary><strong>Descriptions</strong></summary>

<figure><img src="https://231248629-files.gitbook.io/~/files/v0/b/gitbook-x-prod.appspot.com/o/spaces%2FPyUbJF1GXLjxdJqm89IQ%2Fuploads%2Fgit-blob-af8788f2869e80ccc1dbc186f1327fdb0d0274c5%2F1815660083_c3d5842ac7a46b844598d51045ec?alt=media" alt="Screenshot showing the Descriptions section with Area View, Surface View, and Crew Note fields"><figcaption></figcaption></figure>

Add default descriptions to your production rates to provide details to customers and crew.

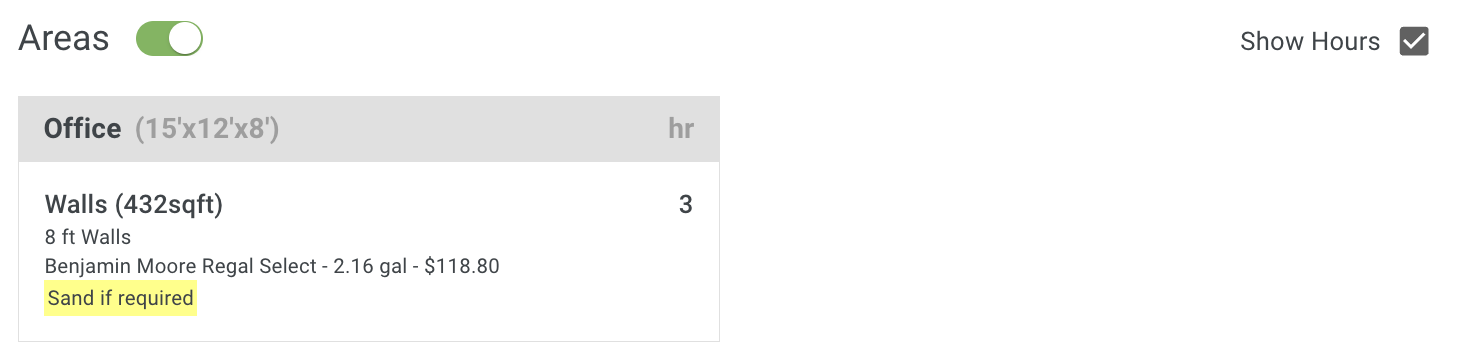
* **Area View:** Appears under the area when the estimate is in Area View. Be as specific as possible about the surface.
* **Surface View:** Appears under the surface when the estimate is in Surface View.
* **Crew Note:** Appears only on the work order for your team. Use this for instructions, reminders, or details hidden from customers.

</details>

<details>

<summary><strong>Advanced Options</strong></summary>

<figure><img src="https://231248629-files.gitbook.io/~/files/v0/b/gitbook-x-prod.appspot.com/o/spaces%2FPyUbJF1GXLjxdJqm89IQ%2Fuploads%2Fgit-blob-d9b29da204bb4849f7bdf1c21d4f4733d27612dd%2F1815661704_4371d4566d6183629171dc013467?alt=media" alt="Screenshot showing the Advanced Options with checkboxes for Hide From Customer, Show Coats, Show Price, and Use Custom Hourly Rate"><figcaption></figcaption></figure>

Advanced options give you more control over how each rate behaves on estimates. These checkboxes set defaults that you can override on individual estimates.

* **Hide From Customer:** Hides the surface from the customer on the estimate. Useful for travel time or prep rates you charge for but do not want to display.
* **Show Coats:** Displays the number of coats applied to the surface on the estimate.
* **Show Price:** Shows the individual surface price in addition to the default area/room price.
* **Use Custom Hourly Rate:** Sets a different hourly rate for this specific surface. Useful for specialty work like carpentry that warrants a higher rate.

</details>

***

## Saving Your Rate

1\. After you've input all of the necessary information for your new rate, click **Done**. It will be added to the rate category and will appear when you build new estimates.

2\. Feel free to repeat and add as many rates as you need!

<figure><img src="https://231248629-files.gitbook.io/~/files/v0/b/gitbook-x-prod.appspot.com/o/spaces%2FPyUbJF1GXLjxdJqm89IQ%2Fuploads%2Fgit-blob-1450cd46790c2bf2ec5dbb9b1849ee6e4dd45974%2F1815665945_9f67c3ba37309250d15048652409?alt=media" alt="Screenshot showing a saved production rate listed within its rate category"><figcaption></figcaption></figure>

{% hint style="info" %}
Within the Rate Category, keep in mind that the **rates listed at the top will be the first ones shown when on an estimate**. So if you have any priority rates, make sure to arrange them accordingly.

You can customize the order of your rates by simply dragging and dropping them to the perfect spot!
{% endhint %}

3\. Once you've built out your rate category, hit the **Done** button followed by the **Save Changes** button to ensure your rates are securely stored!

<figure><img src="https://231248629-files.gitbook.io/~/files/v0/b/gitbook-x-prod.appspot.com/o/spaces%2FPyUbJF1GXLjxdJqm89IQ%2Fuploads%2Fgit-blob-927381ce0eb15787317fde2598e988b2d0d54ccb%2F1815668701_8154137a9bc15169bd9315954b8e?alt=media" alt="Screenshot showing the Done button and Save Changes button for saving production rate settings"><figcaption></figcaption></figure>

## Related articles

<table data-card-size="large" data-view="cards"><thead><tr><th></th><th></th><th data-hidden data-card-target data-type="content-ref"></th></tr></thead><tbody><tr><td><strong>How Production Rates are Calculated</strong></td><td>Understand how production rate calculations work using variables like sqft/hour, hours/item, and dollars/sqft for accurate estimate pricing.</td><td><a href="/support/customization/pricing-and-rates/how-production-rates-are-calculated">How Production Rates are Calculated</a></td></tr><tr><td><strong>Understanding Production Rates</strong></td><td>Understand how PaintScout uses production rates (sqft/hr, lnft/hr) to calculate project hours and pricing, with a step-by-step example showing the full estimation process.</td><td><a href="/support/customization/pricing-and-rates/introduction-to-production-rate-estimation">Understanding Production Rates</a></td></tr><tr><td><strong>Deleting Production Rates</strong></td><td>Remove production rate categories and individual rates from your account settings using the three-dot menu option.</td><td><a href="/support/customization/pricing-and-rates/deleting-production-rates">Deleting Production Rates</a></td></tr><tr><td><strong>Exporting Production Rates</strong></td><td>Export your production rates to a CSV file for backup, analysis in Excel, or sharing with team members.</td><td><a href="/support/customization/pricing-and-rates/exporting-production-rates">Exporting Production Rates</a></td></tr></tbody></table>


# Production Rate Descriptions

Add default descriptions for area view, substrate view, and crew notes to production rates that display on estimates and work orders.

Production rate descriptions in PaintScout let you add default text to your rates that automatically appears on estimates and work orders. You can set descriptions for Area View, Substrate View, and Crew Notes.

{% hint style="info" %}
Before diving into this article, make sure you have a solid grasp of the fundamentals of production rates. [Review Production Rates Overview >](/support/customization/pricing-and-rates/production-rates-section-overview)
{% endhint %}

## How Do I Add Descriptions to a Production Rate?

1\. Click the person icon and go to your **Account Settings**. Navigate to the **Production Rates** section and select one of your rates.

<figure><img src="https://231248629-files.gitbook.io/~/files/v0/b/gitbook-x-prod.appspot.com/o/spaces%2FPyUbJF1GXLjxdJqm89IQ%2Fuploads%2Fgit-blob-14a185e7faadce8458a41f18474125f93147aeef%2F3d69bf6d018df2ed93b1e048_Screen_Recording_2023-09-13_at_04.37.39_PM.gif?alt=media" alt="Animated screen recording showing navigation to Account Settings and selecting a production rate"><figcaption></figcaption></figure>

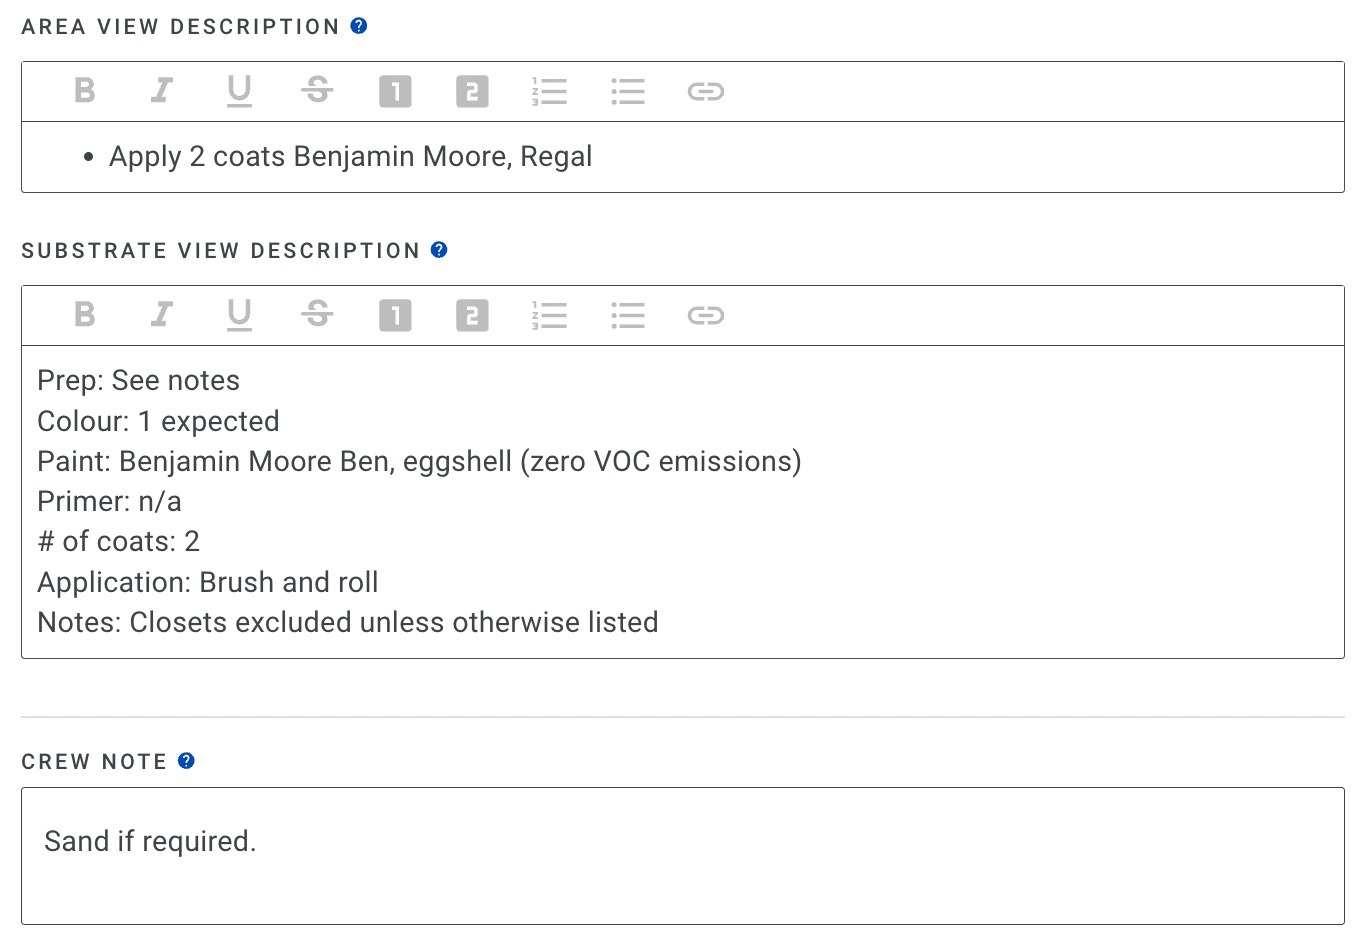
2. Scroll down to your descriptions and fill them out accordingly.

* **Area View:** Displays within the area when your estimate is in Area View. Since this appears beneath the specific room, you can include detailed surface-specific information.
* **Substrate View:** Displays under the surface when your estimate is in Substrate View.
* **Crew Note:** A note associated with the surface that only appears on the work order. Your customers will not see this.

<figure><img src="https://231248629-files.gitbook.io/~/files/v0/b/gitbook-x-prod.appspot.com/o/spaces%2FPyUbJF1GXLjxdJqm89IQ%2Fuploads%2Fgit-blob-36d8cde4a0057863dcf065ce16ad565691e5b8b6%2Fdd870ee265dafd9af0ba602d_Image_2022-06-22_at_3.24.21_PM.jpg?alt=media" alt="Screenshot showing the Area View, Substrate View, and Crew Note description fields for a production rate"><figcaption></figcaption></figure>

***

## Area View Description - How it Displays on the Estimate

<figure><img src="https://231248629-files.gitbook.io/~/files/v0/b/gitbook-x-prod.appspot.com/o/spaces%2FPyUbJF1GXLjxdJqm89IQ%2Fuploads%2Fgit-blob-3b24fc8bc9a30e52b707a7f50c4f82547bce5dbb%2F04aa131f04b57d2bd3938789_PaintScout_Edit_Estimate_2024-01-17_at_3.21.44_PM.jpg?alt=media" alt="Screenshot showing how the Area View description displays under the area on an estimate"><figcaption></figcaption></figure>

## Substrate View Description - How it Displays on the Estimate

<figure><img src="https://231248629-files.gitbook.io/~/files/v0/b/gitbook-x-prod.appspot.com/o/spaces%2FPyUbJF1GXLjxdJqm89IQ%2Fuploads%2Fgit-blob-7badb815b4d6d19758721430ffcb3726573c484e%2Fb958a7d66b4fe4d91036d76e_PaintScout_Edit_Estimate_2024-01-17_at_3.22.50_PM.jpg?alt=media" alt="Screenshot showing how the Substrate View description displays under the surface on an estimate"><figcaption></figcaption></figure>

## Crew Notes - How it Displays on the Work Order

<figure><img src="https://231248629-files.gitbook.io/~/files/v0/b/gitbook-x-prod.appspot.com/o/spaces%2FPyUbJF1GXLjxdJqm89IQ%2Fuploads%2Fgit-blob-766c8fd37c2eab47bbbf210078f9e65e6d5bd1dc%2F1360a98b9ec72ec3f953c710_Screenshot_2024-01-17_at_3.25.06_PM.png?alt=media" alt="Screenshot showing how Crew Notes display on the work order for the team"><figcaption></figcaption></figure>

&#x20;&#x20;

## Related articles

<table data-card-size="large" data-view="cards"><thead><tr><th></th><th></th><th data-hidden data-card-target data-type="content-ref"></th></tr></thead><tbody><tr><td><strong>Advanced Production Rate Options</strong></td><td>Customize production rates with advanced options like hide from customer, show coats, show price, and custom hourly rates per substrate.</td><td><a href="/support/customization/pricing-and-rates/advanced-production-rate-options">Advanced Production Rate Options</a></td></tr><tr><td><strong>Coverage Rates</strong></td><td>Configure product coverage rates in sqft/gallon, lnft/gallon, or gallons/item to automatically calculate paint quantities for estimates.</td><td><a href="/support/customization/pricing-and-rates/coverage-rates">Coverage Rates</a></td></tr></tbody></table>


# Advanced Production Rate Options

Customize production rates with advanced options like hide from customer, show coats, show price, and custom hourly rates per substrate.

Advanced Production Rate Options in PaintScout let you customize individual production rates with settings like hiding substrates from customers, showing coats or prices, and overriding hourly rates.

## How do I access Advanced Production Rate Options?

Each production rate includes an Advanced Options section with all options unselected by default.

1\. Go to your **Account Settings** > **Production Rates** > **Rate Categories** section.

2\. Select your category and then rate.

3\. Scroll to the bottom of the rate to the **Advanced Options** section. A list of options will appear for you to select from.

<figure><img src="https://231248629-files.gitbook.io/~/files/v0/b/gitbook-x-prod.appspot.com/o/spaces%2FPyUbJF1GXLjxdJqm89IQ%2Fuploads%2Fgit-blob-5b4c3bb0f9d7360e7626047a81120b3cf50baa8d%2F30333a36c0f7cda1f3bf5acb_Screen_Shot_2023-07-10_at_3.22.18_PM.png?alt=media" alt="Screenshot showing the Advanced Options section at the bottom of a production rate with selectable options"><figcaption></figcaption></figure>

***

## What does Hide From Customer do?

Hidden substrates do not appear on the customer-facing quote. You can identify hidden substrates by the black circle with an x icon.

<figure><img src="https://231248629-files.gitbook.io/~/files/v0/b/gitbook-x-prod.appspot.com/o/spaces%2FPyUbJF1GXLjxdJqm89IQ%2Fuploads%2Fgit-blob-cfb2eddd650be97c49b3b10be06fe8edd8592445%2Fbbeed37bd310572b1494ff36_Screen_Shot_2023-04-18_at_11.47.54_AM.png?alt=media" alt="Screenshot showing a hidden substrate indicated by a black circle with an x icon on the estimate"><figcaption></figcaption></figure>

{% hint style="info" %}
If an area only contains hidden substrates it will not be visible on the estimate. It will only appear on the work order.
{% endhint %}

***

## What does Show Coats do?

Displays the number of coats for this substrate on the customer-facing estimate.

<figure><img src="https://231248629-files.gitbook.io/~/files/v0/b/gitbook-x-prod.appspot.com/o/spaces%2FPyUbJF1GXLjxdJqm89IQ%2Fuploads%2Fgit-blob-ea8d468629c50fc797a410a9678db47df6d3719b%2F80586c544348b078baa7d598_Image_2019-09-30_at_1.07.07_PM.png?alt=media" alt="Screenshot showing the number of coats displayed on the estimate when Show Coats is enabled"><figcaption></figcaption></figure>

***

## What does Show Price do?

Displays the individual substrate price on the customer-facing estimate.

<figure><img src="https://231248629-files.gitbook.io/~/files/v0/b/gitbook-x-prod.appspot.com/o/spaces%2FPyUbJF1GXLjxdJqm89IQ%2Fuploads%2Fgit-blob-3ba7c19646909c0c6ab3b174e21046b20858474a%2F61124d77817ef02106002ea0_Image_2019-09-30_at_1.08.05_PM.png?alt=media" alt="Screenshot showing the individual substrate price displayed on the estimate when Show Price is enabled"><figcaption></figcaption></figure>

***

## What does Use Custom Hourly Rate do?

This option overrides the estimate's default hourly rate with a custom rate for this specific production rate.

<figure><img src="https://231248629-files.gitbook.io/~/files/v0/b/gitbook-x-prod.appspot.com/o/spaces%2FPyUbJF1GXLjxdJqm89IQ%2Fuploads%2Fgit-blob-a982440742d9940cc8416f5e31aacf186a07bbf5%2F8c76450d1a20447cbf615b33_Screen_Shot_2023-04-18_at_1.02.56_PM.png?alt=media" alt="Screenshot showing the Use Custom Hourly Rate option with a field to enter a custom rate"><figcaption></figcaption></figure>

&#x20;&#x20;

## Related articles

<table data-card-size="large" data-view="cards"><thead><tr><th></th><th></th><th data-hidden data-card-target data-type="content-ref"></th></tr></thead><tbody><tr><td><strong>Production Rate Descriptions</strong></td><td>Add default descriptions for area view, substrate view, and crew notes to production rates that display on estimates and work orders.</td><td><a href="/support/customization/pricing-and-rates/production-rate-descriptions">Production Rate Descriptions</a></td></tr><tr><td><strong>Coverage Rates</strong></td><td>Configure product coverage rates in sqft/gallon, lnft/gallon, or gallons/item to automatically calculate paint quantities for estimates.</td><td><a href="/support/customization/pricing-and-rates/coverage-rates">Coverage Rates</a></td></tr></tbody></table>


# Deleting Production Rates

Remove production rate categories and individual rates from your account settings using the three-dot menu option.

To delete a production rate or rate category in PaintScout, use the three-dot menu in Account Settings. The process is the same for both individual rates and full categories.

## How do I delete a rate category or production rate?

Click the 3-dot icon on the right side of a category or rate, and select **Delete**.

### Rate Categories:

<figure><img src="https://231248629-files.gitbook.io/~/files/v0/b/gitbook-x-prod.appspot.com/o/spaces%2FPyUbJF1GXLjxdJqm89IQ%2Fuploads%2Fgit-blob-75d23cc729941449ba78a66db61aba62398a238a%2F46224bdb48375b4cc702c519_PaintScout_Settings_2024-01-17_at_3.10.45_PM.jpg?alt=media" alt="Screenshot showing the three-dot menu on a rate category with the Delete option"><figcaption></figcaption></figure>

### Production Rates:

<figure><img src="https://231248629-files.gitbook.io/~/files/v0/b/gitbook-x-prod.appspot.com/o/spaces%2FPyUbJF1GXLjxdJqm89IQ%2Fuploads%2Fgit-blob-9a2fd0cfc99b9c70cdef3b3f77f8e3339d250a6f%2F7db4bd7a2595e6807b9ebcfe_PaintScout_Settings_2024-01-17_at_3.13.23_PM.jpg?alt=media" alt="Screenshot showing the three-dot menu on an individual production rate with the Delete option"><figcaption></figcaption></figure>

&#x20;&#x20;

## Related articles

<table data-card-size="large" data-view="cards"><thead><tr><th></th><th></th><th data-hidden data-card-target data-type="content-ref"></th></tr></thead><tbody><tr><td><strong>Exporting Production Rates</strong></td><td>Export your production rates to a CSV file for backup, analysis in Excel, or sharing with team members.</td><td><a href="/support/customization/pricing-and-rates/exporting-production-rates">Exporting Production Rates</a></td></tr><tr><td><strong>Production Rates Overview</strong></td><td>Comprehensive guide to creating and organizing production rates, rate categories, variables, coats, products, descriptions, and advanced options.</td><td><a href="/support/customization/pricing-and-rates/production-rates-section-overview">Production Rates Overview</a></td></tr></tbody></table>


# Exporting Production Rates

Export your production rates to a CSV file for backup, analysis in Excel, or sharing with team members.

You can export all PaintScout production rates to a CSV file for backup, analysis, or sharing with team members.

## How do I export production rates?

1\. Go to your **Account Settings** > **Production Rates** > **Rate Categories** section.

2\. Click the **Export** button. A CSV file downloads that you can open in Excel or another program.

<figure><img src="https://231248629-files.gitbook.io/~/files/v0/b/gitbook-x-prod.appspot.com/o/spaces%2FPyUbJF1GXLjxdJqm89IQ%2Fuploads%2Fgit-blob-0ef3a9aa521b5f058b9a0482609168395e424580%2F2e7e6709096dced34b05c205_PaintScout_Settings_2024-01-17_at_3.26.04_PM.jpg?alt=media" alt="Screenshot showing the Export button in the Rate Categories section for downloading production rates as CSV"><figcaption></figcaption></figure>

&#x20;&#x20;

## Related articles

<table data-card-size="large" data-view="cards"><thead><tr><th></th><th></th><th data-hidden data-card-target data-type="content-ref"></th></tr></thead><tbody><tr><td><strong>Deleting Production Rates</strong></td><td>Remove production rate categories and individual rates from your account settings using the three-dot menu option.</td><td><a href="/support/customization/pricing-and-rates/deleting-production-rates">Deleting Production Rates</a></td></tr><tr><td><strong>Production Rates Overview</strong></td><td>Comprehensive guide to creating and organizing production rates, rate categories, variables, coats, products, descriptions, and advanced options.</td><td><a href="/support/customization/pricing-and-rates/production-rates-section-overview">Production Rates Overview</a></td></tr></tbody></table>


# Coverage Rates

Configure product coverage rates in sqft/gallon, lnft/gallon, or gallons/item to automatically calculate paint quantities for estimates.

A coverage rate in PaintScout defines how much surface area a paint product covers per unit, measured in sqft/gallon, lnft/gallon, or gallons/item. Setting coverage rates lets PaintScout automatically calculate material quantities on estimates.

## What is a coverage rate?

The coverage rate refers to the amount of surface area that a product can effectively cover. It's found in sqft/gallon, lnft/gallon or gallons/item.

Determining your coverage rate will allow PaintScout to automatically calculate the number of gallons needed for your work, depending on the room's dimensions and the surface's number of coats.

***

## How do coverage rates work for walls, trim, and ceilings?

When considering coverage rates for walls, trim and ceilings, it's like asking: "How many square feet or linear feet can I cover with one coat, using just one can of paint?"

You should be able to find the coverage rate for your product on the paint can or on the manufacturer's website. To calculate the amount of paint you'll need, you'll first have to calculate the square footage of the area you need to paint, and then divide this number by the paint can's coverage rate.

As an example, let's say you have a room that is 12ft x 15ft x 8ft. How many gallons of paint are needed for one coat?

| Surface    | Dimensions | Coverage Rate | Gallons |
| ---------- | ---------- | ------------- | ------- |
| Walls      | 432 sqft   | 400 sqft/gal  | 1.08    |
| Baseboards | 54 lnft    | 650 lnft/gal  | 0.17    |
| Ceilings   | 180 sqft   | 400 sqft/gal  | 0.45    |

***

## How do coverage rates work for items?

In PaintScout, the coverage rate for items such as doors, windows, etc. is measured in gallons per item.

This requires estimating how much product from a gallon of paint would be used for a single item, and so the question becomes: "How many *items* can I paint with one coat, using just one can of paint?"

Let's break it down using standard window frames as an example. With 1 can of paint, you estimate that you can paint 20 window frames (with 1 coat of paint), and so the calculation is:

**1 / 20 = 0.05 gal/item**

Once you understand your coverage rate for items, you can calculate the total number of gallons of paint needed for your project using this formula:

**# items x Coverage rate x # coats**

So, let's say you are painting 20 window frames with 2 coats, how many gallons of paint will you need?

**20 window frames x 0.05 coverage rate x 2 coats = 2 gallons of paint**

***

## How do I add coverage rates to my products in PaintScout?

1\. Click the person icon in the top right of your page and go to your **Account Settings** > **Products**.

2\. To add your coverage rates, simply create or edit the product in question.

3\. Once this dialog is open, you're able to add your **surface area coverage rate** and/or your **item-based coverage rate**:

<figure><img src="https://231248629-files.gitbook.io/~/files/v0/b/gitbook-x-prod.appspot.com/o/spaces%2FPyUbJF1GXLjxdJqm89IQ%2Fuploads%2Fgit-blob-9a8206b16109835c09ab9773cad0dc95a5f56e71%2F1780273852_2d46d2eff15cdf0dca5ace9cb0f7?alt=media" alt="Screenshot showing the product edit dialog with surface area coverage rate and item-based coverage rate fields"><figcaption></figcaption></figure>

***

## Important notes

* When entering your coverage rates, input them for one coat of paint. PaintScout considers the number of coats when calculating the total gallons needed on an estimate.
* The materials calculated on the work order may slightly exceed your actual requirements since it doesn't initially factor in spaces like doors and windows. This aligns with the [PCA rules of measurement](https://www.pcapainted.org/blog/pcas-industry-standards-on-estimating/).
* A helpful guideline is to order slightly less product than calculated on the work order (around 60-70%). It's always more convenient to buy additional paint if needed rather than ending up with excess!

&#x20;&#x20;

## Related articles

<table data-card-size="large" data-view="cards"><thead><tr><th></th><th></th><th data-hidden data-card-target data-type="content-ref"></th></tr></thead><tbody><tr><td><strong>Production Rate Descriptions</strong></td><td>Add default descriptions for area view, substrate view, and crew notes to production rates that display on estimates and work orders.</td><td><a href="/support/customization/pricing-and-rates/production-rate-descriptions">Production Rate Descriptions</a></td></tr><tr><td><strong>Advanced Production Rate Options</strong></td><td>Customize production rates with advanced options like hide from customer, show coats, show price, and custom hourly rates per substrate.</td><td><a href="/support/customization/pricing-and-rates/advanced-production-rate-options">Advanced Production Rate Options</a></td></tr><tr><td><strong>Adding Products</strong></td><td>Add paint products to your library with labels, coverage rates for sqft/lnft/items, pricing per gallon, and custom unit types.</td><td><a href="/support/customization/products/adding-products">Adding Products</a></td></tr><tr><td><strong>Assign a Product to a Rate</strong></td><td>Link default products to production rates so material calculations happen automatically when adding surfaces to estimates.</td><td><a href="/support/customization/products/how-to-assign-a-product-to-a-rate">Assign a Product to a Rate</a></td></tr></tbody></table>


# Products

Add and manage paint products, assign them to rates, and configure coverage calculations.

Build your product library so PaintScout can calculate materials automatically on estimates and work orders. Add your own products, assign them to production rates, control rounding, and use the Sherwin-Williams tools for products and colors.

## In This Section

* [Adding Products](/support/customization/products/adding-products) — Create products with coverage rates, pricing, unit types, and estimate type assignments
* [Assign a Product to a Rate](/support/customization/products/how-to-assign-a-product-to-a-rate) — Link default products to production rates for automatic labor and material calculations
* [Product Rounding](/support/customization/products/product-rounding) — Control how calculated product quantities appear on work orders
* [Sherwin-Williams Color Catalogue](/support/customization/products/sherwin-williams-color-catalogue) — Choose Sherwin-Williams colors when a Sherwin-Williams product is used on an estimate
* [Sherwin-Williams Product Browser](/support/customization/products/sherwin-williams-product-browser) — Browse, import, and manage Sherwin-Williams products in your library

&#x20;&#x20;


# Adding Products

Add paint products to your library with labels, coverage rates for sqft/lnft/items, pricing per gallon, and custom unit types.

Products in PaintScout are paint and material items with coverage rates and pricing that you add to your product library for use on estimates.

{% embed url="<https://www.youtube.com/watch?v=Bk8c7Glx6bs>" %}

## How do I add a product?

1\. Click the person icon in the top right and go to your **Account Settings** > **Products** section. Click the **+Add New Product** button.

<figure><img src="https://231248629-files.gitbook.io/~/files/v0/b/gitbook-x-prod.appspot.com/o/spaces%2FPyUbJF1GXLjxdJqm89IQ%2Fuploads%2Fgit-blob-375e11bb440c9d8626b5696b1942bb29f06c2ddd%2Fcc334c4b03670b878ee0ccd7_PaintScout_Settings_2024-01-17_at_4.04.22_PM.jpg?alt=media" alt="Screenshot showing the Products section in Account Settings with the Add New Product button"><figcaption></figcaption></figure>

2\. Fill out your product information.

* Label your product
* Select which estimate types you want it to be available on
* Enter your coverage rate for square footage, linear footage, and items
* Enter your price/gallon (selling price, what you are charging the client)
* Customize your unit type. The default is gallon, but you can create a different unit type (e.g., item, 5 gal, quart)

<figure><img src="https://231248629-files.gitbook.io/~/files/v0/b/gitbook-x-prod.appspot.com/o/spaces%2FPyUbJF1GXLjxdJqm89IQ%2Fuploads%2Fgit-blob-e0dcfe612148bbd6752d46785fd61ccbbc8e137d%2Fe57007afb04ae633c9bc0bc4_Screen_Shot_2023-07-07_at_11.18.26_AM.png?alt=media" alt="Screenshot showing the product information form with fields for label, estimate types, coverage rates, price per gallon, and unit type"><figcaption></figcaption></figure>

&#x20;&#x20;

## Related articles

<table data-card-size="large" data-view="cards"><thead><tr><th></th><th></th><th data-hidden data-card-target data-type="content-ref"></th></tr></thead><tbody><tr><td><strong>Assign a Product to a Rate</strong></td><td>Link default products to production rates so material calculations happen automatically when adding surfaces to estimates.</td><td><a href="/support/customization/products/how-to-assign-a-product-to-a-rate">Assign a Product to a Rate</a></td></tr><tr><td><strong>Coverage Rates</strong></td><td>Configure product coverage rates in sqft/gallon, lnft/gallon, or gallons/item to automatically calculate paint quantities for estimates.</td><td><a href="/support/customization/pricing-and-rates/coverage-rates">Coverage Rates</a></td></tr><tr><td><strong>Sherwin-Williams Color Catalogue</strong></td><td>Browse and select Sherwin-Williams paint colors from the integrated color catalogue when using their products on estimates.</td><td><a href="/support/customization/products/sherwin-williams-color-catalogue">Sherwin-Williams Color Catalogue</a></td></tr><tr><td><strong>Sherwin-Williams Product Browser</strong></td><td>Browse and add Sherwin-Williams paint products directly to your library with images, descriptions, and coverage rates for estimates.</td><td><a href="/support/customization/products/sherwin-williams-product-browser">Sherwin-Williams Product Browser</a></td></tr></tbody></table>


# Assign a Product to a Rate

Link default products to production rates so material calculations happen automatically when adding surfaces to estimates.

Assigning a default product to a production rate in PaintScout makes material calculations happen automatically when you add surfaces to estimates. Choose your most commonly used products for this.

Start by adding your product list to the **Products** section of your Account Settings.

If you haven't added any products into PaintScout yet, check out how to do that below.

{% hint style="info" %}
[How to Add Products](/support/customization/products/adding-products)
{% endhint %}

## How to Assign Products to Production Rates

1\. After your materials have been input into the Products section of your Account Settings, go to the **Production Rates** tab.

<figure><img src="https://231248629-files.gitbook.io/~/files/v0/b/gitbook-x-prod.appspot.com/o/spaces%2FPyUbJF1GXLjxdJqm89IQ%2Fuploads%2Fgit-blob-914482044e2e6ebeabdb54094c3ad93ef7c97818%2F6e12e31bfcb4f71d2ec506e9_PaintScout_Settings_2023-12-05_at_2.19.32_PM.jpg?alt=media" alt="Screenshot showing the Production Rates tab in Account Settings"><figcaption></figcaption></figure>

2\. Select the **Rate Category** you would like to start with.

<figure><img src="https://231248629-files.gitbook.io/~/files/v0/b/gitbook-x-prod.appspot.com/o/spaces%2FPyUbJF1GXLjxdJqm89IQ%2Fuploads%2Fgit-blob-02c40ef9b492ab16643e948c8024d2f5ae070f86%2Fa40629edbd5164576d6cdbf6_PaintScout_Settings_2023-12-05_at_2.22.00_PM.jpg?alt=media" alt="Screenshot showing the Rate Category selection list in Production Rates settings"><figcaption></figcaption></figure>

3\. Choose the rate you want to add a product to.

<figure><img src="https://231248629-files.gitbook.io/~/files/v0/b/gitbook-x-prod.appspot.com/o/spaces%2FPyUbJF1GXLjxdJqm89IQ%2Fuploads%2Fgit-blob-78ce17fe3d3b8c780cc2530601896d36dc8ab4a5%2Fa586153d1ea49cee77e86cae_PaintScout_Settings_2023-12-05_at_2.23.06_PM.jpg?alt=media" alt="Screenshot showing the individual production rate selection within a rate category"><figcaption></figcaption></figure>

4\. Click inside the product box to open your product list and choose a default product. The system uses the coverage rate specified on the selected product. To customize the coverage rate (for example, for a spray production rate), use the **coverage rate** box below.

<figure><img src="https://231248629-files.gitbook.io/~/files/v0/b/gitbook-x-prod.appspot.com/o/spaces%2FPyUbJF1GXLjxdJqm89IQ%2Fuploads%2Fgit-blob-9902b090162fc658586344a7508bc160df01428a%2F96cc8e07c34afe56349276f6_PaintScout_Settings_2023-12-05_at_2.24.58_PM.jpg?alt=media" alt="Screenshot showing the default product selection box and coverage rate field on a production rate"><figcaption></figcaption></figure>

{% hint style="warning" %}
Changing a rate's measurement variables clears its custom product coverage. Enter a new coverage amount if the updated rate needs one.
{% endhint %}

5\. Now, when a surface is added to an area, both the labor and material columns will calculate automatically!

<figure><img src="https://231248629-files.gitbook.io/~/files/v0/b/gitbook-x-prod.appspot.com/o/spaces%2FPyUbJF1GXLjxdJqm89IQ%2Fuploads%2Fgit-blob-11ef5c5fbc419fff8ae56ca7d8f6b0b9af13c7d1%2F4ef2159691aea610e26808c7_Screenshot_2024-02-01_at_10.17.25_AM.png?alt=media" alt="Screenshot showing an estimate with automatically calculated labor and material columns after adding a surface"><figcaption></figcaption></figure>

***

## How do you change a default product on an estimate?

1\. Open the area that has the substrate you want to adjust and select the surface you want to change the product for.

2\. Choose **Select Product** to populate your product list and choose your preferred product.

<figure><img src="https://231248629-files.gitbook.io/~/files/v0/b/gitbook-x-prod.appspot.com/o/spaces%2FPyUbJF1GXLjxdJqm89IQ%2Fuploads%2Fgit-blob-a4915d6a3d03c8e2fa67757ab4ecd13fc2e31d37%2Faa1e7a8414715e39125b4826_PaintScout_Edit_Estimate_2023-12-05_at_3.51.55_PM.jpg?alt=media" alt="Screenshot showing the Select Product option on an estimate surface to choose a product from the list"><figcaption></figcaption></figure>

3\. Choose **Clear Product** if you would like to change or delete the assigned product.

<figure><img src="https://231248629-files.gitbook.io/~/files/v0/b/gitbook-x-prod.appspot.com/o/spaces%2FPyUbJF1GXLjxdJqm89IQ%2Fuploads%2Fgit-blob-a2c85abb1d6151c406b9f341a1d0d771ee618608%2Fb95deeade70539ca7978a24b_PaintScout_Edit_Estimate_2023-12-05_at_3.54.09_PM.jpg?alt=media" alt="Screenshot showing the Clear Product option to remove or change the assigned product on a surface"><figcaption></figcaption></figure>

## Related articles

<table data-card-size="large" data-view="cards"><thead><tr><th></th><th></th><th data-hidden data-card-target data-type="content-ref"></th></tr></thead><tbody><tr><td><strong>Adding Products</strong></td><td>Add paint products to your library with labels, coverage rates for sqft/lnft/items, pricing per gallon, and custom unit types.</td><td><a href="/support/customization/products/adding-products">Adding Products</a></td></tr><tr><td><strong>Coverage Rates</strong></td><td>Configure product coverage rates in sqft/gallon, lnft/gallon, or gallons/item to automatically calculate paint quantities for estimates.</td><td><a href="/support/customization/pricing-and-rates/coverage-rates">Coverage Rates</a></td></tr><tr><td><strong>Product Rounding</strong></td><td>Understand how PaintScout rounds product quantities on estimates and work orders, and configure rounding to match your purchasing needs.</td><td><a href="/support/customization/products/product-rounding">Product Rounding</a></td></tr><tr><td><strong>Working With Work Orders</strong></td><td>Create and manage work orders with hour breakdowns, crew notes, hours display options, downloading, and sharing with your team.</td><td><a href="/support/estimating/managing-estimates-and-work-orders/work-orders/working-with-work-orders">Working With Work Orders</a></td></tr></tbody></table>


# Product Rounding

Understand how PaintScout rounds product quantities on estimates and work orders, and configure rounding to match your purchasing needs.

Product rounding in PaintScout controls how calculated material quantities are displayed on work orders. You can choose to show exact values, round to the nearest unit, or always round up to ensure your crew has enough product on hand.

## How Does Product Rounding Work?

PaintScout calculates product usage per item using exact values. **Pricing is always based on exact quantities**, regardless of your rounding setting. Rounding only affects the quantity displayed on the work order — the total your customer sees on the estimate is always based on the precise calculation.

By default, PaintScout sums the exact product quantities across all items and then rounds the **total** on the work order. The rounding variance will never be more than 0.5 gallons per product.

### Example

If you have 5 bedrooms with baseboards, and each calculates to 0.1 gallons of trim paint, at $50/gallon, each room costs $5 — totaling 0.5 gallons and $25. On the work order, 0.5 gallons rounds to **1 gal**, so there can be a small gap between what's charged and what's listed for purchasing. That gap is capped at half a gallon.

## What Rounding Options Are Available?

PaintScout offers three rounding modes:

<details>

<summary><strong>No Rounding (Default)</strong></summary>

Product quantities are displayed as exact calculated values. The work order shows the precise amount needed (e.g., 2.2 gal). This gives you the most accurate view of material usage but may not align with how you purchase paint.

</details>

<details>

<summary><strong>Round to Nearest Unit</strong></summary>

Quantities are rounded to the nearest whole number using standard rounding rules. For example, 2.6 gal rounds to **3 gal** and 2.4 gal rounds to **2 gal**.

Be aware that this can round small quantities **down to zero**. If several items each need a fraction of a gallon and the total comes to less than 0.5 gallons, the work order will show **0 gal** — even though you still need to buy at least one. If your jobs frequently have small product quantities, consider using **Always Round Upwards** instead.

</details>

<details>

<summary><strong>Always Round Upwards</strong></summary>

Quantities are always rounded up to the next whole number. For example, 2.1 gal rounds to **3 gal**. This ensures the work order never underestimates the amount of product to purchase, which is the safest option if you want your crew to always have enough material on hand.
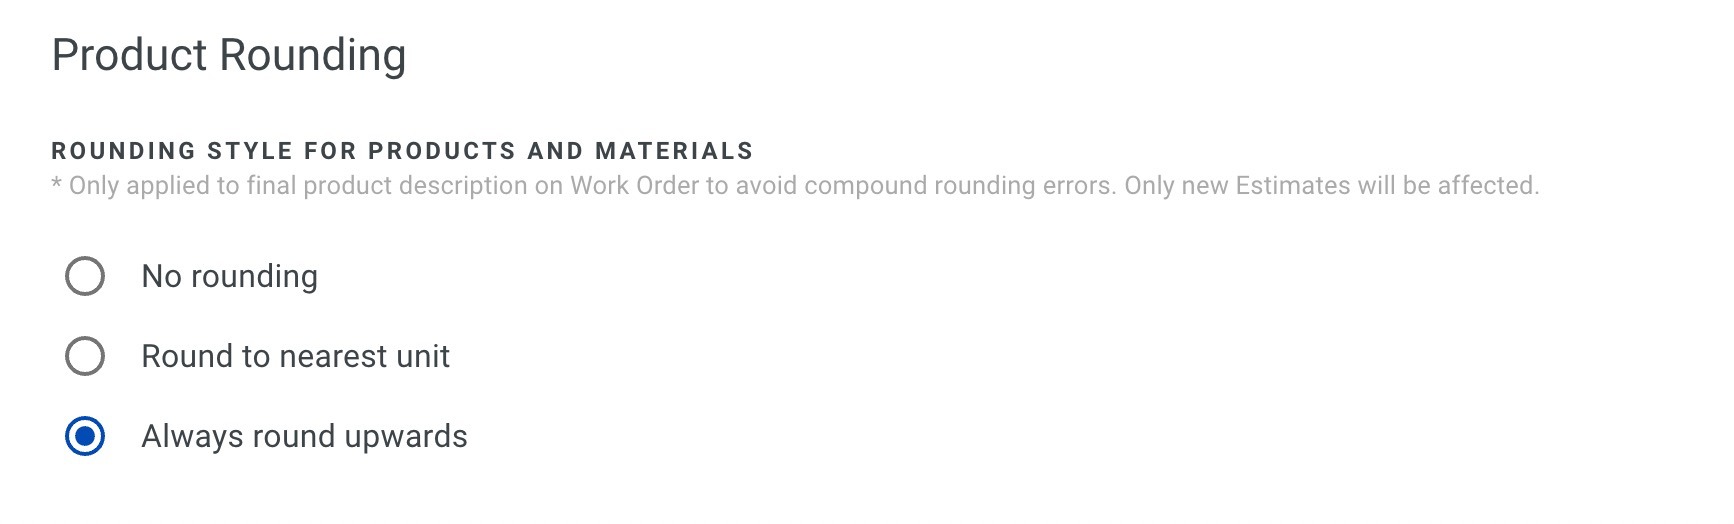
</details>

## How Do I Change My Rounding Settings?

1. Click the person icon and go to **Account Settings** > **Estimates** > **Settings**.
2. Scroll to the **Product Rounding** section and select your preferred option.

<figure><img src="https://231248629-files.gitbook.io/~/files/v0/b/gitbook-x-prod.appspot.com/o/spaces%2FPyUbJF1GXLjxdJqm89IQ%2Fuploads%2Fgit-blob-93a8fac6d8b6f5362eb98fc24bc243181bda9e48%2F48009bd80a7adb3129aa73df_Image_2022-06-09_at_12.42.08_PM.jpg?alt=media" alt="Screenshot showing the Product Rounding settings with options to round to nearest unit or always round upwards"><figcaption></figcaption></figure>

&#x20;&#x20;

## Related articles

<table data-card-size="large" data-view="cards"><thead><tr><th></th><th></th><th data-hidden data-card-target data-type="content-ref"></th></tr></thead><tbody><tr><td><strong>Assign a Product to a Rate</strong></td><td>Link default products to production rates so material calculations happen automatically when adding surfaces to estimates.</td><td><a href="/support/customization/products/how-to-assign-a-product-to-a-rate">Assign a Product to a Rate</a></td></tr><tr><td><strong>Working With Work Orders</strong></td><td>Create and manage work orders with hour breakdowns, crew notes, hours display options, downloading, and sharing with your team.</td><td><a href="/support/estimating/managing-estimates-and-work-orders/work-orders/working-with-work-orders">Working With Work Orders</a></td></tr></tbody></table>


# Sherwin-Williams Color Catalogue

Browse and select Sherwin-Williams paint colors from the integrated color catalogue when using their products on estimates.

The Sherwin-Williams Color Catalogue in PaintScout lets you browse the full range of Sherwin-Williams paint colors and apply them directly to estimates. Colors are available whenever you use a Sherwin-Williams product on an estimate.

***

## What Can I Do with the Color Catalogue?

* Browse the complete selection of Sherwin-Williams paint colors.
* Apply specific colors to estimates so your team knows the exact specifications for each job.

{% hint style="warning" %}
You’ll only be able to choose colors from the Sherwin-Williams catalogue if you’re using a **Sherwin-Williams product** on your estimate. [Review Sherwin-Williams Product Browser >](/support/customization/products/sherwin-williams-product-browser)
{% endhint %}

***

## How Do I Add a Color to My Estimate?

1. Add a **Sherwin-Williams product** to your estimate.
2. When adding a color to the product, the **Color Catalogue** dropdown will appear.

   <figure><img src="https://231248629-files.gitbook.io/~/files/v0/b/gitbook-x-prod.appspot.com/o/spaces%2FPyUbJF1GXLjxdJqm89IQ%2Fuploads%2Fgit-blob-529b8c432981d2625444fdbd1650e2e40a93cfd3%2F1690972709_d3bb9c009449c5a2b78072760e4a?alt=media" alt="Screenshot showing the Sherwin-Williams Color Catalogue dropdown appearing when adding a color to a product"><figcaption></figcaption></figure>
3. Select the desired color for that product.

&#x20;&#x20;

## Related articles

<table data-card-size="large" data-view="cards"><thead><tr><th></th><th></th><th data-hidden data-card-target data-type="content-ref"></th></tr></thead><tbody><tr><td><strong>Sherwin-Williams Product Browser</strong></td><td>Browse and add Sherwin-Williams paint products directly to your library with images, descriptions, and coverage rates for estimates.</td><td><a href="/support/customization/products/sherwin-williams-product-browser">Sherwin-Williams Product Browser</a></td></tr><tr><td><strong>Adding Products</strong></td><td>Add paint products to your library with labels, coverage rates for sqft/lnft/items, pricing per gallon, and custom unit types.</td><td><a href="/support/customization/products/adding-products">Adding Products</a></td></tr></tbody></table>


# Sherwin-Williams Product Browser

Browse and add Sherwin-Williams paint products directly to your library with images, descriptions, and coverage rates for estimates.

The Sherwin-Williams Product Browser in PaintScout lets you search the Sherwin-Williams product catalogue, add products to your library, and display them on estimates with images and descriptions.

{% hint style="info" %}
If you do not see the Sherwin-Williams Product Browser in your settings, contact support and we'll get it enabled for you <support@paintscout.com>.
{% endhint %}

***

## What Is the Sherwin-Williams Product Browser?

The Product Browser is a built-in integration that lets you explore the full Sherwin-Williams product list directly from your PaintScout settings.

* **Browse Products:** Search by application (interior, exterior, or both) and by type (e.g., liquid coating, primer).
* **Add to Your Library:** Select one or multiple products to add directly to your own library.
* **Ready-to-Use on Estimates:** Products added from Sherwin-Williams include an image and short description, which will display to your customers on estimates.

***

## How Do I Add Sherwin-Williams Products?

1. Go to your **Account** **Settings** > **Products** section and open the **Sherwin-Williams Product Browser**.
2. Select one or multiple products.

   <figure><img src="https://231248629-files.gitbook.io/~/files/v0/b/gitbook-x-prod.appspot.com/o/spaces%2FPyUbJF1GXLjxdJqm89IQ%2Fuploads%2Fgit-blob-e50b4bddde972173cafcebe96605ecfcc9fb389b%2F1755853726_28ef08ee01d7e9f38955f66121ea?alt=media" alt="Screenshot showing the Sherwin-Williams Product Browser with products selected"><figcaption></figcaption></figure>
3. Click **+Add to My Library**.

   <figure><img src="https://231248629-files.gitbook.io/~/files/v0/b/gitbook-x-prod.appspot.com/o/spaces%2FPyUbJF1GXLjxdJqm89IQ%2Fuploads%2Fgit-blob-cfe4e2819a87ac0c50e50033fa14de5376d449fe%2F1755842332_f2f84dc0c7b9e143bd64875eacf9?alt=media" alt="Screenshot showing the Add to My Library button in the Sherwin-Williams Product Browser"><figcaption></figcaption></figure>
4. The products you add will now appear in your own library.

<figure><img src="https://231248629-files.gitbook.io/~/files/v0/b/gitbook-x-prod.appspot.com/o/spaces%2FPyUbJF1GXLjxdJqm89IQ%2Fuploads%2Fgit-blob-61963f978f876c635e6dda4db65f1377c5776033%2F1755841760_709c6c5910c47e297869a012cc00?alt=media" alt="Screenshot showing Sherwin-Williams products added to your own product library"><figcaption></figcaption></figure>

### From your library, you can:

* Adjust the **price**
* Update the **coverage**
* Assign the product to specific **estimate types** *(by default, products added to your library will be assigned to all types)*

<figure><img src="https://231248629-files.gitbook.io/~/files/v0/b/gitbook-x-prod.appspot.com/o/spaces%2FPyUbJF1GXLjxdJqm89IQ%2Fuploads%2Fgit-blob-f6211d5c9977eaf787f7c70c132a93260a60f76c%2F1690759732_de5401e61cf5b6e14ed63e269d6b?alt=media" alt="Screenshot showing product library options for adjusting price, coverage, and estimate type assignments"><figcaption></figcaption></figure>

***

## How Do Products Appear on Estimates?

When you add Sherwin-Williams products to an estimate, a **Products** section appears below the estimate showing:

* The **product image**
* A **short description**

This gives customers a clear view of the materials being used for their project.

<figure><img src="https://231248629-files.gitbook.io/~/files/v0/b/gitbook-x-prod.appspot.com/o/spaces%2FPyUbJF1GXLjxdJqm89IQ%2Fuploads%2Fgit-blob-03f1b1d6705d037dc4000c2a79035030e7fc6478%2F1690790006_a123f7e6dcd131557575ca1c8be5?alt=media" alt="Screenshot showing the Products section on an estimate displaying Sherwin-Williams product images and descriptions"><figcaption></figcaption></figure>

***

## FAQ

### How do I remove a Sherwin-Williams product from my library?

1. Go to your **Products** > **My library** section and click the 3 dots next to a product and delete.
2. This will remove the Sherwin-Williams product from your library - you can always add it back later if needed!

<figure><img src="https://231248629-files.gitbook.io/~/files/v0/b/gitbook-x-prod.appspot.com/o/spaces%2FPyUbJF1GXLjxdJqm89IQ%2Fuploads%2Fgit-blob-50f839de452a64347cab1f6f963ac4a73c99353f%2F1690807409_a208fe35d423c8b205e0967bcf67?alt=media" alt="Screenshot showing the three-dot menu on a product with the option to delete it from your library"><figcaption></figcaption></figure>

***

### Why can't I add a Sherwin-Williams product to my library?

If the checkbox to add a product is no longer there, or the Save button is greyed out, it's because you have already added the product to your library!

<figure><img src="https://231248629-files.gitbook.io/~/files/v0/b/gitbook-x-prod.appspot.com/o/spaces%2FPyUbJF1GXLjxdJqm89IQ%2Fuploads%2Fgit-blob-549d14acdd901f393cb1b7b346baed7e113151e1%2F1690811126_5c2d8c33ac8e074ecdc693fa6f85?alt=media" alt="Screenshot showing a greyed-out save button indicating the product has already been added to your library"><figcaption></figcaption></figure>

***

### Can I adjust the name and description of a Sherwin-Williams product?

Not currently. The name and description of the product is provided by Sherwin-Williams and is not editable at this time.

***

### Is a coverage rate also imported?

Yes! Most products have a recommended range for coverage rate. This integration will import the minimum of the provided range listed on the paint can. You can always customize the coverage rate once it is added to your library.

***

### How do I hide or show the Sherwin-Williams products on my estimate?

Click the toggle button beside the Products section on the estimate to hide or show the list of images and descriptions.

<figure><img src="https://231248629-files.gitbook.io/~/files/v0/b/gitbook-x-prod.appspot.com/o/spaces%2FPyUbJF1GXLjxdJqm89IQ%2Fuploads%2Fgit-blob-e228d08e930da028afafee3f99be6733034ea504%2F1690818929_723f1a03b19e7432785740f34fe1?alt=media" alt="Screenshot showing the toggle button to hide or show the Products section on an estimate"><figcaption></figcaption></figure>

&#x20;&#x20;

## Related articles

<table data-card-size="large" data-view="cards"><thead><tr><th></th><th></th><th data-hidden data-card-target data-type="content-ref"></th></tr></thead><tbody><tr><td><strong>Sherwin-Williams Color Catalogue</strong></td><td>Browse and select Sherwin-Williams paint colors from the integrated color catalogue when using their products on estimates.</td><td><a href="/support/customization/products/sherwin-williams-color-catalogue">Sherwin-Williams Color Catalogue</a></td></tr><tr><td><strong>Adding Products</strong></td><td>Add paint products to your library with labels, coverage rates for sqft/lnft/items, pricing per gallon, and custom unit types.</td><td><a href="/support/customization/products/adding-products">Adding Products</a></td></tr></tbody></table>


# Templates & Presets

Save time with estimate templates, smart templates, and preset configurations.

Save time and keep estimates consistent with reusable templates and account defaults. Set up estimate types, build templates, configure estimate and invoice settings, and manage reusable area names and line items.

## In This Section

* [Estimate Types](/support/customization/templates-and-presets/what-are-estimate-types) — Create project types with their own rates, terms, presentations, and defaults
* [Estimate Templates](/support/customization/templates-and-presets/estimate-templates) — Create reusable estimates with pre-filled areas, rates, and line items
* [Smart Templates](/support/customization/templates-and-presets/smart-templates) — Keep new templates synced with your latest rates, products, and terms
* [Estimate Settings](/support/customization/templates-and-presets/estimate-settings) — Set defaults for hourly rates, taxes, discounts, rounding, options, and expiry
* [Estimate Disclaimers](/support/customization/templates-and-presets/estimate-disclaimers) — Customize the messages shown when customers accept or decline estimates
* [Invoice Settings](/support/customization/templates-and-presets/invoice-settings) — Set invoice due-date defaults and automatic invoice generation
* [Payment Methods](/support/customization/templates-and-presets/adding-payment-methods) — Configure the payment methods available on invoices
* [Area Names](/support/customization/templates-and-presets/area-names) — Create reusable room and location labels for faster estimate setup
* [Line Items Overview](/support/customization/templates-and-presets/line-items-overview) — Build reusable fixed-price items with pricing, notes, and materials

&#x20;&#x20;


# Estimate Types

Create estimate types like Interior, Exterior, and Cabinets to organize rates, terms, presentations, and filter reporting data.

Estimate types in PaintScout are categories that represent the different kinds of projects you offer, such as Interior, Exterior, or Cabinets. Each type can have its own rates, terms, presentations, and templates.

## What Is an Estimate Type?

An estimate type is a project category you assign to estimates. Examples include **Interior, Exterior, Cabinets**, and more. Each type links to specific production rates, contract terms, and presentations.

***

## Why Use Different Estimate Types?

Different estimate types help organize your account. When you select an estimate type, PaintScout only shows the rates, line items, and templates assigned to that type. This streamlines estimate creation, improves reporting, and lets you track close rates by project type.

➡️ **Skip to the 3:25 timestamp in the video below.**

{% embed url="<https://www.youtube.com/watch?v=Sc-iM49Nu4Y>" %}

***

## How Do I Create an Estimate Type?

1\. Go to your **Account Settings** > **Estimates** > **Estimate Types** section and click the **+Add New Estimate Type** button.

<figure><img src="https://231248629-files.gitbook.io/~/files/v0/b/gitbook-x-prod.appspot.com/o/spaces%2FPyUbJF1GXLjxdJqm89IQ%2Fuploads%2Fgit-blob-e79448cbc8b4f0dbcf70ae31b3770938dad729ba%2F37ee9e1c9b09fe7e9133b5a2_PaintScout_Settings_2024-01-17_at_2.41.04_PM.jpg?alt=media" alt="Screenshot showing the Estimate Types section in Account Settings with the Add New Estimate Type button"><figcaption></figcaption></figure>

2\. A window will appear where you can add various information regarding your new Estimate Type:

* **Label:** add the name of your estimate type.
* **Hourly Rate:** set a distinct hourly rate for each estimate type. It will take precedence over your general hourly rate mentioned in the Company section. If you prefer to use your general hourly rate, simply leave this field empty.
* **Area Type:** set your default area type to Room or Surface.
* **Default Presentation:** select which presentation will default to this estimate type
* **Default Terms:** select which terms will be associated with this estimate type

<figure><img src="https://231248629-files.gitbook.io/~/files/v0/b/gitbook-x-prod.appspot.com/o/spaces%2FPyUbJF1GXLjxdJqm89IQ%2Fuploads%2Fgit-blob-96489bdc2ea19088b1b9e83cd76e4483941632fc%2Fe273ce8c0463c9dc3ad1feb0_Screen_Shot_2023-06-26_at_2.21.26_PM.png?alt=media" alt="Screenshot showing the new Estimate Type dialog with fields for Label, Hourly Rate, Area Type, Default Presentation, and Default Terms"><figcaption></figcaption></figure>

&#x20;&#x20;

## Related articles

<table data-card-size="large" data-view="cards"><thead><tr><th></th><th></th><th data-hidden data-card-target data-type="content-ref"></th></tr></thead><tbody><tr><td><strong>Setting a Default Presentation</strong></td><td>Set a default presentation (proposal template) for each estimate type so the correct layout is automatically applied to every new estimate.</td><td><a href="/support/customization/presentations-and-terms/setting-a-default-presentation">Setting a Default Presentation</a></td></tr><tr><td><strong>Setting Default Terms</strong></td><td>Set default contract terms for each estimate type so the correct terms are automatically applied every time you create a new estimate.</td><td><a href="/support/customization/presentations-and-terms/setting-default-terms">Setting Default Terms</a></td></tr></tbody></table>


# Estimate Templates

Create reusable estimate templates with pre-filled areas, rates, and line items to speed up creating similar estimates.

Estimate Templates in PaintScout are pre-filled estimates with areas, rates, and line items already configured, so you can create similar estimates faster without starting from scratch.

{% embed url="<https://www.youtube.com/watch?v=jkgDP7jfCn8>" %}

## Why use Estimate Templates?

Templates save time when you frequently create similar estimates. Pull up a saved template and adjust it instead of building each estimate from scratch.

***

## How do I create an Estimate Template?

1\. Go to your **Account Settings** > **Estimates** > **Templates** section. Click **+Add New Estimate Template.**

<figure><img src="https://231248629-files.gitbook.io/~/files/v0/b/gitbook-x-prod.appspot.com/o/spaces%2FPyUbJF1GXLjxdJqm89IQ%2Fuploads%2Fgit-blob-6c96667ea237ed477a9173b0bc3310a3816e0683%2Fa5e1c448f6066859cde62d25_PaintScout_Settings_2024-01-17_at_2.43.17_PM.jpg?alt=media" alt="Screenshot showing the Templates section in Account Settings with the Add New Estimate Template button"><figcaption></figcaption></figure>

2\. Enter the name of your template, and select which estimate type it is associated with.

<figure><img src="https://231248629-files.gitbook.io/~/files/v0/b/gitbook-x-prod.appspot.com/o/spaces%2FPyUbJF1GXLjxdJqm89IQ%2Fuploads%2Fgit-blob-f78f47ff99340d1ad08e308569dd2d5d40c06648%2F5f3a6c66c10bc62f44491ffe_Image_2022-07-11_at_1.29.11_PM.jpg?alt=media" alt="Screenshot showing the template name and estimate type selection dialog"><figcaption></figcaption></figure>

3\. A blank estimate will open and you can start adding in your items. Once you have finished, click the **Save** button.

<figure><img src="https://231248629-files.gitbook.io/~/files/v0/b/gitbook-x-prod.appspot.com/o/spaces%2FPyUbJF1GXLjxdJqm89IQ%2Fuploads%2Fgit-blob-703129a1f55d3e18f58518438cc9717edcd1e0e7%2Fa4c6f1f9d9c462c68fce6adc_Image_2022-07-11_at_1.35.09_PM.jpg?alt=media" alt="Screenshot showing a blank estimate template open for editing with the Save button"><figcaption></figcaption></figure>

***

## What are Smart Templates?

All new templates use **Smart Template** functionality, which automatically incorporates your latest production rates and settings to ensure consistency. Older customized templates display a banner at the top.

<figure><img src="https://231248629-files.gitbook.io/~/files/v0/b/gitbook-x-prod.appspot.com/o/spaces%2FPyUbJF1GXLjxdJqm89IQ%2Fuploads%2Fgit-blob-93f188793a13a006590654bdf56b8469984d950a%2F1289440559_3181a51f6de0309217de11351361?alt=media" alt="Screenshot showing a banner on an older customized template indicating it is not a Smart Template"><figcaption></figcaption></figure>

{% hint style="warning" %}
**Customized templates cannot be converted into Smart Templates.** To utilize the Smart Template functionality, you must recreate the template manually.
{% endhint %}

***

## How do I create a template from an existing estimate?

You can save any existing estimate as a template without creating it from Settings.

1\. Click the drop-down arrow beside the send button and select **Save as Template.**

<figure><img src="https://231248629-files.gitbook.io/~/files/v0/b/gitbook-x-prod.appspot.com/o/spaces%2FPyUbJF1GXLjxdJqm89IQ%2Fuploads%2Fgit-blob-ce14b68c93a61625fd94fe3edcc94844d93bc51c%2F1766dffc567c6b3d6c72ff95_PaintScout_Edit_Estimate_2024-01-17_at_2.45.43_PM.jpg?alt=media" alt="Screenshot showing the Save as Template option in the dropdown menu beside the send button"><figcaption></figcaption></figure>

2\. Add a name for the template and choose the estimate type you want it assigned to. Click **Confirm** to save the estimate as a template. You can then adjust the template by editing it in your settings.

<figure><img src="https://231248629-files.gitbook.io/~/files/v0/b/gitbook-x-prod.appspot.com/o/spaces%2FPyUbJF1GXLjxdJqm89IQ%2Fuploads%2Fgit-blob-2ba5a61e4914c8f91716ea0ed2c55a1090546889%2F493731a5be7085a826e3f1fb_Screenshot_2024-01-17_at_2.46.59_PM.png?alt=media" alt="Screenshot showing the Save as Template dialog with template name and estimate type fields and Confirm button"><figcaption></figcaption></figure>

&#x20;&#x20;

## Related articles

<table data-card-size="large" data-view="cards"><thead><tr><th></th><th></th><th data-hidden data-card-target data-type="content-ref"></th></tr></thead><tbody><tr><td><strong>Smart Templates</strong></td><td>Learn how Smart Templates automatically incorporate your latest production rates, products, and terms into new estimate templates.</td><td><a href="/support/customization/templates-and-presets/smart-templates">Smart Templates</a></td></tr><tr><td><strong>Create a New Estimate</strong></td><td>Start new estimates from the dashboard using templates or blank quotes and add areas and line items to build your proposal.</td><td><a href="/support/estimating/creating-estimates/how-to-create-a-new-estimate">Create a New Estimate</a></td></tr></tbody></table>


# Smart Templates

Learn how Smart Templates automatically incorporate your latest production rates, products, and terms into new estimate templates.

Smart Templates in PaintScout automatically pull the latest production rates, products, and terms from your account settings into new estimate templates. This means your templates always stay up to date without manual updates.

***

## What Are Smart Templates?

Smart Templates are estimate templates that dynamically incorporate your current settings. When you update a [production rate](/support/customization/pricing-and-rates/production-rates-section-overview) or product in your account, Smart Templates automatically reflect those changes in new estimates.

***

## How Are Smart Templates Different from Regular Templates?

Regular templates are static snapshots. When you change a rate or product in your settings, regular templates do not update automatically. You must manually edit or recreate the template. Smart Templates pull the latest information from your settings each time you use them.

***

## Can I Convert Existing Templates to Smart Templates?

No, existing templates cannot be converted. Once Smart Templates are enabled, all ***new*** templates use the Smart Template functionality. To upgrade an existing template, recreate it as a new template.

***

## Why Can I Only Select One Estimate Type per Smart Template?

Smart Templates have a 1:1 relationship with [estimate types](/support/customization/templates-and-presets/what-are-estimate-types). Each template is linked to one estimate type. To use the same template structure for multiple types, copy the template and assign a different estimate type.

***

## Will Deleting Old Templates Affect Existing Estimates?

No. Deleting old templates ***will not*** change estimates you have already created with them. It only removes those templates as options for future estimates.

***

## Can I Copy an Existing Template to Make It a Smart Template?

No. Copying an existing template creates another regular template. To create a Smart Template, click **+New Template** and build it from scratch.

***

## I Created a New Template but Nothing Changed. What Is Wrong?

Please reach out to our Support Team at <support@paintscout.com> to activate Smart Templates in your account!

&#x20;&#x20;

## Related articles

<table data-card-size="large" data-view="cards"><thead><tr><th></th><th></th><th data-hidden data-card-target data-type="content-ref"></th></tr></thead><tbody><tr><td><strong>Estimate Templates</strong></td><td>Create reusable estimate templates with pre-filled areas, rates, and line items to speed up creating similar estimates.</td><td><a href="/support/customization/templates-and-presets/estimate-templates">Estimate Templates</a></td></tr><tr><td><strong>Create a New Estimate</strong></td><td>Start new estimates from the dashboard using templates or blank quotes and add areas and line items to build your proposal.</td><td><a href="/support/estimating/creating-estimates/how-to-create-a-new-estimate">Create a New Estimate</a></td></tr></tbody></table>


# Estimate Settings

Configure estimate defaults including hourly rate, tax rates, discounts, rounding options, customer accepted options, and expiry settings.

Estimate Settings in PaintScout control defaults for hourly rates, taxes, discounts, rounding, and expiry that apply to all new estimates.

{% hint style="info" %}
Changes to estimate settings only affect **future** estimates, not existing or draft estimates.
{% endhint %}

{% embed url="<https://www.youtube.com/watch?v=Sc-iM49Nu4Y>" %}

## What is the Hourly Rate setting?

The hourly rate is what you charge the customer per hour. Set a default value here, and enable the checkbox to allow your team to customize the hourly rate on individual estimates.

<figure><img src="https://231248629-files.gitbook.io/~/files/v0/b/gitbook-x-prod.appspot.com/o/spaces%2FPyUbJF1GXLjxdJqm89IQ%2Fuploads%2Fgit-blob-0b2e4ce0c51009d19e9ae3c1accb5e3fb46daa84%2Fb4aa9617cabbcba396e97b57_Screenshot_2023-08-20_at_1.46.34_PM.png?alt=media" alt="Screenshot showing the Hourly Rate setting with default rate field and customization checkbox"><figcaption></figcaption></figure>

***

## How do Tax Rates work?

Tax rates with **Include on New Estimates** enabled are automatically applied to every new estimate. Rates without this option remain available in the sidebar menu for manual selection.

To add a rate, click **+Add Tax Rate**. To remove one, click the circle icon on the right.

<figure><img src="https://231248629-files.gitbook.io/~/files/v0/b/gitbook-x-prod.appspot.com/o/spaces%2FPyUbJF1GXLjxdJqm89IQ%2Fuploads%2Fgit-blob-3ff41fe7ea762215187587bc311282ff81e01b98%2Fa1c94974ade6418130f24bd0_Screenshot_2023-10-23_at_9.50.13_AM.png?alt=media" alt="Screenshot showing the Tax Rates section with Add Tax Rate button and Include on New Estimates toggle"><figcaption></figcaption></figure>

{% hint style="info" %}
You can also use tax rates to add other percentage charges like credit card fees or disposal fees.
{% endhint %}

***

## How do Discounts work?

Discounts can be a percentage (%) or dollar amount ($). All discounts are available for selection from the estimate sidebar menu.

* Check **Include on New Estimates** to auto-apply a discount to all new estimates.
* Click the circle icon on the right to delete a discount.

<figure><img src="https://231248629-files.gitbook.io/~/files/v0/b/gitbook-x-prod.appspot.com/o/spaces%2FPyUbJF1GXLjxdJqm89IQ%2Fuploads%2Fgit-blob-1f679889de9e21089a3034d32156621d0bcd07fa%2F423f3cf1f4edbe56c9d4d02c_Screenshot_2023-10-23_at_10.31.42_AM.png?alt=media" alt="Screenshot showing the Discounts section with percentage and dollar amount options and Include on New Estimates checkbox"><figcaption></figcaption></figure>

***

## What are the Rounding options?

### Hours

Choose a rounding increment for painting hours: 1 hour, 0.5 hours (30 min), 0.25 hours (15 min), or no rounding for precise numbers.

<figure><img src="https://231248629-files.gitbook.io/~/files/v0/b/gitbook-x-prod.appspot.com/o/spaces%2FPyUbJF1GXLjxdJqm89IQ%2Fuploads%2Fgit-blob-d8b3c4db6a05b2512e6fc3d42f6255e56355abc9%2F67e762fb65d95449370ea52b_Screenshot_2023-08-20_at_1.55.14_PM.png?alt=media" alt="Screenshot showing the Hours rounding options with choices for 1 hour, 0.5 hours, 0.25 hours, or no rounding"><figcaption></figcaption></figure>

### Product & Materials

<figure><img src="https://231248629-files.gitbook.io/~/files/v0/b/gitbook-x-prod.appspot.com/o/spaces%2FPyUbJF1GXLjxdJqm89IQ%2Fuploads%2Fgit-blob-caf9693728162b5a3485626e48bacb5578c85295%2F9cf2ccadaaf8bfee538b3f76_Screenshot_2023-08-20_at_1.55.38_PM.png?alt=media" alt="Screenshot showing the Product and Materials rounding options with round to nearest unit or always round upwards"><figcaption></figcaption></figure>

* **Round to nearest unit:** to the nearest integer. Ex: 2.2 gal would round to 2 gal.
* **Always round upwards:** to the highest integer. Ex: 2.2 gal would round to 3 gal.

{% hint style="info" %}
[Learn more about product rounding and how it works!](/support/customization/products/product-rounding)
{% endhint %}

***

## Price Rounding

Set price rounding for surfaces, line items, and totals. Options: No rounding, Round to nearest dollar, or Always round upwards.

<figure><img src="https://231248629-files.gitbook.io/~/files/v0/b/gitbook-x-prod.appspot.com/o/spaces%2FPyUbJF1GXLjxdJqm89IQ%2Fuploads%2Fgit-blob-3abc9ea19b0916ca24d5e9aa39ed7ca3835bb2f6%2Fd74d4669221aa8ec4a5b6f76_Screenshot_2023-08-20_at_1.56.30_PM.png?alt=media" alt="Screenshot showing the Price rounding preferences for surfaces, line items, and overall total"><figcaption></figcaption></figure>

***

## What are Customer Accepted Options?

Enable this setting to let customers add their own options to the estimate before accepting it.

<figure><img src="https://231248629-files.gitbook.io/~/files/v0/b/gitbook-x-prod.appspot.com/o/spaces%2FPyUbJF1GXLjxdJqm89IQ%2Fuploads%2Fgit-blob-da5c8800e46386aeec7b77aec69a301e19828f15%2F1b06aaea8e8aa5a37c5837db_Screenshot_2023-12-11_at_5.15.30_PM.png?alt=media" alt="Screenshot showing the Customer Accepted Options settings for estimate acceptance behavior"><figcaption></figcaption></figure>

***

## What is Client Visible Expiry?

Client Visible Expiry automatically expires estimates after a set number of days. Expired estimates display a screen prompting the customer to contact their estimator.

The expiry date shows as TBD until the estimate is **sent**.

<figure><img src="https://231248629-files.gitbook.io/~/files/v0/b/gitbook-x-prod.appspot.com/o/spaces%2FPyUbJF1GXLjxdJqm89IQ%2Fuploads%2Fgit-blob-37f677c712bfa6497496b8942bb6e9f0f6d74549%2F2a3b00a5e4724959189011f2_Screenshot_2023-08-29_at_2.29.54_PM.png?alt=media" alt="Screenshot showing the Client Visible Expiry settings with enable checkbox and expiry period configuration"><figcaption></figcaption></figure>

&#x20;&#x20;

## Related articles

<table data-card-size="large" data-view="cards"><thead><tr><th></th><th></th><th data-hidden data-card-target data-type="content-ref"></th></tr></thead><tbody><tr><td><strong>Update Your Tax Rate</strong></td><td>Configure tax rates in estimate settings with options to automatically include rates on new estimates or add multiple tax rates.</td><td><a href="/support/customization/templates-and-presets/estimate-settings/how-to-update-your-tax-rate">Update Your Tax Rate</a></td></tr><tr><td><strong>Pricing &#x26; Calculations</strong></td><td>Common questions about rates, pricing display, discounts, taxes, and estimate calculations in PaintScout.</td><td><a href="/support/resources/frequently-asked-questions/pricing-and-calculations">Pricing &amp; Calculations</a></td></tr><tr><td><strong>Area Names</strong></td><td>Create and organize reusable area labels like rooms and locations for faster estimate creation with drag-and-drop organization.</td><td><a href="/support/customization/templates-and-presets/area-names">Area Names</a></td></tr><tr><td><strong>Line Items Overview</strong></td><td>Create reusable line items for fixed-price services, quantities, and custom charges.</td><td><a href="/support/customization/templates-and-presets/line-items-overview">Line Items Overview</a></td></tr></tbody></table>


# Update Your Tax Rate

Configure tax rates in estimate settings with options to automatically include rates on new estimates or add multiple tax rates.

Tax rates in PaintScout control the sales tax applied to your estimates. You can set default rates that auto-apply to new estimates or add multiple rates for different jurisdictions.

## How to Update Your Tax Rate

1\. Navigate to the person icon and select **Account Settings** > **Estimates** > **Settings.**

<figure><img src="https://231248629-files.gitbook.io/~/files/v0/b/gitbook-x-prod.appspot.com/o/spaces%2FPyUbJF1GXLjxdJqm89IQ%2Fuploads%2Fgit-blob-603d880e893d36116f5d2398614cc5aeb056d3f5%2F081892ed57603c6a54c0f73c_PaintScout_Settings_2024-01-17_at_2.29.04_PM.jpg?alt=media" alt="Screenshot showing the Account Settings navigation to Estimates and Settings for tax rate configuration"><figcaption></figcaption></figure>

2\. Scroll to the tax rates section and enter your tax rates. Enable the **Include on New Estimates** toggle to auto-apply this rate to every new estimate. Rates without this toggle enabled remain available in the sidebar menu for manual selection.

{% hint style="info" %}
If you do not apply tax, simply leave these fields blank and unchecked.
{% endhint %}

<figure><img src="https://231248629-files.gitbook.io/~/files/v0/b/gitbook-x-prod.appspot.com/o/spaces%2FPyUbJF1GXLjxdJqm89IQ%2Fuploads%2Fgit-blob-3ff41fe7ea762215187587bc311282ff81e01b98%2Fa1c94974ade6418130f24bd0_Screenshot_2023-10-23_at_9.50.13_AM.png?alt=media" alt="Screenshot showing the tax rates section with rate fields and the Include on New Estimates toggle"><figcaption></figcaption></figure>

***

## How to Add More Tax Rates

1\. Click the **Add Tax Rate** button and fill in the fields.

<figure><img src="https://231248629-files.gitbook.io/~/files/v0/b/gitbook-x-prod.appspot.com/o/spaces%2FPyUbJF1GXLjxdJqm89IQ%2Fuploads%2Fgit-blob-86587de44d7e10cff732398cf75dcd518a58abc7%2F0565c4af35565fce03036de2_PaintScout_Settings_2024-01-17_at_2.37.19_PM.jpg?alt=media" alt="Screenshot showing the Add Tax Rate button and fields for adding additional tax rates"><figcaption></figcaption></figure>

2\. If you use multiple tax rates frequently, create an estimate template with all your needed rates pre-configured.

{% hint style="info" %}
[Learn more about templates!](/support/customization/templates-and-presets/estimate-templates)
{% endhint %}

&#x20;&#x20;

## Related articles

<table data-card-size="large" data-view="cards"><thead><tr><th></th><th></th><th data-hidden data-card-target data-type="content-ref"></th></tr></thead><tbody><tr><td><strong>Pricing &#x26; Calculations</strong></td><td>Common questions about rates, pricing display, discounts, taxes, and estimate calculations in PaintScout.</td><td><a href="/support/resources/frequently-asked-questions/pricing-and-calculations">Pricing &amp; Calculations</a></td></tr></tbody></table>


# Estimate Disclaimers

Customize acceptance and decline disclaimers that appear below the signature box when customers respond to estimates.

Estimate Disclaimers in PaintScout are customizable messages that appear below the signature box when customers accept or decline an estimate.

➡️ **Skip to the 5:41 timestamp in the video below.**

{% embed url="<https://www.youtube.com/watch?v=Sc-iM49Nu4Y>" %}

## What are Acceptance Disclaimers?

PaintScout requires an electronic signature from your customer upon acceptance. The acceptance disclaimer is the message displayed below the signature box when customers accept estimates or additional work.

<figure><img src="https://231248629-files.gitbook.io/~/files/v0/b/gitbook-x-prod.appspot.com/o/spaces%2FPyUbJF1GXLjxdJqm89IQ%2Fuploads%2Fgit-blob-b52f451d271eddde87e56df154cb05a50359dcb4%2F65bada1d1d9f10d1d461c9a2_Screenshot_2023-08-20_at_2.05.37_PM.png?alt=media" alt="Screenshot showing the acceptance disclaimer settings displayed below the electronic signature box"><figcaption></figcaption></figure>

***

## How do I let customers decline estimates?

Toggle on the **Declined** option to give customers a decline button on the estimate. You can add a custom disclaimer message, similar to the acceptance disclaimer.

<figure><img src="https://231248629-files.gitbook.io/~/files/v0/b/gitbook-x-prod.appspot.com/o/spaces%2FPyUbJF1GXLjxdJqm89IQ%2Fuploads%2Fgit-blob-18ab36554cb02dfdf4baf27098a862d59dd3a20d%2Fde0fae17e2a4c9a63764947f_Screenshot_2023-08-20_at_2.05.53_PM.png?alt=media" alt="Screenshot showing the decline disclaimer toggle and message field for customer estimate declines"><figcaption></figcaption></figure>

Customers can also provide a reason for their decline after clicking the "decline" button on the estimate.

&#x20;&#x20;

## Related articles

<table data-card-size="large" data-view="cards"><thead><tr><th></th><th></th><th data-hidden data-card-target data-type="content-ref"></th></tr></thead><tbody><tr><td><strong>Updating Estimate Terms</strong></td><td>Add, edit, and manage contract terms in your account settings, plus learn how to change or update terms on individual estimates before they are accepted.</td><td><a href="/support/customization/presentations-and-terms/updating-estimate-terms">Updating Estimate Terms</a></td></tr><tr><td><strong>Setting Default Terms</strong></td><td>Set default contract terms for each estimate type so the correct terms are automatically applied every time you create a new estimate.</td><td><a href="/support/customization/presentations-and-terms/setting-default-terms">Setting Default Terms</a></td></tr></tbody></table>


# Invoice Settings

Configure invoice due dates and enable automatic invoice generation when estimates are accepted in PaintScout.

Invoice settings in PaintScout let you configure default due dates and enable automatic invoice generation when estimates are accepted. These settings apply account-wide, so every user on your team gets the same defaults.

## How to Access Your Invoice Settings

1. Click the person icon in the top right of your page and go to your **Account Settings**
2. Navigate to the **Invoices** section

<figure><img src="https://231248629-files.gitbook.io/~/files/v0/b/gitbook-x-prod.appspot.com/o/spaces%2FPyUbJF1GXLjxdJqm89IQ%2Fuploads%2Fgit-blob-5a9694d48411a50281d34ffae13e717d115e678c%2Fa1fe77615dc201b8b6f4702e_PaintScout_Settings_2024-01-17_at_3.05.09_PM.jpg?alt=media" alt="Screenshot showing the Account Settings navigation to the Invoices section"><figcaption></figcaption></figure>

***

## Invoice Due Date

The due date setting adds a payment deadline to every invoice you send.

1. Enable the **Invoice Due Date** toggle.
2. Enter your default timeframe (e.g., "Net 30", "Due upon receipt", "Due within 14 days"). This text appears on all invoices sent to customers.

<figure><img src="https://231248629-files.gitbook.io/~/files/v0/b/gitbook-x-prod.appspot.com/o/spaces%2FPyUbJF1GXLjxdJqm89IQ%2Fuploads%2Fgit-blob-cf539a07189a288e6b6c94d3405b2f655d7420be%2F9e8698f8f1cc1553fc53fdc1_Screenshot_2023-11-07_at_4.26.32_PM.png?alt=media" alt="Screenshot showing the Invoice Due Date toggle and timeframe input field"><figcaption></figcaption></figure>

{% hint style="info" %}
The due date is a text field, not a calculated date. Enter whatever payment terms you use with your customers. Common examples: "Net 30", "Due upon completion", "Due within 7 days of invoice date".
{% endhint %}

***

## Automatic Invoice Generation

When enabled, PaintScout automatically creates an invoice every time an estimate is accepted — whether accepted by the customer via email link, on-site via preview mode, or manually by you.

<figure><img src="https://231248629-files.gitbook.io/~/files/v0/b/gitbook-x-prod.appspot.com/o/spaces%2FPyUbJF1GXLjxdJqm89IQ%2Fuploads%2Fgit-blob-1d2d97c40cfaf11ffbf18b07b5d4bb5df743d513%2F86410b9c3d82c20af9bdef12_Screenshot_2023-11-07_at_4.26.39_PM.png?alt=media" alt="Screenshot showing the Automatic Invoice Generation toggle for auto-creating invoices from accepted estimates"><figcaption></figcaption></figure>

### How it works

* The invoice is created instantly when the estimate status changes to **Accepted**
* All accepted line items, areas, pricing, and contact information carry over from the estimate
* The invoice is created but **not sent** — you still need to review and send it manually
* If deposits via credit card are enabled, the invoice also generates when a customer pays their deposit

### When to use automatic generation

* **Turn it on** if you always invoice after acceptance and want to save a step
* **Leave it off** if you sometimes do additional work or adjustments between acceptance and invoicing, or if you don't invoice every accepted estimate

***

## Common Questions

### Can I override these settings on individual invoices?

The due date text set here is the default. You cannot override it per-invoice, but you can communicate different terms in your email when sending the invoice.

### Do settings changes affect existing invoices?

No. Changes to invoice settings only apply to invoices created **after** the change. Existing invoices keep whatever settings were in place when they were created.

### I enabled automatic generation but the invoice wasn't created.

Make sure the estimate status actually changed to **Accepted**. If you manually set the status to Accepted (rather than the customer accepting via email/preview), the automatic invoice should still generate. If it doesn't, contact <support@paintscout.com>.

{% hint style="info" %}
Want to learn about invoicing in PaintScout? [Check out this article](/support/invoicing-and-payments/invoices/invoicing-with-paintscout).
{% endhint %}

## Related articles

* [Creating Invoices](/support/invoicing-and-payments/invoices/creating-invoices) — Learn what carries over when you invoice accepted estimates
* [QuickBooks Online](/support/integrations/accounting/quickbooks-online-integration) — Export invoices and sync payments with QuickBooks
* [Xero](/support/integrations/accounting/xero-integration) — Export quotes and invoices to Xero

## Related articles

<table data-card-size="large" data-view="cards"><thead><tr><th></th><th></th><th data-hidden data-card-target data-type="content-ref"></th></tr></thead><tbody><tr><td><strong>Create and Send an Invoice</strong></td><td>Create invoices from estimates manually or automatically, then send them to customers for payment.</td><td><a href="/support/invoicing-and-payments/invoices/creating-invoices">Create and Send an Invoice</a></td></tr><tr><td><strong>QuickBooks Online</strong></td><td>Connect QuickBooks Online to export invoices, handle deposits, and sync payments automatically</td><td><a href="/support/integrations/accounting/quickbooks-online-integration">QuickBooks Online</a></td></tr><tr><td><strong>Xero</strong></td><td>Connect Xero accounting software to export quotes, invoices, and sync payments from PaintScout</td><td><a href="/support/integrations/accounting/xero-integration">Xero</a></td></tr></tbody></table>


# Payment Methods

Configure the list of accepted payment methods that appear on invoices such as check, cash, credit card, and other options.

PaintScout lets you configure which payment methods appear on your invoices, such as check, cash, credit card, and other options.

## How to Add a Payment Method

1\. Go to **Account Settings** > **Invoices** > **Payment Methods**.

<figure><img src="https://231248629-files.gitbook.io/~/files/v0/b/gitbook-x-prod.appspot.com/o/spaces%2FPyUbJF1GXLjxdJqm89IQ%2Fuploads%2Fgit-blob-201db60218ef096aab8b49620849461f2afc31e7%2F250cd0efcb23298c45b60dd0_Zight_2024-05-14_at_8_33_49_AM.jpg?alt=media" alt="Screenshot showing the Payment Methods section under Account Settings > Invoices"><figcaption></figcaption></figure>

2\. Click the **+Add New Payment Method** to add a new option and click **Confirm**.

<figure><img src="https://231248629-files.gitbook.io/~/files/v0/b/gitbook-x-prod.appspot.com/o/spaces%2FPyUbJF1GXLjxdJqm89IQ%2Fuploads%2Fgit-blob-ae88f5ad70cda3133fcadcb5e9380d7e1b84fdcb%2Fc470976aef36e3a7aaff3255_Screenshot_2024-05-14_at_8_36_27_AM.png?alt=media" alt="Screenshot showing the Add New Payment Method dialog with Confirm button"><figcaption></figcaption></figure>

&#x20;&#x20;

## Related articles

<table data-card-size="large" data-view="cards"><thead><tr><th></th><th></th><th data-hidden data-card-target data-type="content-ref"></th></tr></thead><tbody><tr><td><strong>PaintScout Payments</strong></td><td>Set up PaintScout Payments for credit card and ACH payments with deposits and surcharging options</td><td><a href="/support/invoicing-and-payments/payments/paintscout-payments">PaintScout Payments</a></td></tr><tr><td><strong>Payment Processing with Stripe</strong></td><td>Set up Stripe integration for credit card payments, deposits, and surcharging on estimates and invoices</td><td><a href="/support/invoicing-and-payments/payments/payment-processing-with-stripe">Payment Processing with Stripe</a></td></tr></tbody></table>


# Area Names

Create and organize reusable area labels like rooms and locations for faster estimate creation with drag-and-drop organization.

Area Names in PaintScout are reusable labels for rooms and locations (e.g., bedroom, deck, whole house) that you create once in Settings and reuse across estimates.

## What is an Area Name?

An area is any room or surface you are painting. Within each area, you add surfaces like walls, ceilings, and windows. You can adjust dimensions for each room, wall, or section.

Create commonly used area labels in Settings so they are available when building estimates. This saves time compared to creating custom names on each estimate.

➡️ **Skip to the 5:34 timestamp in the video below.**

{% embed url="<https://www.youtube.com/watch?v=jnBGUDdoH_0>" %}

## How to Add an Area in the Settings

1\. Click the person icon in the top right and go to your **Account Settings** > **Production Rates** > **Area Names** section.

2\. Click the **Add New Area** button.

<figure><img src="https://231248629-files.gitbook.io/~/files/v0/b/gitbook-x-prod.appspot.com/o/spaces%2FPyUbJF1GXLjxdJqm89IQ%2Fuploads%2Fgit-blob-1f53c2c421765493efaad154aaf4c8a1fce87b29%2F3a6cb6c1a5aa39d4db4c1501_PaintScout_Settings_2024-01-17_at_3.27.30_PM.jpg?alt=media" alt="Screenshot showing the Area Names section in Account Settings with the Add New Area button"><figcaption></figcaption></figure>

3\. Name your area and choose which estimate types you want it to be available on.

<figure><img src="https://231248629-files.gitbook.io/~/files/v0/b/gitbook-x-prod.appspot.com/o/spaces%2FPyUbJF1GXLjxdJqm89IQ%2Fuploads%2Fgit-blob-a95d7760adf39e07139198f741e828479993fbb7%2F3414e8d383e8681a92901c42_Screen_Recording_2022-06-23_at_01.34.31_PM.gif?alt=media" alt="Animation showing how to name an area and select which estimate types it applies to"><figcaption></figcaption></figure>

***

### What does the Active Toggle do?

The Active toggle controls whether an area appears as a selection option on estimates. Deactivate it to hide the area from the selection list without deleting it.

<figure><img src="https://231248629-files.gitbook.io/~/files/v0/b/gitbook-x-prod.appspot.com/o/spaces%2FPyUbJF1GXLjxdJqm89IQ%2Fuploads%2Fgit-blob-4758909fe2b7674a5ad62d06c01e19b6520e7ea9%2F7c668bbbb213e086b6f83d36_PaintScout_Settings_2024-01-17_at_3.28.56_PM.jpg?alt=media" alt="Screenshot showing the Active toggle switch on an area name to enable or disable it"><figcaption></figcaption></figure>

***

## How do I organize Area Names?

Areas appear on estimates in the same order as in Settings. Move frequently used areas toward the top for faster access, especially on tablet or phone.

To reorder: click and hold an area, then drag and drop it to the desired position. Click **Save** when finished.

<figure><img src="https://231248629-files.gitbook.io/~/files/v0/b/gitbook-x-prod.appspot.com/o/spaces%2FPyUbJF1GXLjxdJqm89IQ%2Fuploads%2Fgit-blob-514fdc36349fb98c365871c77d7083a5766ac6fe%2Fc76da2eccf9b07f32d689bb3_Screen_Recording_2023-08-20_at_03.06.57_PM.gif?alt=media" alt="Animation showing drag-and-drop reordering of area names in the settings"><figcaption></figcaption></figure>

&#x20;&#x20;

## Related articles

<table data-card-size="large" data-view="cards"><thead><tr><th></th><th></th><th data-hidden data-card-target data-type="content-ref"></th></tr></thead><tbody><tr><td><strong>Line Items Overview</strong></td><td>Create reusable line items for fixed-price services, quantities, and custom charges.</td><td><a href="/support/customization/templates-and-presets/line-items-overview">Line Items Overview</a></td></tr><tr><td><strong>Adding Areas</strong></td><td>Add and customize areas (rooms or spaces) to estimates with dimensions, area types, surfaces, and automatic price calculations.</td><td><a href="/support/estimating/areas-and-rates/adding-areas-to-an-estimate">Adding Areas</a></td></tr><tr><td><strong>Adding Rates</strong></td><td>Add and edit production rates to estimate surfaces including custom rates, dimensions, products, and advanced pricing options.</td><td><a href="/support/estimating/areas-and-rates/adding-rates-to-an-estimate">Adding Rates</a></td></tr></tbody></table>


# Line Items Overview

Create reusable line items for fixed-price services, quantities, and custom charges.

## What is a line item?

A line item is a fixed-price project entry. It does not use dimensions or production rates.

Use line items for services, quantities, or custom charges. Save common items in **Account Settings** for reuse.

You can also save a custom item from an estimate. See [Add & Edit Line Items](/support/estimating/line-items-and-options/how-to-add-and-edit-a-line-item).

***

## Create a line item

1. Select the person icon.
2. Go to **Account Settings → Line Items**.
3. Select **+ Add New Line Item**.
4. Enter a label and description.

<figure><img src="https://231248629-files.gitbook.io/~/files/v0/b/gitbook-x-prod.appspot.com/o/spaces%2FPyUbJF1GXLjxdJqm89IQ%2Fuploads%2Fgit-blob-fda628d217caf5e00eb163f37a9ad07f3a1f2dc6%2FScreenshot%202026-08-17%20at%2010.35.20%E2%80%AFAM.png?alt=media" alt="Screenshot showing the Line Items settings page with the Add New Line Item button"><figcaption></figcaption></figure>

<figure><img src="https://231248629-files.gitbook.io/~/files/v0/b/gitbook-x-prod.appspot.com/o/spaces%2FPyUbJF1GXLjxdJqm89IQ%2Fuploads%2Fgit-blob-bac0de11528440c18bd2dd710d9b3b4b171eaa80%2FScreenshot%202026-08-17%20at%2010.38.00%E2%80%AFAM.png?alt=media" alt="Screenshot showing the line item label and description input fields"><figcaption></figcaption></figure>

***

## How do I set my line item pricing?

There are three ways to set your line item pricing in your settings:

* [Hourly Rate](#hourly-rate)
* [Quantity](#quantity)
* [Custom](#custom)

### Hourly rate

Enter the hours you apply to this item. PaintScout uses the hourly rate on the current estimate.

<figure><img src="https://231248629-files.gitbook.io/~/files/v0/b/gitbook-x-prod.appspot.com/o/spaces%2FPyUbJF1GXLjxdJqm89IQ%2Fuploads%2Fgit-blob-e14d9c3dcd94784e53332427c485da62c38edda3%2F2af358309b02eff827dd7c7b_Screenshot_2023-12-28_at_12.54.12_PM.png?alt=media" alt="Screenshot showing the Hourly Rate pricing option with hours input field for a line item"><figcaption></figcaption></figure>

### Quantity

Enter the units and price per unit for this line item. PaintScout calculates the total.

Select **+ Hrs For Work Order** to add hours without changing the price.

<figure><img src="https://231248629-files.gitbook.io/~/files/v0/b/gitbook-x-prod.appspot.com/o/spaces%2FPyUbJF1GXLjxdJqm89IQ%2Fuploads%2Fgit-blob-11290fc774803f74c4e6bb04206d5169cedb8b36%2FScreenshot%202026-08-17%20at%2010.41.59%E2%80%AFAM.png?alt=media" alt="Screenshot showing the Quantity pricing option with units, price per unit, and hours for work order fields"><figcaption></figcaption></figure>

### Custom

Enter a custom price. Select **+ Hrs For Work Order** to add work-order hours.

<figure><img src="https://231248629-files.gitbook.io/~/files/v0/b/gitbook-x-prod.appspot.com/o/spaces%2FPyUbJF1GXLjxdJqm89IQ%2Fuploads%2Fgit-blob-574c3c2cd4c8d897c2cd85fc2d0aef2e360fedc9%2FScreenshot%202026-08-17%20at%2010.42.50%E2%80%AFAM.png?alt=media" alt="Screenshot showing the Custom pricing option with price and hours for work order fields"><figcaption></figcaption></figure>

***

## Can I add notes and materials?

Select **Notes** to add default notes. You can edit them on each estimate.

* **Crew note** appears on the team work order.
* **Client note** appears on the customer estimate.

<figure><img src="https://231248629-files.gitbook.io/~/files/v0/b/gitbook-x-prod.appspot.com/o/spaces%2FPyUbJF1GXLjxdJqm89IQ%2Fuploads%2Fgit-blob-f21cdc4e179618bb85989353a32e2ce3c0e28e44%2FScreenshot%202026-08-17%20at%2010.43.44%E2%80%AFAM.png?alt=media" alt="Screenshot showing the line item Notes section with Client Note and Crew Note fields"><figcaption></figcaption></figure>

Select **Materials** to add products and quantities.

{% hint style="info" %}
Enter gallon quantities **manually**. PaintScout does not calculate them automatically.
{% endhint %}

<figure><img src="https://231248629-files.gitbook.io/~/files/v0/b/gitbook-x-prod.appspot.com/o/spaces%2FPyUbJF1GXLjxdJqm89IQ%2Fuploads%2Fgit-blob-c5732b6ac6a9fc9f83036effe28164696676cfee%2FScreenshot%202026-08-17%20at%2010.47.20%E2%80%AFAM.png?alt=media" alt="Screenshot showing the line item Materials section for adding product materials and quantities"><figcaption></figcaption></figure>

***

## Manage line items

### Reorder line items

When selecting line items on an estimate, the order follows the order from your settings. We recommend putting frequently used line items at the top of your list.

Drag an item to its new position, then select **Save Changes**.

<figure><img src="https://231248629-files.gitbook.io/~/files/v0/b/gitbook-x-prod.appspot.com/o/spaces%2FPyUbJF1GXLjxdJqm89IQ%2Fuploads%2Fgit-blob-731629d834cd53f55f87de5b5978043dd5995e88%2FZight%20Recording%202026-08-17%20at%2010.50.13%20AM.gif?alt=media" alt="Animated screen recording showing drag and drop reordering of line items in settings"><figcaption></figcaption></figure>

### **Edit, Copy and Delete**

Click the three dots next to a line item.

You can then choose to edit, copy or delete that item.

<figure><img src="https://231248629-files.gitbook.io/~/files/v0/b/gitbook-x-prod.appspot.com/o/spaces%2FPyUbJF1GXLjxdJqm89IQ%2Fuploads%2Fgit-blob-2b4eec4bb31f6e8a4c8609e4b0db8ed76dd89541%2FScreenshot%202026-08-17%20at%2010.52.02%E2%80%AFAM.png?alt=media" alt="" width="563"><figcaption></figcaption></figure>

&#x20;&#x20;

## Related articles

<table data-card-size="large" data-view="cards"><thead><tr><th></th><th></th><th data-hidden data-card-target data-type="content-ref"></th></tr></thead><tbody><tr><td><strong>Area Names</strong></td><td>Create and organize reusable area labels like rooms and locations for faster estimate creation with drag-and-drop organization.</td><td><a href="/support/customization/templates-and-presets/area-names">Area Names</a></td></tr><tr><td><strong>Add &#x26; Edit Line Items</strong></td><td>Add and customize line items on estimates including pricing options, materials, hours, photos, and notes for detailed project scopes.</td><td><a href="/support/estimating/line-items-and-options/how-to-add-and-edit-a-line-item">Add &amp; Edit Line Items</a></td></tr><tr><td><strong>Working With Options</strong></td><td>Create optional add-on items or services on estimates that customers can choose to include before accepting their quote.</td><td><a href="/support/estimating/line-items-and-options/working-with-options">Working With Options</a></td></tr></tbody></table>


# Presentations & Terms

Customize how your estimates look to customers with presentations and terms.

Presentations and terms control how your proposals look and what contract language they include. Build branded multi-page presentations, choose the right defaults for each estimate type, and manage the terms attached to new and existing estimates.

## In This Section

* [Presentations Overview](/support/customization/presentations-and-terms/presentations-overview) — Build branded multi-page proposal presentations with pages, sections, and live previews
* [Presentation Sections](/support/customization/presentations-and-terms/presentation-sections) — Explore the available section types for layout, media, testimonials, documents, and more
* [Setting a Default Presentation](/support/customization/presentations-and-terms/setting-a-default-presentation) — Assign the right presentation to each estimate type so new estimates use it automatically
* [Updating Estimate Terms](/support/customization/presentations-and-terms/updating-estimate-terms) — Add or edit terms in settings and update terms on individual estimates before acceptance
* [Setting Default Terms](/support/customization/presentations-and-terms/setting-default-terms) — Assign a default terms document to each estimate type

&#x20;&#x20;


# Presentations Overview

Build professional multi-page proposal presentations with company info, services, testimonials, and custom sections for estimates.

## What is a PaintScout Presentation?

A PaintScout presentation is a multi-page proposal that transforms your estimates into professional, branded documents. Presentations work like a mini-website, showcasing your company's best features alongside the estimate itself.

{% embed url="<https://www.youtube.com/watch?v=svmIVOl3MLg>" %}

***

## Why use PaintScout Presentations?

Presentations go beyond a basic scope of work and price. You can include multiple pages with About Us content, services you offer, testimonials, galleries, and more — giving customers a complete picture of your painting company.

***

## How to Create a PaintScout Presentation

1\. Click the person icon in the top right and go to your **Account Settings** > **Presentations** section. Click **+Add New Presentation** button.

<figure><img src="https://231248629-files.gitbook.io/~/files/v0/b/gitbook-x-prod.appspot.com/o/spaces%2FPyUbJF1GXLjxdJqm89IQ%2Fuploads%2Fgit-blob-afb42c925b3d7a68e50c765d8c052d477e9b045e%2F54862941fa5eca43733eb6f7_PaintScout_Settings_2024-01-22_at_9.37.32_AM.jpg?alt=media" alt=""><figcaption></figcaption></figure>

2\. Label your Presentation and select which estimate type it is associated with.

<figure><img src="https://231248629-files.gitbook.io/~/files/v0/b/gitbook-x-prod.appspot.com/o/spaces%2FPyUbJF1GXLjxdJqm89IQ%2Fuploads%2Fgit-blob-f50fb2dc57d660081a74e73d7dcf46d9d384c4dc%2F1938cbff2fcf4915f72f7fbf_PaintScout_Settings_2024-01-22_at_9.39.04_AM.jpg?alt=media" alt=""><figcaption></figcaption></figure>

Each Presentation can have multiple **pages**, and within those pages, you can add different **sections**. When you first create a Presentation, it will have two default pages already there for you - the quote itself, and the terms.

3\. Click the **Plus Sign** to add another page to your presentation. Each page will appear as a tab to your customers. Clicking on a tab will display that page's contents.

<figure><img src="https://231248629-files.gitbook.io/~/files/v0/b/gitbook-x-prod.appspot.com/o/spaces%2FPyUbJF1GXLjxdJqm89IQ%2Fuploads%2Fgit-blob-9dd46d1ac17612270447992b735e61abfa39de5c%2F986e3870c6ca64583f84687d_PaintScout_Settings_2024-01-22_at_9.40.09_AM.jpg?alt=media" alt=""><figcaption></figcaption></figure>

4\. You will have the option to add an empty page, or the quote page (which just shows the quote itself). Click **Empty Page.**

<figure><img src="https://231248629-files.gitbook.io/~/files/v0/b/gitbook-x-prod.appspot.com/o/spaces%2FPyUbJF1GXLjxdJqm89IQ%2Fuploads%2Fgit-blob-7fe14136a7de6f5fc9dcfe53f53caf3ed83f306f%2Fdf0b91684d76bfa678b64ecb_Image_2020-11-20_at_12.54.01_PM.png?alt=media" alt=""><figcaption></figcaption></figure>

5\. Add a title to your page.

<figure><img src="https://231248629-files.gitbook.io/~/files/v0/b/gitbook-x-prod.appspot.com/o/spaces%2FPyUbJF1GXLjxdJqm89IQ%2Fuploads%2Fgit-blob-177b8ed5d7d0bd5a0bf5e02e4da603db7caf33a2%2F813b77c67aa307072fe4014a_PaintScout_Settings_2024-01-22_at_9.42.30_AM.jpg?alt=media" alt=""><figcaption></figcaption></figure>

6\. Click **Add Section** to begin adding different sections to your page.

<figure><img src="https://231248629-files.gitbook.io/~/files/v0/b/gitbook-x-prod.appspot.com/o/spaces%2FPyUbJF1GXLjxdJqm89IQ%2Fuploads%2Fgit-blob-1db961121ba9e3628642ef1e14f97bd1a70de55d%2Fa0c41049693b141d05cb4f4e_Screen_Recording_2024-01-22_at_09.43.52_AM.gif?alt=media" alt=""><figcaption></figcaption></figure>

{% hint style="info" %}
PaintScout offers various section types — some designed for specific content, others flexible for any information. See [Presentation Sections](/support/customization/presentations-and-terms/presentation-sections) for a full breakdown of each type with examples.
{% endhint %}

***

## Presentation Sections

Once you add a section to your page, you can begin to add relevant content. The left side of the section is what's editable. The right side of the section shows a preview of what the section will look like.

<figure><img src="https://231248629-files.gitbook.io/~/files/v0/b/gitbook-x-prod.appspot.com/o/spaces%2FPyUbJF1GXLjxdJqm89IQ%2Fuploads%2Fgit-blob-d0c06b9f348acf867b4a29a7bb78bc722e29c9db%2Fadea038b4692c3caa459fd57_Image_2020-11-20_at_3.57.07_PM.png?alt=media" alt=""><figcaption></figcaption></figure>

### 1. Content Tab

This is where you will add your section's content. Add a title to the section, upload photos, and re-arrange its layout. Use the vertical arrows to switch the text and image layout.

<figure><img src="https://231248629-files.gitbook.io/~/files/v0/b/gitbook-x-prod.appspot.com/o/spaces%2FPyUbJF1GXLjxdJqm89IQ%2Fuploads%2Fgit-blob-7f9f5c24637343a610513988930a795d9facca16%2Fdeac28e46c1259d6e9ec5a44_PaintScout_Settings_2024-01-22_at_9.49.36_AM.jpg?alt=media" alt=""><figcaption></figcaption></figure>

Choose the alignment of the text, so it displays at the top, in the middle, or at the bottom.

<figure><img src="https://231248629-files.gitbook.io/~/files/v0/b/gitbook-x-prod.appspot.com/o/spaces%2FPyUbJF1GXLjxdJqm89IQ%2Fuploads%2Fgit-blob-e09494f12add8ee817cc16313a1bd9e28cdb3c37%2F044e70ec9a09e8cb9fee8059_Image_2020-11-20_at_4.02.50_PM.png?alt=media" alt=""><figcaption></figcaption></figure>

### 2. Style Tab

* Adjust the **background color**, and **foreground color** (text color).
* **Background Style:** Full width (full width of the page) or contained (more narrow)

<figure><img src="https://231248629-files.gitbook.io/~/files/v0/b/gitbook-x-prod.appspot.com/o/spaces%2FPyUbJF1GXLjxdJqm89IQ%2Fuploads%2Fgit-blob-a1b24f3dad0b7683e4a7c00aad6c7d638063c0cf%2Fb30cf9b5df4d3ba1a4b375de_Image_2020-11-20_at_4.06.10_PM.png?alt=media" alt=""><figcaption></figcaption></figure>

* **Padding** adds extra spacing to your section. If you check the box and remove padding, the text and photo will touch the edge of the page.

### 3. Advanced Tab

You may want to adjust certain sections of a presentation directly on your estimates. In order to do this, be sure to check this box so that estimators can edit the section directly on the estimate before sending it. This will only affect the presentation of the estimate they are working on.

<figure><img src="https://231248629-files.gitbook.io/~/files/v0/b/gitbook-x-prod.appspot.com/o/spaces%2FPyUbJF1GXLjxdJqm89IQ%2Fuploads%2Fgit-blob-e969a9edfc3c4bdff351dab5d6929c6f9c2d432d%2Ff20ddf0ba64bc9ad8ac59794_Image_2020-11-20_at_4.11.31_PM.png?alt=media" alt=""><figcaption></figcaption></figure>

### 4. Import/Export

If you need to import a section of your presentation to another presentation, use the import/export function! Click **Copy** to copy the section's content. Then, on the other presentation section, paste the content into the box and click **Import.** The copied content will appear.

<figure><img src="https://231248629-files.gitbook.io/~/files/v0/b/gitbook-x-prod.appspot.com/o/spaces%2FPyUbJF1GXLjxdJqm89IQ%2Fuploads%2Fgit-blob-dbbd4c2965d57fca46f4cd73dff52eb3bb8b0823%2F03e319799ad368ff3774ebdd_copy.jpg?alt=media" alt=""><figcaption></figcaption></figure>

***

## Example Presentations

We've created a few example presentations for reference:

[Example #1](https://app.paintscout.com/view/?\&view=quote\&u=B1Dd2yEfM)

[Example #2](https://app.paintscout.com/view/?\&view=quote\&u=CbgnFT09W\&s=1)

&#x20;&#x20;

## Related articles

<table data-card-size="large" data-view="cards"><thead><tr><th></th><th></th><th data-hidden data-card-target data-type="content-ref"></th></tr></thead><tbody><tr><td><strong>Presentation Sections</strong></td><td>Explore all presentation section types including cover pages, columns, galleries, testimonials, documents, and custom HTML for professional proposals.</td><td><a href="/support/customization/presentations-and-terms/presentation-sections">Presentation Sections</a></td></tr><tr><td><strong>Setting a Default Presentation</strong></td><td>Set a default presentation (proposal template) for each estimate type so the correct layout is automatically applied to every new estimate.</td><td><a href="/support/customization/presentations-and-terms/setting-a-default-presentation">Setting a Default Presentation</a></td></tr></tbody></table>


# Presentation Sections

Explore all presentation section types including cover pages, columns, galleries, testimonials, documents, and custom HTML for professional proposals.

Presentation sections are the building blocks of PaintScout proposals. Each section type serves a different purpose — from cover pages and testimonials to galleries, documents, and custom HTML. Add sections to presentation pages to create professional, multi-page proposals.

<details open>

<summary><strong>Cover Page</strong></summary>

<figure><img src="https://231248629-files.gitbook.io/~/files/v0/b/gitbook-x-prod.appspot.com/o/spaces%2FPyUbJF1GXLjxdJqm89IQ%2Fuploads%2Fgit-blob-0352d839ac5b6a1c6838b0b22576325d3cbf4dd0%2F0d1508d3d7deea39a13ad142_Image_2020-11-25_at_1.13.09_PM.png?alt=media" alt=""><figcaption></figcaption></figure>

The Cover Page section adds a header to your presentation page. Include a title, subtitle, and logo with horizontal alignment options. Click the Text Editor icon to customize font, size, and color. Add a background color from the **Style** tab.

<figure><img src="https://231248629-files.gitbook.io/~/files/v0/b/gitbook-x-prod.appspot.com/o/spaces%2FPyUbJF1GXLjxdJqm89IQ%2Fuploads%2Fgit-blob-6b6af112ecef332dcb6fd530ddf393f888c1111c%2F8d6f1be3b6d685bdb6e1a854_PaintScout_Settings_2024-01-22_at_10.10.47_AM.jpg?alt=media" alt=""><figcaption></figcaption></figure>

</details>

<details>

<summary><strong>Two-Column and Three-Column</strong></summary>

<figure><img src="https://231248629-files.gitbook.io/~/files/v0/b/gitbook-x-prod.appspot.com/o/spaces%2FPyUbJF1GXLjxdJqm89IQ%2Fuploads%2Fgit-blob-9b6794a230db2797e16cbac789d42af367aeee94%2F4306b4c7a2b1b72597e225ba_Screenshot_2024-01-22_at_10.11.40_AM.png?alt=media" alt=""><figcaption></figcaption></figure>

These two sections are very similar - one with two columns and the other with three. Each column can contain either text or an image/video.

* **Text:** Add a title and write in the text content.
* **Image/Video:** Upload your file, or paste a Youtube URL.

Use the **Alignment** options to move your text to the top, middle, or bottom.

<figure><img src="https://231248629-files.gitbook.io/~/files/v0/b/gitbook-x-prod.appspot.com/o/spaces%2FPyUbJF1GXLjxdJqm89IQ%2Fuploads%2Fgit-blob-b0347ae5fdb1f163b873f18ab0b7660cd4d18c8c%2F90ad0839367835903d0c82af_Screenshot_2024-01-22_at_10.19.18_AM.png?alt=media" alt=""><figcaption></figcaption></figure>

{% hint style="info" %}
If your text content is smaller than your image, add the title directly into the content box instead of using the **Title** box (leave that blank). Depending on the content, this option might look better!
{% endhint %}

<figure><img src="https://231248629-files.gitbook.io/~/files/v0/b/gitbook-x-prod.appspot.com/o/spaces%2FPyUbJF1GXLjxdJqm89IQ%2Fuploads%2Fgit-blob-fd904eec929900bc2b658cd512515134391136d7%2F8f9964f7f86697ea56a3fc0d_PaintScout_Settings_2024-01-22_at_10.21.30_AM.jpg?alt=media" alt=""><figcaption></figcaption></figure>

</details>

<details>

<summary><strong>Centered Text</strong></summary>

<figure><img src="https://231248629-files.gitbook.io/~/files/v0/b/gitbook-x-prod.appspot.com/o/spaces%2FPyUbJF1GXLjxdJqm89IQ%2Fuploads%2Fgit-blob-e1fd71a1f08d3e0e6cfea1a7598aeabdad1e11ea%2F715f458c0de67a378f05f2a3_Screenshot_2024-01-22_at_10.32.28_AM.png?alt=media" alt=""><figcaption></figcaption></figure>

This section lets you add a title, text, and an image, all neatly centered on the page.

<figure><img src="https://231248629-files.gitbook.io/~/files/v0/b/gitbook-x-prod.appspot.com/o/spaces%2FPyUbJF1GXLjxdJqm89IQ%2Fuploads%2Fgit-blob-60a3c9baf55a877e4a8d2740cffd39ea17a0e6e9%2Fccfa5b9766b168056dc1c3ad_Screenshot_2024-01-22_at_10.34.35_AM.png?alt=media" alt=""><figcaption></figcaption></figure>

</details>

<details>

<summary><strong>Divider</strong></summary>

<figure><img src="https://231248629-files.gitbook.io/~/files/v0/b/gitbook-x-prod.appspot.com/o/spaces%2FPyUbJF1GXLjxdJqm89IQ%2Fuploads%2Fgit-blob-5c8815c593a5c1435ba743ac49b1c355cba1fd12%2F9016e74dbc6ba7112502ca07_Screenshot_2024-01-22_at_10.35.00_AM.png?alt=media" alt=""><figcaption></figcaption></figure>

You can use this horizontal divider to separate sections. To customize it, go to the Style tab, where you can adjust the line color, background color, and padding.

<figure><img src="https://231248629-files.gitbook.io/~/files/v0/b/gitbook-x-prod.appspot.com/o/spaces%2FPyUbJF1GXLjxdJqm89IQ%2Fuploads%2Fgit-blob-ac70e48492df68e462d146e01c34f413faf7525f%2Fd682d9fb11bff5a0b0bbcea0_Screenshot_2024-01-22_at_10.35.31_AM.png?alt=media" alt=""><figcaption></figcaption></figure>

</details>

<details>

<summary><strong>Documents</strong></summary>

<figure><img src="https://231248629-files.gitbook.io/~/files/v0/b/gitbook-x-prod.appspot.com/o/spaces%2FPyUbJF1GXLjxdJqm89IQ%2Fuploads%2Fgit-blob-4bd056a8d122b1494360e164700a221cc8e100c8%2Fea0c6f5f0259f3ec82081e96_Screenshot_2024-01-22_at_10.36.13_AM.png?alt=media" alt=""><figcaption></figcaption></figure>

Upload key documents like insurance info, warranties, or safety pamphlets. Add a section title and upload each document with its own title and description. Customers click any PDF to view it.

<figure><img src="https://231248629-files.gitbook.io/~/files/v0/b/gitbook-x-prod.appspot.com/o/spaces%2FPyUbJF1GXLjxdJqm89IQ%2Fuploads%2Fgit-blob-1a615b5221f079b164544d28f85a0ae501a0b749%2F379b49f0b0e138ea238a1c56_Screenshot_2024-01-22_at_10.37.28_AM.png?alt=media" alt=""><figcaption></figcaption></figure>

</details>

<details>

<summary><strong>Gallery</strong></summary>

<figure><img src="https://231248629-files.gitbook.io/~/files/v0/b/gitbook-x-prod.appspot.com/o/spaces%2FPyUbJF1GXLjxdJqm89IQ%2Fuploads%2Fgit-blob-ca147ac639f6278414ad1c9d14e7b833bf384024%2F8561dd1a813e5ff27fd69759_Screenshot_2024-01-22_at_10.37.59_AM.png?alt=media" alt=""><figcaption></figcaption></figure>

Build a photo gallery with ease. Just add a section title, choose the number of columns from the dropdown, and, if you'd prefer no border around the images, simply uncheck the border option.

<figure><img src="https://231248629-files.gitbook.io/~/files/v0/b/gitbook-x-prod.appspot.com/o/spaces%2FPyUbJF1GXLjxdJqm89IQ%2Fuploads%2Fgit-blob-e56ad8fb97a2f7f8ab37c3a53ae4fab19eb806e9%2Ff0d63ea8e5a86b3a986f9dfe_Screen_Recording_2024-01-22_at_10.43.39_AM.gif?alt=media" alt=""><figcaption></figcaption></figure>

</details>

<details>

<summary><strong>Image</strong></summary>

<figure><img src="https://231248629-files.gitbook.io/~/files/v0/b/gitbook-x-prod.appspot.com/o/spaces%2FPyUbJF1GXLjxdJqm89IQ%2Fuploads%2Fgit-blob-ed9e91826f420ebcd0a920439f48730308c74ca4%2F2e03a69e477cbc4a84914be2_Screenshot_2024-01-22_at_10.40.57_AM.png?alt=media" alt=""><figcaption></figcaption></figure>

This section will show a single image or video. Choose to upload the file, or insert the Youtube URL link. You can also hyperlink to image to your website or other websites by using the **link** box at the bottom of the screen.

{% hint style="info" %}
If you are uploading a YouTube Shorts URL, you will need to manually change the word "shorts" in the URL to "embed".

For example, change the link from [www.youtube.com/](https://www.youtube.com/)**shorts**/cbF7i3xY6Zg to [www.youtube.com/](https://www.youtube.com/)**embed**/cbF7i3xY6Zg before pasting into the image presentation section.
{% endhint %}

<figure><img src="https://231248629-files.gitbook.io/~/files/v0/b/gitbook-x-prod.appspot.com/o/spaces%2FPyUbJF1GXLjxdJqm89IQ%2Fuploads%2Fgit-blob-b728d8a8c242555730d20a7aa4f31995eac002ff%2Fba36bda84fa00b47083fe9cc_Screenshot_2024-01-22_at_10.42.18_AM.png?alt=media" alt=""><figcaption></figcaption></figure>

</details>

<details>

<summary><strong>Images Row</strong></summary>

<figure><img src="https://231248629-files.gitbook.io/~/files/v0/b/gitbook-x-prod.appspot.com/o/spaces%2FPyUbJF1GXLjxdJqm89IQ%2Fuploads%2Fgit-blob-07ab224072a62889cf8a951252b65e170434abcc%2F1377c956cc9aa569db937563_Screenshot_2024-01-22_at_12.53.29_PM.png?alt=media" alt=""><figcaption></figcaption></figure>

In this section, you can add multiple images with a title on the left—perfect for showcasing awards or credentials. You can also link each image, making it easy for customers to click through for more details, like your Google Reviews page.

<figure><img src="https://231248629-files.gitbook.io/~/files/v0/b/gitbook-x-prod.appspot.com/o/spaces%2FPyUbJF1GXLjxdJqm89IQ%2Fuploads%2Fgit-blob-fff27e076f589d65e7cc6462d8356191af5cf79e%2F310905b291cea843db3eb76c_Screenshot_2024-01-22_at_12.58.07_PM.png?alt=media" alt=""><figcaption></figcaption></figure>

</details>

<details>

<summary><strong>Testimonials</strong></summary>

<figure><img src="https://231248629-files.gitbook.io/~/files/v0/b/gitbook-x-prod.appspot.com/o/spaces%2FPyUbJF1GXLjxdJqm89IQ%2Fuploads%2Fgit-blob-74acf58ad9b1eb0a9326cf19659042faced0bcef%2F6968affae1b354bcc508a69b_Screenshot_2024-01-22_at_1.00.46_PM.png?alt=media" alt=""><figcaption></figcaption></figure>

Display customer reviews with reviewer credits and optional photos. If no photo is uploaded, a profile icon in your brand color appears instead. Add a section title or leave it blank.

<figure><img src="https://231248629-files.gitbook.io/~/files/v0/b/gitbook-x-prod.appspot.com/o/spaces%2FPyUbJF1GXLjxdJqm89IQ%2Fuploads%2Fgit-blob-7cb82e4258d8660eb1061905e0f77544bd99dfb7%2F5c5fe24aee73eedba5b386c9_Screenshot_2024-01-22_at_1.01.51_PM.png?alt=media" alt=""><figcaption></figcaption></figure>

</details>

<details>

<summary><strong>Text Block</strong></summary>

<figure><img src="https://231248629-files.gitbook.io/~/files/v0/b/gitbook-x-prod.appspot.com/o/spaces%2FPyUbJF1GXLjxdJqm89IQ%2Fuploads%2Fgit-blob-93b4bc0a1f23adafb8038994c0c072f4ff9c763e%2F86f094d9b6a6a7f3b564d39e_Screenshot_2024-01-22_at_1.03.14_PM.png?alt=media" alt=""><figcaption></figcaption></figure>

In this section, you can add text content.

<figure><img src="https://231248629-files.gitbook.io/~/files/v0/b/gitbook-x-prod.appspot.com/o/spaces%2FPyUbJF1GXLjxdJqm89IQ%2Fuploads%2Fgit-blob-163a490a84612dad037bb3f1c9aab582d955c023%2F67e547ff9ef383e01f1d7f0f_Screenshot_2024-01-22_at_1.08.07_PM.png?alt=media" alt=""><figcaption></figcaption></figure>

</details>

<details>

<summary><strong>Two Column Rows</strong></summary>

<figure><img src="https://231248629-files.gitbook.io/~/files/v0/b/gitbook-x-prod.appspot.com/o/spaces%2FPyUbJF1GXLjxdJqm89IQ%2Fuploads%2Fgit-blob-5c4f70cc1fa058e03e5b8d566d3969e4a0b1726b%2Fef45c5a9add4654015331edd_Screenshot_2024-01-22_at_1.20.11_PM.png?alt=media" alt=""><figcaption></figcaption></figure>

This section places a photo on the left with content on the right — ideal for showcasing services, painting processes, or list-style items. Customize image size and alignment (top, bottom, or middle). Include a title for the section and individual titles for each row.

<figure><img src="https://231248629-files.gitbook.io/~/files/v0/b/gitbook-x-prod.appspot.com/o/spaces%2FPyUbJF1GXLjxdJqm89IQ%2Fuploads%2Fgit-blob-a71e5f9872421bf273d25a3d09eeb87adbe4bdd3%2F4387aa7ae28c76ee82e5423b_Screenshot_2024-01-22_at_1.13.21_PM.png?alt=media" alt=""><figcaption></figcaption></figure>

</details>

<details>

<summary><strong>Custom HTML/CSS</strong></summary>

<figure><img src="https://231248629-files.gitbook.io/~/files/v0/b/gitbook-x-prod.appspot.com/o/spaces%2FPyUbJF1GXLjxdJqm89IQ%2Fuploads%2Fgit-blob-2e1bd592c2db3d1b7bb51bf70dd538055a3ff790%2Fbaf8f0aa040a4172591c151e_Screenshot_2024-01-22_at_1.21.03_PM.png?alt=media" alt=""><figcaption></figcaption></figure>

Add custom code for designs not available in the standard section types. Use the **Content** box for HTML code and the **Styles** box for CSS.

**Example 1:**

<figure><img src="https://231248629-files.gitbook.io/~/files/v0/b/gitbook-x-prod.appspot.com/o/spaces%2FPyUbJF1GXLjxdJqm89IQ%2Fuploads%2Fgit-blob-45051ab310e94c53bfa901918a8d0908f532bda6%2F2f341d66b5fcb2c4969671d0_Screenshot_2024-01-22_at_1.24.19_PM.png?alt=media" alt=""><figcaption></figcaption></figure>

**Example 2:**

<figure><img src="https://231248629-files.gitbook.io/~/files/v0/b/gitbook-x-prod.appspot.com/o/spaces%2FPyUbJF1GXLjxdJqm89IQ%2Fuploads%2Fgit-blob-421fd817b06aacde7ae3a76b083cd8fdc1d7f790%2Feac5fe1919f7fdc9851497d7_Screenshot_2024-01-22_at_1.25.36_PM.png?alt=media" alt=""><figcaption></figcaption></figure>

</details>

<details>

<summary><strong>Before &#x26; After Image Slider</strong></summary>

You can easily showcase transformations by sliding between two images. Perfect for highlighting your work in a visually engaging way!
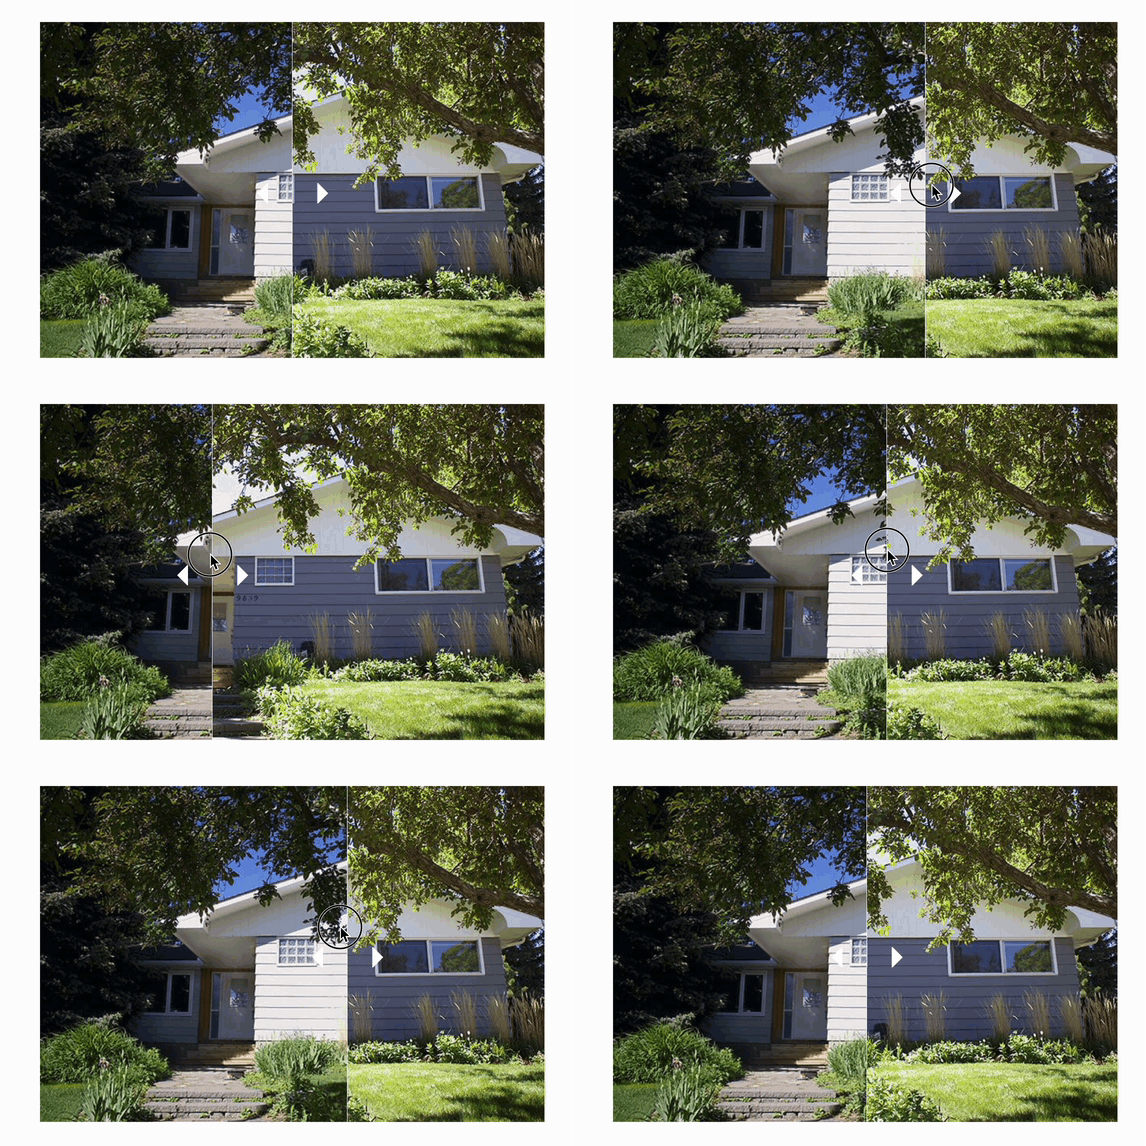
<figure><img src="https://231248629-files.gitbook.io/~/files/v0/b/gitbook-x-prod.appspot.com/o/spaces%2FPyUbJF1GXLjxdJqm89IQ%2Fuploads%2Fgit-blob-081779151c1fd2b0c3609f495708090c79ec3336%2F1232007445_65ea40f361b01c690f19ef4a55bc?alt=media" alt=""><figcaption></figcaption></figure>

Upload your before & after pictures, and add a title if you want!

<figure><img src="https://231248629-files.gitbook.io/~/files/v0/b/gitbook-x-prod.appspot.com/o/spaces%2FPyUbJF1GXLjxdJqm89IQ%2Fuploads%2Fgit-blob-58e6a1c9174b1787d813c7340f24447189ac67ac%2F1232008164_542b7a23a2cae1c222301a2ab88a?alt=media" alt=""><figcaption></figcaption></figure>

Drag the arrows and watch the image transform!

<figure><img src="https://231248629-files.gitbook.io/~/files/v0/b/gitbook-x-prod.appspot.com/o/spaces%2FPyUbJF1GXLjxdJqm89IQ%2Fuploads%2Fgit-blob-2723826840b77b50ad685daa93d1e22b4bc6c09d%2Fpresentation-before-after-slider.gif?alt=media" alt=""><figcaption></figcaption></figure>

</details>

<details>

<summary><strong>Social Media Section</strong></summary>

This section allows you to easily create quicklinks to your social media.

<figure><img src="https://231248629-files.gitbook.io/~/files/v0/b/gitbook-x-prod.appspot.com/o/spaces%2FPyUbJF1GXLjxdJqm89IQ%2Fuploads%2Fgit-blob-8f61a8e86a160a1b7fcce825ea7c8cc77803735f%2F1232018505_c82c653680ecffa846479ac3bcf9?alt=media" alt=""><figcaption></figcaption></figure>

Select the socials you want to display and include the link in the provided box.

<figure><img src="https://231248629-files.gitbook.io/~/files/v0/b/gitbook-x-prod.appspot.com/o/spaces%2FPyUbJF1GXLjxdJqm89IQ%2Fuploads%2Fgit-blob-1b5462ab8f8d0a14e4c810e18707949cffdb959a%2F1232019096_435826d50a94123901ccd020f367?alt=media" alt=""><figcaption></figcaption></figure>

</details>

<details>

<summary><strong>Estimate, Estimate Pictures, Terms &#x26; Work Order</strong></summary>

When you initially set up a presentation, these sections will automatically appear on the **Estimate** page. However, you can also add or remove them at different locations within your presentation. Each section will retrieve the information as specified for each estimate.

**Estimate:** This section will show the details as they appear on the Estimate.
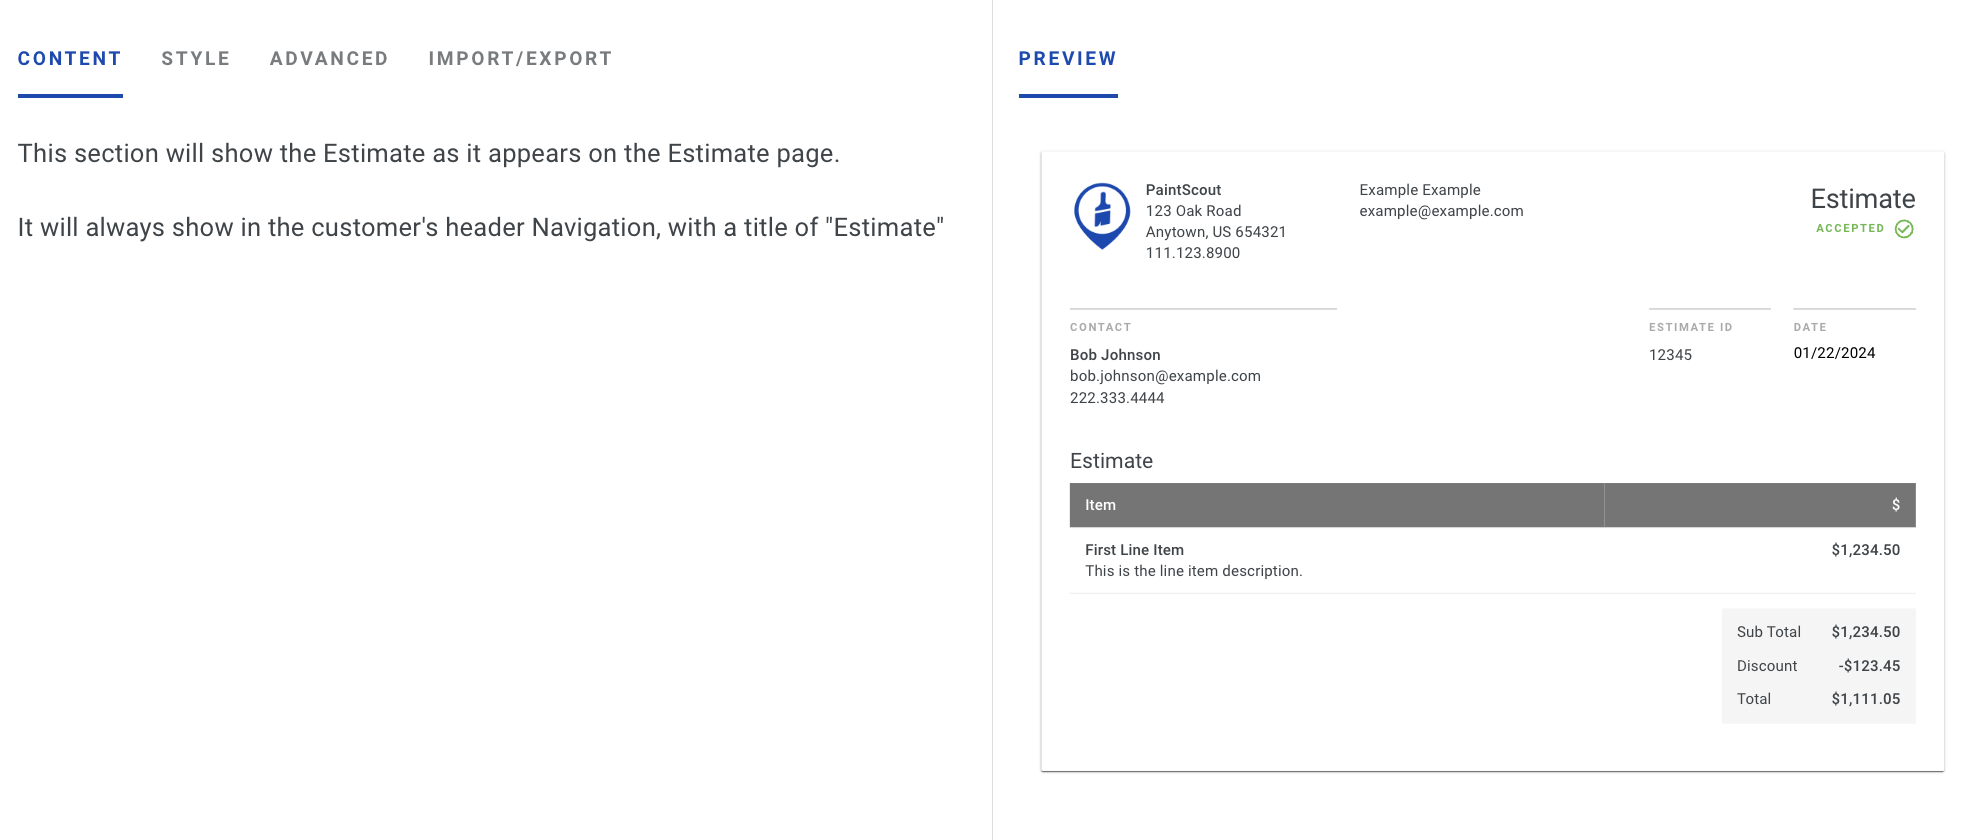
<figure><img src="https://231248629-files.gitbook.io/~/files/v0/b/gitbook-x-prod.appspot.com/o/spaces%2FPyUbJF1GXLjxdJqm89IQ%2Fuploads%2Fgit-blob-ae5a1d082207cbf7b61ece39574212fda367214c%2F0816b51d36c5c467d4f7b694_Screenshot_2024-01-22_at_1.26.40_PM.png?alt=media" alt=""><figcaption></figcaption></figure>

<figure><img src="https://231248629-files.gitbook.io/~/files/v0/b/gitbook-x-prod.appspot.com/o/spaces%2FPyUbJF1GXLjxdJqm89IQ%2Fuploads%2Fgit-blob-19d9cad7b232908a6fd440814f83b816400303db%2F4de513590f5eb5f12996d912_Screenshot_2024-01-22_at_1.27.14_PM.png?alt=media" alt=""><figcaption></figcaption></figure>

**Estimate Pictures:** This section will show the pictures attached to the Estimate.

<figure><img src="https://231248629-files.gitbook.io/~/files/v0/b/gitbook-x-prod.appspot.com/o/spaces%2FPyUbJF1GXLjxdJqm89IQ%2Fuploads%2Fgit-blob-1dadc103a57cdd03b2ad96c4ab60d8e90d5c17a1%2Fa4cd8d23969c909cc36300af_Screenshot_2024-01-22_at_1.27.43_PM.png?alt=media" alt=""><figcaption></figcaption></figure>

<figure><img src="https://231248629-files.gitbook.io/~/files/v0/b/gitbook-x-prod.appspot.com/o/spaces%2FPyUbJF1GXLjxdJqm89IQ%2Fuploads%2Fgit-blob-c5ca9845e50cd64c4d151987f2d422db5008dd13%2Feccca07e50e9ff2105736044_Screenshot_2024-01-22_at_1.27.49_PM.png?alt=media" alt=""><figcaption></figcaption></figure>

**Terms:** This section will show the Contract Terms of your Estimate.

<figure><img src="https://231248629-files.gitbook.io/~/files/v0/b/gitbook-x-prod.appspot.com/o/spaces%2FPyUbJF1GXLjxdJqm89IQ%2Fuploads%2Fgit-blob-a9579d63a0dac10c89a28bcf885a20730e490e27%2F670b06f07f752c0a2277b1c4_Screenshot_2024-01-22_at_1.28.21_PM.png?alt=media" alt=""><figcaption></figcaption></figure>

<figure><img src="https://231248629-files.gitbook.io/~/files/v0/b/gitbook-x-prod.appspot.com/o/spaces%2FPyUbJF1GXLjxdJqm89IQ%2Fuploads%2Fgit-blob-336e1ebf686f907b280e1a8f22056f3256cf8c86%2Ff1acafd10fd77c116ba43162_Screenshot_2024-01-22_at_1.28.28_PM.png?alt=media" alt=""><figcaption></figcaption></figure>

**Work Order:** This section will show the Work Order as it appears on the Work Order page.

<figure><img src="https://231248629-files.gitbook.io/~/files/v0/b/gitbook-x-prod.appspot.com/o/spaces%2FPyUbJF1GXLjxdJqm89IQ%2Fuploads%2Fgit-blob-53c3d30e310e45750958f1a0deaba0dc0b810fb7%2F4b7ff573e558c49565c897a5_Screenshot_2024-01-22_at_1.28.58_PM.png?alt=media" alt=""><figcaption></figcaption></figure>

<figure><img src="https://231248629-files.gitbook.io/~/files/v0/b/gitbook-x-prod.appspot.com/o/spaces%2FPyUbJF1GXLjxdJqm89IQ%2Fuploads%2Fgit-blob-fa74644cfdde8949950744da4a727cf36d491534%2Fbd041ade9ed50849061b7579_Screenshot_2024-01-22_at_1.29.06_PM.png?alt=media" alt=""><figcaption></figcaption></figure>

</details>

&#x20;&#x20;

## Related articles

<table data-card-size="large" data-view="cards"><thead><tr><th></th><th></th><th data-hidden data-card-target data-type="content-ref"></th></tr></thead><tbody><tr><td><strong>Presentations Overview</strong></td><td>Build professional multi-page proposal presentations with company info, services, testimonials, and custom sections for estimates.</td><td><a href="/support/customization/presentations-and-terms/presentations-overview">Presentations Overview</a></td></tr><tr><td><strong>Setting a Default Presentation</strong></td><td>Set a default presentation (proposal template) for each estimate type so the correct layout is automatically applied to every new estimate.</td><td><a href="/support/customization/presentations-and-terms/setting-a-default-presentation">Setting a Default Presentation</a></td></tr></tbody></table>


# Sherwin-Williams Presentation Pages

Add ready-made, branded Sherwin-Williams color and product sections to your estimate presentations.

Add branded, ready-made Sherwin-Williams content directly to your PaintScout estimates. Give your customers a polished, professional way to explore color options, tools, and resources, without building any of it yourself.

## Overview

Customers often want to see color inspiration, product information, and design resources as part of a presentation. Creating that kind of content from scratch takes time, and skipping it can make a presentation feel incomplete or generic.

PaintScout now includes a library of ready-made, professionally designed presentation sections you can add to your estimates in just a few clicks. This content is provided and maintained by Sherwin-Williams, so it stays current and on-brand with no extra effort on your part.

***

## How to Add Sherwin-Williams Content

1. Go to **Account Settings → Presentations**
2. Click on a presentation
3. Click **Add a section of content**
4. Select the **Sherwin-Williams** tab
5. Choose from the available sections and add them to your presentation

<figure><img src="https://231248629-files.gitbook.io/~/files/v0/b/gitbook-x-prod.appspot.com/o/spaces%2FPyUbJF1GXLjxdJqm89IQ%2Fuploads%2FfZxcyXRNERkW9XRSMQXo%2FZight%20Recording%202026-08-05%20at%2009.17.00%20AM.gif?alt=media&amp;token=1d065387-a1ef-44c6-bfb9-405d654868fb" alt=""><figcaption></figcaption></figure>

***

## Available Content Sections

The following sections are provided by Sherwin-Williams and ready to use as is. Because this content is managed by Sherwin-Williams, it can't be edited by users.

* Most Popular Colors
* Color of the Year
* Top Colors
* Brightest Whites & Neutrals
* Designer Color Collection
* Colormix Forecast
* Explore Exterior Paint
* Schedule Free Consultation
* Paint Color Visualizer
* Sample Color In Your Space
* Color Expert App (download)

***

## FAQ

<details>

<summary><strong>Can I edit the content?</strong></summary>

Content sections are read-only. They can't be modified or customized by users.

</details>

&#x20;&#x20;


# Setting a Default Presentation

Set a default presentation (proposal template) for each estimate type so the correct layout is automatically applied to every new estimate.

A default presentation in PaintScout automatically links the correct proposal template to new estimates based on their estimate type. This saves you from manually selecting a presentation each time.

## How Do I Set a Default Presentation?

1\. Click the person icon in the top right and go to your **Account Settings** > **Estimates** > **Estimate Types** section and select one.

<figure><img src="https://231248629-files.gitbook.io/~/files/v0/b/gitbook-x-prod.appspot.com/o/spaces%2FPyUbJF1GXLjxdJqm89IQ%2Fuploads%2Fgit-blob-bdb2443499f93eea706588ef18a87afe9227b239%2F3485dbc4ce18b672ea70fd92_PaintScout_Settings___2024-01-09_at_10.55.56_AM.jpg?alt=media" alt="Screenshot showing the Estimate Types section in Account Settings with an estimate type selected"><figcaption></figcaption></figure>

2\. From the **Presentation** drop-down choose which presentation you would like to set as the default.

<figure><img src="https://231248629-files.gitbook.io/~/files/v0/b/gitbook-x-prod.appspot.com/o/spaces%2FPyUbJF1GXLjxdJqm89IQ%2Fuploads%2Fgit-blob-6d9a9a31dc5c38139a1a5a3fa7b4be52df4e6e9c%2Fcad9bed4184326974c6e3867_PaintScout_Settings___2024-01-09_at_10.55.12_AM.jpg?alt=media" alt="Screenshot showing the Presentation drop-down menu for choosing a default presentation on an estimate type"><figcaption></figcaption></figure>

{% hint style="info" %}
This change will only apply to *new* estimates created.
{% endhint %}

&#x20;&#x20;

## Related articles

<table data-card-size="large" data-view="cards"><thead><tr><th></th><th></th><th data-hidden data-card-target data-type="content-ref"></th></tr></thead><tbody><tr><td><strong>Estimate Types</strong></td><td>Create estimate types like Interior, Exterior, and Cabinets to organize rates, terms, presentations, and filter reporting data.</td><td><a href="/support/customization/templates-and-presets/what-are-estimate-types">Estimate Types</a></td></tr><tr><td><strong>Setting Default Terms</strong></td><td>Set default contract terms for each estimate type so the correct terms are automatically applied every time you create a new estimate.</td><td><a href="/support/customization/presentations-and-terms/setting-default-terms">Setting Default Terms</a></td></tr><tr><td><strong>Presentations Overview</strong></td><td>Build professional multi-page proposal presentations with company info, services, testimonials, and custom sections for estimates.</td><td><a href="/support/customization/presentations-and-terms/presentations-overview">Presentations Overview</a></td></tr><tr><td><strong>Presentation Sections</strong></td><td>Explore all presentation section types including cover pages, columns, galleries, testimonials, documents, and custom HTML for professional proposals.</td><td><a href="/support/customization/presentations-and-terms/presentation-sections">Presentation Sections</a></td></tr></tbody></table>


# Updating Estimate Terms

Add, edit, and manage contract terms in your account settings, plus learn how to change or update terms on individual estimates before they are accepted.

Estimate terms in PaintScout are the contract terms attached to your proposals. You can add and edit terms in your account settings, and also modify terms on individual estimates before a customer accepts.

{% hint style="warning" %}
Terms updated in settings only affect ***new*** estimates. See below to update terms on existing estimates.
{% endhint %}

## How Do I Add and Edit Terms?

{% embed url="<https://www.youtube.com/watch?v=4272ZUZpSb8>" %}

1\. Click the person icon in the top right and go to your **Account Settings** > **Terms** section.

<figure><img src="https://231248629-files.gitbook.io/~/files/v0/b/gitbook-x-prod.appspot.com/o/spaces%2FPyUbJF1GXLjxdJqm89IQ%2Fuploads%2Fgit-blob-0d69f966e22603a67504245bea7a5fd34ab41c4a%2Fc5d013d4d6976d1e6086cf09_PaintScout_Settings_2024-01-17_at_4.09.10_PM.jpg?alt=media" alt="Screenshot showing the Terms section in Account Settings"><figcaption></figcaption></figure>

2\. A default set of terms comes with your account, you can adjust these or create a new set by clicking the **+Add New Terms Document** button.

<figure><img src="https://231248629-files.gitbook.io/~/files/v0/b/gitbook-x-prod.appspot.com/o/spaces%2FPyUbJF1GXLjxdJqm89IQ%2Fuploads%2Fgit-blob-5cf433a47d0ac48c2f99da35005dc6b29a29891e%2F0ccf62c02271c1ec2fbaedfe_Screen_Shot_2023-07-03_at_3.30.23_PM.png?alt=media" alt="Screenshot showing the default terms document with the Add New Terms Document button"><figcaption></figcaption></figure>

3\. Once you have finished, be sure to assign your terms to your estimate types by clicking the **Estimate Types** section in your account settings and selecting each type to assign a default set of terms. [Learn more here >](/support/customization/presentations-and-terms/setting-default-terms)

***

## How Do I Edit Terms on an Existing Estimate?

1\. Click the **Menu Sidebar** icon on the far right of your screen.

<figure><img src="https://231248629-files.gitbook.io/~/files/v0/b/gitbook-x-prod.appspot.com/o/spaces%2FPyUbJF1GXLjxdJqm89IQ%2Fuploads%2Fgit-blob-d6ffb42f1719cce68155a0638121f9850d9685ea%2Ffbde66e3adb88677347f811d_Screen_Shot_2019-08-20_at_3.42.31_PM.png?alt=media" alt="Screenshot showing the Menu Sidebar icon on the far right of the estimate screen"><figcaption></figcaption></figure>

2\. Select the **Contract Terms** tab.

<figure><img src="https://231248629-files.gitbook.io/~/files/v0/b/gitbook-x-prod.appspot.com/o/spaces%2FPyUbJF1GXLjxdJqm89IQ%2Fuploads%2Fgit-blob-f7719e39ba1ed421f8a0394e267ba0ded63bc815%2F96f348d5102bcf54cde197c1_sidebar.jpg?alt=media" alt="Screenshot showing the Contract Terms tab selected in the estimate sidebar"><figcaption></figcaption></figure>

3\. From here, you can select a different set of terms by clicking **change selection**, or edit the contract currently chosen.

<figure><img src="https://231248629-files.gitbook.io/~/files/v0/b/gitbook-x-prod.appspot.com/o/spaces%2FPyUbJF1GXLjxdJqm89IQ%2Fuploads%2Fgit-blob-1b12415bd182490c2bc1436c8e46f896d422b91e%2F3ad9a6f60de20de023a7bbac_Screen_Recording_2024-01-17_at_04.15.33_PM.gif?alt=media" alt="Animated screenshot showing how to change the terms selection or edit the contract on an estimate"><figcaption></figcaption></figure>

{% hint style="warning" %}
**Important Reminders:**

Please be aware that any changes made to the contract will only apply to the specific estimate you are currently working on. These modifications will not affect other estimates in the system or update the Terms in your Account Settings.

Additionally, **once an estimate has been accepted, the terms cannot be adjusted.**
{% endhint %}

&#x20;&#x20;

## Related articles

<table data-card-size="large" data-view="cards"><thead><tr><th></th><th></th><th data-hidden data-card-target data-type="content-ref"></th></tr></thead><tbody><tr><td><strong>Estimate Disclaimers</strong></td><td>Customize acceptance and decline disclaimers that appear below the signature box when customers respond to estimates.</td><td><a href="/support/customization/templates-and-presets/estimate-disclaimers">Estimate Disclaimers</a></td></tr><tr><td><strong>Setting Default Terms</strong></td><td>Set default contract terms for each estimate type so the correct terms are automatically applied every time you create a new estimate.</td><td><a href="/support/customization/presentations-and-terms/setting-default-terms">Setting Default Terms</a></td></tr></tbody></table>


# Setting Default Terms

Set default contract terms for each estimate type so the correct terms are automatically applied every time you create a new estimate.

Default terms in PaintScout assign a specific contract terms document to each estimate type, so the correct terms are automatically applied to every new estimate. If your estimates are using the wrong terms, you likely need to assign terms to your estimate types.

{% embed url="<https://www.youtube.com/watch?v=4272ZUZpSb8>" %}

## How Do I Assign Terms to Estimate Types?

1\. Click the person icon in the top right and go to your **Account Settings** > **Estimates** > **Estimate Types** section and select each one.

<figure><img src="https://231248629-files.gitbook.io/~/files/v0/b/gitbook-x-prod.appspot.com/o/spaces%2FPyUbJF1GXLjxdJqm89IQ%2Fuploads%2Fgit-blob-fa635c62e75277275d4af7e8c360d9b5d701d045%2F5dee82954190faf656e65336_PaintScout_Settings_2024-01-17_at_4.18.26_PM.jpg?alt=media" alt="Screenshot showing the Estimate Types section in Account Settings with estimate types listed"><figcaption></figcaption></figure>

2\. Once you have selected an estimate type, choose which set of terms you would like to set as the default.

<figure><img src="https://231248629-files.gitbook.io/~/files/v0/b/gitbook-x-prod.appspot.com/o/spaces%2FPyUbJF1GXLjxdJqm89IQ%2Fuploads%2Fgit-blob-ab1c9008db1cb0a66ca9e6f7f192b2962e7abc1b%2F2b901739f8b6bbbb6d0e23eb_PaintScout_Settings_2024-01-17_at_4.19.22_PM.jpg?alt=media" alt="Screenshot showing the Terms drop-down for selecting default terms on an estimate type"><figcaption></figcaption></figure>

{% hint style="warning" %}
Once you do this, it will only affect ***new*** estimates made. [Learn how to change a set of terms on a previous estimate.](/support/customization/presentations-and-terms/updating-estimate-terms)
{% endhint %}

&#x20;&#x20;

## Related articles

<table data-card-size="large" data-view="cards"><thead><tr><th></th><th></th><th data-hidden data-card-target data-type="content-ref"></th></tr></thead><tbody><tr><td><strong>Estimate Types</strong></td><td>Create estimate types like Interior, Exterior, and Cabinets to organize rates, terms, presentations, and filter reporting data.</td><td><a href="/support/customization/templates-and-presets/what-are-estimate-types">Estimate Types</a></td></tr><tr><td><strong>Setting a Default Presentation</strong></td><td>Set a default presentation (proposal template) for each estimate type so the correct layout is automatically applied to every new estimate.</td><td><a href="/support/customization/presentations-and-terms/setting-a-default-presentation">Setting a Default Presentation</a></td></tr><tr><td><strong>Estimate Disclaimers</strong></td><td>Customize acceptance and decline disclaimers that appear below the signature box when customers respond to estimates.</td><td><a href="/support/customization/templates-and-presets/estimate-disclaimers">Estimate Disclaimers</a></td></tr><tr><td><strong>Updating Estimate Terms</strong></td><td>Add, edit, and manage contract terms in your account settings, plus learn how to change or update terms on individual estimates before they are accepted.</td><td><a href="/support/customization/presentations-and-terms/updating-estimate-terms">Updating Estimate Terms</a></td></tr></tbody></table>


# Estimating Overview

Create, send, and manage professional estimates in PaintScout using production rates, line items, and customer-ready proposals.

{% hint style="success" %}
**Start here:** New to PaintScout estimating? Begin with [Understanding Production Rates](/support/customization/pricing-and-rates/introduction-to-production-rate-estimation) and [Calculate Your Hourly Rate](/support/customization/pricing-and-rates/how-to-calculate-your-hourly-rate).
{% endhint %}

PaintScout helps you build consistent estimates from your production rates, hourly rate, line items, and customer-ready proposals. This section covers the full workflow, from creating an estimate to sending it, managing revisions, and sharing work orders with your crew.

## In This Section

* [Creating Estimates](/support/estimating/creating-estimates) — Start a new estimate, learn the estimate page, use the sidebar, and manage estimate actions
* [Areas & Rates](/support/estimating/areas-and-rates) — Add areas and production rates, then adjust dimensions, coats, and prep hours
* [Line Items & Options](/support/estimating/line-items-and-options) — Add fixed-price work, create customer options, and manage change orders
* [Organizing Estimates](/support/estimating/organizing-estimates) — Group content, hide internal items, copy estimate content, and add media
* [Notes & Communication](/support/estimating/notes-and-communication) — Use estimator notes, crew notes, and other note types to keep everyone aligned
* [Sending & Acceptance](/support/estimating/sending-and-acceptance) — Send proposals, collect signatures, and understand the customer acceptance flow
* [Managing estimates & work orders](/support/estimating/managing-estimates-and-work-orders) — Review activity, restore versions, search records, export results, archive estimates, and share crew-facing work orders

## Recommended first reads

* [Understanding Production Rates](/support/customization/pricing-and-rates/introduction-to-production-rate-estimation) — Learn how PaintScout turns measurements into hours and pricing
* [Calculate Your Hourly Rate](/support/customization/pricing-and-rates/how-to-calculate-your-hourly-rate) — Build an hourly rate that covers costs and profit
* [What is a Sales Rate?](/support/estimating/creating-estimates/what-is-a-sales-rate) — Understand total price compared to total project hours

&#x20;&#x20;


# Creating Estimates

Learn how to create new estimates in PaintScout, navigate the estimate page, and use core estimating features.

This section covers the core estimate workflow in PaintScout. Start a new estimate, learn the estimate page, use the sidebar tools, understand sales rate, manage estimate actions, and save your work properly.

## In This Section

* [Create a New Estimate](/support/estimating/creating-estimates/how-to-create-a-new-estimate) — Start a fresh estimate from scratch or from a template
* [The Estimate Page](/support/estimating/creating-estimates/introduction-to-the-estimate-page) — Understand the layout and components of the estimate interface
* [Sidebar Overview](/support/estimating/creating-estimates/sidebar-overview) — Use the sidebar for activity, chat, follow-ups, calculations, terms, and payment settings
* [What is a Sales Rate?](/support/estimating/creating-estimates/what-is-a-sales-rate) — Understand total price compared to total project hours
* [Estimate Actions](/support/estimating/creating-estimates/estimate-actions) — Preview, share, invoice, copy, download, archive, and delete estimates
* [Saving & Syncing](/support/estimating/creating-estimates/saving-syncing-estimates) — How PaintScout saves your work and keeps estimates in sync across devices

&#x20;&#x20;


# Create a New Estimate

Start new estimates from the dashboard using templates or blank quotes and add areas and line items to build your proposal.

To create a new estimate in PaintScout, click the **New** button, select an estimate type, choose a template or blank quote, and start adding areas and line items.

1. Click the **New** button on the Dashboard or the Estimate page.

   <figure><img src="https://231248629-files.gitbook.io/~/files/v0/b/gitbook-x-prod.appspot.com/o/spaces%2FPyUbJF1GXLjxdJqm89IQ%2Fuploads%2Fgit-blob-254ef3ed52038d5c865dbb9cc0b3c8cd45097b61%2Fca667c63319dbf7ed56b7ec2_PaintScout_Dashboard_2024-04-04_at_5_01_00_PM.jpg?alt=media" alt="Screenshot showing the New button on the PaintScout Dashboard"><figcaption></figcaption></figure>
2. You will be prompted to select an estimate type. [Learn more about estimate types >](/support/customization/templates-and-presets/what-are-estimate-types)

   <figure><img src="https://231248629-files.gitbook.io/~/files/v0/b/gitbook-x-prod.appspot.com/o/spaces%2FPyUbJF1GXLjxdJqm89IQ%2Fuploads%2Fgit-blob-cd283fc69ddd528b62b8fd6cc1522bbe72c7ae61%2F6a583729169149a7d0a351df_Screenshot_2024-04-04_at_5_02_03_PM.png?alt=media" alt="Screenshot showing the estimate type selection dialog after clicking New"><figcaption></figcaption></figure>
3. You now have the option to either start from a pre-created template or begin with a blank estimate by choosing **Empty Quote.** [Learn more about templates >](/support/customization/templates-and-presets/estimate-templates)

   <figure><img src="https://231248629-files.gitbook.io/~/files/v0/b/gitbook-x-prod.appspot.com/o/spaces%2FPyUbJF1GXLjxdJqm89IQ%2Fuploads%2Fgit-blob-f81bde448f907ccddefbef2d75f143ac202b2f3c%2Fc1d0151f3136c37818dd44cd_Screenshot_2024-04-04_at_5_06_12_PM.png?alt=media" alt="Screenshot showing template selection with the Empty Quote option for starting a blank estimate"><figcaption></figcaption></figure>
4. Start building your estimate by clicking on the **+Add Area or Line Item** button!

   <figure><img src="https://231248629-files.gitbook.io/~/files/v0/b/gitbook-x-prod.appspot.com/o/spaces%2FPyUbJF1GXLjxdJqm89IQ%2Fuploads%2Fgit-blob-0728aca0be0a4f0da84824e67fe5417372cad248%2F105d4b479d865b98bd77d3dc_Screenshot_2024-04-04_at_5_12_04_PM.png?alt=media" alt="Screenshot showing the Add Area or Line Item button on a new estimate"><figcaption></figcaption></figure>

{% hint style="info" %}
If you find that certain items aren't available for selection when you're creating your estimate, it could be because they haven't been enabled for that specific estimate type.

Head to your **Account Settings** and ensure that the items like contracts or production rates are enabled for the type of estimate you're working with.
{% endhint %}

&#x20;&#x20;

## Related articles

<table data-card-size="large" data-view="cards"><thead><tr><th></th><th></th><th data-hidden data-card-target data-type="content-ref"></th></tr></thead><tbody><tr><td><strong>Estimate Templates</strong></td><td>Create reusable estimate templates with pre-filled areas, rates, and line items to speed up creating similar estimates.</td><td><a href="/support/customization/templates-and-presets/estimate-templates">Estimate Templates</a></td></tr><tr><td><strong>Smart Templates</strong></td><td>Learn how Smart Templates automatically incorporate your latest production rates, products, and terms into new estimate templates.</td><td><a href="/support/customization/templates-and-presets/smart-templates">Smart Templates</a></td></tr></tbody></table>


# The Estimate Page

Tour the estimate page interface including title, status, tabs, company details, contact info, estimate ID, date, and sidebar menu.

The PaintScout estimate page is where you build, customize, and manage your painting proposals. It includes the estimate title, status, tabs, contact details, sidebar menu, and all pricing components.

<figure><img src="https://231248629-files.gitbook.io/~/files/v0/b/gitbook-x-prod.appspot.com/o/spaces%2FPyUbJF1GXLjxdJqm89IQ%2Fuploads%2Fgit-blob-11981ac4f002bfda37139fa2f951e5c91474d54c%2F4e6f3f9f0147a52e7f803e41_Screenshot_2024-04-04_at_4_46_51_PM.png?alt=media" alt="Screenshot showing the full PaintScout estimate page interface overview"><figcaption></figcaption></figure>

***

## What is the estimate title?

The estimate title appears at the top left and shows either the estimate **Type** (e.g., Interior, Exterior) or the **Template** name. It identifies the project scope at a glance.

<figure><img src="https://231248629-files.gitbook.io/~/files/v0/b/gitbook-x-prod.appspot.com/o/spaces%2FPyUbJF1GXLjxdJqm89IQ%2Fuploads%2Fgit-blob-142209acb850b8d650f86b00579ecc473f05df95%2Ff3334400941f125662af6368_Screen_Shot_2023-06-29_at_12.57.18_PM.png?alt=media" alt="Screenshot showing the estimate title and type label at the top left of the estimate"><figcaption></figcaption></figure>

Right below the Type, you'll see the **Status** of the estimate, whether it's in a *Draft, Sent, Accepted*, or another stage. You have the flexibility to change the status by clicking the status and selecting an alternative from the pop-up that will appear.

Use the **Status Change Reason** box to add an internal note that will show as a banner along the top of the estimate.

<figure><img src="https://231248629-files.gitbook.io/~/files/v0/b/gitbook-x-prod.appspot.com/o/spaces%2FPyUbJF1GXLjxdJqm89IQ%2Fuploads%2Fgit-blob-c0fc92bd9094b03a9cb52e5f2717e6a1315f9bb2%2F1a9499153b60652223c548f2_Screen_Shot_2023-06-29_at_12.59.42_PM.png?alt=media" alt="Screenshot showing the estimate status selector and Status Change Reason box"><figcaption></figcaption></figure>

***

## What are the estimate tabs?

Five tabs below the title let you navigate different parts of the estimate:

<figure><img src="https://231248629-files.gitbook.io/~/files/v0/b/gitbook-x-prod.appspot.com/o/spaces%2FPyUbJF1GXLjxdJqm89IQ%2Fuploads%2Fgit-blob-8a20cc73a3e91c7ae0af803ca3bfbd3160c2d165%2F59b3304d7d7b928a63f6e433_PaintScout_Edit_Estimate_2024-04-04_at_4_44_33_PM.jpg?alt=media" alt="Screenshot showing the four estimate tabs: Estimate, Work Order, Archived, and Notes"><figcaption></figcaption></figure>

1. **Estimate:** This tab displays the actual estimate, including the items to be painted and their associated prices. This is where you can add areas or line items to your estimate.
2. **Presentation:** This is where you can change a presentation attached to an estimate, or turn off and on various pages of content. [Learn more about presentations here >](/support/customization/presentations-and-terms/presentations-overview)
3. **Work Order:** Here, you'll find the hours and products required to complete each item or area listed in the estimate. It also includes crew notes for further team clarity.
4. **Archived:** This tab provides access to all the archived items from the estimate, making it easy to store items removed from the estimate.
5. **Notes:** Consider this tab as a "scratch pad" for estimator notes. You can jot down any additional information or reminders related to the estimate. These notes are internal and cannot be seen on the estimate or work order.

***

## Where are the company details?

Your **company contact information** and **estimator details** appear at the top. Click the estimator name to reassign the estimate to a different user. The new user becomes the owner, and all communications use their email address.

<figure><img src="https://231248629-files.gitbook.io/~/files/v0/b/gitbook-x-prod.appspot.com/o/spaces%2FPyUbJF1GXLjxdJqm89IQ%2Fuploads%2Fgit-blob-f7d9a47689431b7c2b3d5d2b423f9773d0dc4f4c%2F90c66e1c31e57b304aac663a_Screenshot_2024-04-04_at_4_48_05_PM.png?alt=media" alt="Screenshot showing company contact information and estimator details at the top of the estimate"><figcaption></figcaption></figure>

***

## How do you add contact details?

Add a **Contact** to the estimate by selecting an existing contact or creating a new one. Include a separate **Job Address** if it differs from the contact address, and add an "Identifier" (e.g., PO #) if needed.

***

## When is the estimate ID generated?

The Estimate ID is generated when you press the **Save** button. Save regularly to sync your changes to the system.

***

## How does the estimate date and expiration work?

The **Date** next to the Estimate ID shows the creation date. If estimate expiration is enabled, the expiry shows TBD until the estimate is sent, then calculates from your settings. Click the *pencil icon* to modify either date.

<figure><img src="https://231248629-files.gitbook.io/~/files/v0/b/gitbook-x-prod.appspot.com/o/spaces%2FPyUbJF1GXLjxdJqm89IQ%2Fuploads%2Fgit-blob-c7fd1acdf2cb1dfcc0b5ca93f604ccfef27de825%2F7855ffc2d061f1d19c0913a5_Screenshot_2024-04-04_at_4_48_36_PM.png?alt=media" alt="Screenshot showing the estimate ID number and date fields with the pencil icon for editing"><figcaption></figcaption></figure>

***

## What is the sidebar menu?

The **Sidebar Menu** on the right side of the screen provides access to estimate settings, activity tracking, calculations, and more:

<figure><img src="https://231248629-files.gitbook.io/~/files/v0/b/gitbook-x-prod.appspot.com/o/spaces%2FPyUbJF1GXLjxdJqm89IQ%2Fuploads%2Fgit-blob-1ba5bcaa901b5281dc27f20011e73597ded89907%2Fc49a0ac1f189871723b19013_PaintScout_Edit_Estimate_2024-04-04_at_4_54_00_PM.jpg?alt=media" alt="Screenshot showing the sidebar menu location on the right side of the estimate screen"><figcaption></figcaption></figure>

The sidebar menu contains these sections:

<figure><img src="https://231248629-files.gitbook.io/~/files/v0/b/gitbook-x-prod.appspot.com/o/spaces%2FPyUbJF1GXLjxdJqm89IQ%2Fuploads%2Fgit-blob-e554321255291329c6475e2c3b8373e47f6e74a2%2F43b0d82625c0c07b0f5f1774_Screenshot_2024-04-04_at_4_57_03_PM.png?alt=media" alt="Screenshot showing the expanded sidebar menu with sections for Activity, Chat, Follow-ups, Calculations, Presentation, Terms, Advanced, and Payments"><figcaption></figcaption></figure>

* **Activity:** This section keeps you informed about the activity of the estimate, such as when it was sent, viewed, accepted, and more. It helps you easily track the progress of the estimate and stay organized.
* **Chat:** The Chat log allows you to maintain a record of any conversations you have with your customer through the chat bubble on the estimate. Whether you reply directly from this section or via email, everything will be conveniently logged here.
* **Follow-ups:** Take full control over the follow-up messages your customer receives in this section. You can easily turn specific messages on or off by using the available toggles.
* **Calculations**: Dive into the details of your numbers in the Calculations tab. Here, you'll find the estimate sales rate and a breakdown of labor and materials. You also have the flexibility to manually adjust the total, tax, and discounts as needed.
* **Presentation:** Choose the presentation associated with your estimate by selecting the change selection button.
* **Contract Terms:** Switch out the terms associated with your estimate by selecting the change selection button. You can either choose from the available options or customize the terms to fit your specific requirements.
* **Advanced:** In this space, you'll discover additional options to enhance your Estimate such as a client note that will be displayed below the total box, allowing you to communicate important details effectively. Furthermore, you have the ability to control the visibility of the Estimate.
* **Payments & Lending:** Manage your Stripe and Wisetack deposit percentages and surcharge fees for each estimate.

&#x20;&#x20;

## Related articles

<table data-card-size="large" data-view="cards"><thead><tr><th></th><th></th><th data-hidden data-card-target data-type="content-ref"></th></tr></thead><tbody><tr><td><strong>Sidebar Overview</strong></td><td>Navigate the estimate sidebar menu including activity, chat, follow-ups, calculations, presentation, terms, and payment settings.</td><td><a href="/support/estimating/creating-estimates/sidebar-overview">Sidebar Overview</a></td></tr><tr><td><strong>Estimate Actions</strong></td><td>Explore all estimate actions including preview, share with staff, create invoice, save as template, copy links, download, and archive.</td><td><a href="/support/estimating/creating-estimates/estimate-actions">Estimate Actions</a></td></tr></tbody></table>


# Sidebar Overview

Navigate the estimate sidebar menu including activity, chat, follow-ups, calculations, presentation, terms, and payment settings.

The sidebar menu in PaintScout appears on the right side of every estimate. It provides access to activity tracking, chat, follow-ups, calculations, presentation, terms, advanced settings, and payment options.

<figure><img src="https://231248629-files.gitbook.io/~/files/v0/b/gitbook-x-prod.appspot.com/o/spaces%2FPyUbJF1GXLjxdJqm89IQ%2Fuploads%2Fgit-blob-13c0266f8785d7869de91274f7904935d18c7697%2Feabbed0dd2484660759be5b7_Screen_Recording_2023-12-19_at_09.15.55_AM.gif?alt=media" alt=""><figcaption></figcaption></figure>

***

## Activity

The activity section shows all events on the estimate, including when it was sent, viewed, accepted, and paid.

* **Estimate Sent:** Find out when the estimate was sent, what the email contained, and even restore the estimate to this version if needed.
* **Estimate Viewed:** Track when and how long your customer checked out the estimate.
* **Estimate Accepted:** Keep tabs on when your customer accepted the estimate, complete with their signature.
* **Thank You Message Sent:** Verify that the automatic thank-you message reached your customer.
* **Payment Added:** Spot the moment a successful payment is made via Stripe or reported directly on the estimate.

<figure><img src="https://231248629-files.gitbook.io/~/files/v0/b/gitbook-x-prod.appspot.com/o/spaces%2FPyUbJF1GXLjxdJqm89IQ%2Fuploads%2Fgit-blob-5a3b5bd17abb6217198d55b90208c4eda072010e%2F3adc8fb1efc023922298265c_Screenshot_2023-12-19_at_9.28.35_AM.png?alt=media" alt=""><figcaption></figcaption></figure>

***

## Chat

* View messages customers send through the chat button on their estimate.
* Respond via email — the conversation is logged in the sidebar.
* Automatic emails (thank you messages, follow-ups) also appear here.

<figure><img src="https://231248629-files.gitbook.io/~/files/v0/b/gitbook-x-prod.appspot.com/o/spaces%2FPyUbJF1GXLjxdJqm89IQ%2Fuploads%2Fgit-blob-96679e3af4cc8f36ae806dce68e92b1e65ffcf74%2F4443ab47db170fa7ccce1aa8_Screenshot_2023-12-19_at_9.41.17_AM.png?alt=media" alt=""><figcaption></figcaption></figure>

***

## Follow-ups

Take charge of your follow-ups for each estimate by heading to the follow-ups section in the sidebar. Toggle follow-ups on or off for each estimate, giving you complete control over the communications sent.

<figure><img src="https://231248629-files.gitbook.io/~/files/v0/b/gitbook-x-prod.appspot.com/o/spaces%2FPyUbJF1GXLjxdJqm89IQ%2Fuploads%2Fgit-blob-b32b84af0c8fe19e49b41321f57123aea9591471%2Fa6ca53884d3457595a1a7fcc_Screenshot_2023-12-19_at_10.49.49_AM.png?alt=media" alt=""><figcaption></figcaption></figure>

***

## Calculations

View and adjust how the estimate is calculated:

* **Hourly Rate:** Modify your hourly rate for this estimate.
* **Subtotal:** Manually adjust the subtotal using either a $ or % value *please note: this will turn off area pricing on the estimate.*
* **Options Added:** See options added by the customer into the estimate.
* **Addtnl Work:** See additional work added.
* **Discounts:** Include a pre-made or custom discount.
* **Tax:** Add or remove tax from the estimate.
* **Total:** The total amount of the estimate, including options, additional work, discounts, and tax.
* **Labor & Materials:** Review the breakdown of labor and materials.
* View the estimate's **Total Hours & Sales Rate.**
* **Show Total:** Choose to show or hide the subtotal box on the estimate.
* **Show Balance Due:** Choose to show or hide the balance due *(only on invoices)*

<figure><img src="https://231248629-files.gitbook.io/~/files/v0/b/gitbook-x-prod.appspot.com/o/spaces%2FPyUbJF1GXLjxdJqm89IQ%2Fuploads%2Fgit-blob-65db5e2d8d977b871b3a018c70d0ddd106ee3d69%2F4edc3f9e8df8b0172f8e0ea8_Capture.PNG?alt=media" alt=""><figcaption></figcaption></figure>

***

## Presentation

Adjust or change the presentation attached to the estimate including uploading additional documents.

<figure><img src="https://231248629-files.gitbook.io/~/files/v0/b/gitbook-x-prod.appspot.com/o/spaces%2FPyUbJF1GXLjxdJqm89IQ%2Fuploads%2Fgit-blob-8213ed3b1165f607b8c703b4f4fe96bbcb5d6bfb%2Fa86f14bc2e00cf7512de3bfe_Screen_Recording_2023-12-19_at_12.43.07_PM-2.gif?alt=media" alt=""><figcaption></figcaption></figure>

***

## Terms

In the Terms tab, you have the flexibility to update the attached terms or craft and personalize a new set of terms specifically for this estimate.

<figure><img src="https://231248629-files.gitbook.io/~/files/v0/b/gitbook-x-prod.appspot.com/o/spaces%2FPyUbJF1GXLjxdJqm89IQ%2Fuploads%2Fgit-blob-ce0729bcfbb5466a4c652f2e54a51c060992b478%2F6b0fc66dcbba3d13a6e42a7f_Screen_Recording_2023-12-19_at_01.26.15_PM.gif?alt=media" alt=""><figcaption></figcaption></figure>

***

## Advanced

Apply further customization to your estimate through the use of notes, integrations and visibility.

* **Client Note:** Include a note for the client to appear below the total on the estimate.
* **Estimate Visibility:** Take control over who sees the estimate by toggling visibility for both the client on the estimate and the crew on the work order.
* **Integrations:** Access details if your estimate originated from another application.

<figure><img src="https://231248629-files.gitbook.io/~/files/v0/b/gitbook-x-prod.appspot.com/o/spaces%2FPyUbJF1GXLjxdJqm89IQ%2Fuploads%2Fgit-blob-c81d579d9dd0fa85a16dbd12629e279043396bbd%2F96832dc399af5a452c96f7f1_Screenshot_2023-12-19_at_1.30.26_PM.png?alt=media" alt=""><figcaption></figcaption></figure>

***

## Payments & Lending

This section will appear if you have connected the Stripe integration.

* **Allow Payments:** Decide if you want to accept credit card payments on the estimate.
* **Deposits:** Choose the deposit amount, either as a percentage or a fixed dollar amount.
* **Surcharging:** Turn on surcharging for the estimate and specify the surcharge amount applied to credit card payments.

<figure><img src="https://231248629-files.gitbook.io/~/files/v0/b/gitbook-x-prod.appspot.com/o/spaces%2FPyUbJF1GXLjxdJqm89IQ%2Fuploads%2Fgit-blob-d98ab97fb1812fe3dd6f91a8b403826b0fb72227%2Fbb034582301de8d7508b87f2_Screenshot_2023-12-19_at_1.38.52_PM.png?alt=media" alt=""><figcaption></figcaption></figure>

&#x20;&#x20;

## Related articles

<table data-card-size="large" data-view="cards"><thead><tr><th></th><th></th><th data-hidden data-card-target data-type="content-ref"></th></tr></thead><tbody><tr><td><strong>The Estimate Page</strong></td><td>Tour the estimate page interface including title, status, tabs, company details, contact info, estimate ID, date, and sidebar menu.</td><td><a href="/support/estimating/creating-estimates/introduction-to-the-estimate-page">The Estimate Page</a></td></tr><tr><td><strong>Estimate Actions</strong></td><td>Explore all estimate actions including preview, share with staff, create invoice, save as template, copy links, download, and archive.</td><td><a href="/support/estimating/creating-estimates/estimate-actions">Estimate Actions</a></td></tr></tbody></table>


# What is a Sales Rate?

Understand sales rate as total project price divided by total hours to determine project profitability and discount flexibility.

A sales rate in PaintScout is the total project price divided by the total project hours. It shows how much revenue each labor hour generates and helps you gauge project profitability and discount flexibility.

## Where do you find the sales rate?

Open the sidebar menu on the right of any estimate and expand the **Calculations** section.

<figure><img src="https://231248629-files.gitbook.io/~/files/v0/b/gitbook-x-prod.appspot.com/o/spaces%2FPyUbJF1GXLjxdJqm89IQ%2Fuploads%2Fgit-blob-763bb8ba40a54e0a2778dd9b4d4bdc405f19ac77%2F9c37bfbce4bd12c886e9d8bc_Zight_2024-05-28_at_4_50_34_PM.jpg?alt=media" alt="Screenshot showing the Sales Rate displayed in the Calculations section of the sidebar menu"><figcaption></figcaption></figure>

## How is the sales rate calculated?

**Sales Rate = total project price / total project hours.**

Items that add to the price without adding hours (e.g., extra materials or flat-fee line items) increase your sales rate. Use this metric to assess project profitability and determine how much room you have for discounts.

&#x20;&#x20;


# Estimate Actions

Explore all estimate actions including preview, share with staff, create invoice, save as template, copy links, download, and archive.

PaintScout provides 10 actions in the dropdown beside the Send button on every estimate. These let you preview, share, copy, download, invoice, template, and archive estimates.

<figure><img src="https://231248629-files.gitbook.io/~/files/v0/b/gitbook-x-prod.appspot.com/o/spaces%2FPyUbJF1GXLjxdJqm89IQ%2Fuploads%2Fgit-blob-750ce278fe7ab7eb844fa2e71cb628b7fd7a767c%2F1e97cdd60dbc401063331297_Screenshot_2024-04-05_at_11_49_13_AM.png?alt=media" alt=""><figcaption></figcaption></figure>

{% tabs %}
{% tab title="Sales" %}
Sales users have access to **all actions** listed below, including Share with Staff, Save as Template, and Delete Estimate.

Depending on their [custom permissions](/support/account-settings/users-and-permissions/user-permissions), the Sales user can either only access their own estimates, or all estimates.
{% endtab %}

{% tab title="Team" %}
Team users can **view and send** estimates from all users but **cannot create** new estimates. They can Preview, Send, Copy links, and Download PDFs. They cannot Save as Template or Delete.
{% endtab %}

{% tab title="Painter" %}
Painter users have **limited actions** on estimates shared with them. They can Preview estimates and work orders, add additional work, and create invoices. They **cannot** send estimates to customers, save templates, or delete estimates.
{% endtab %}
{% endtabs %}

***

## 1. Preview/Accept

View the quote from your customer's perspective. Also useful for on-site presentations to close the job on the spot.

<figure><img src="https://231248629-files.gitbook.io/~/files/v0/b/gitbook-x-prod.appspot.com/o/spaces%2FPyUbJF1GXLjxdJqm89IQ%2Fuploads%2Fgit-blob-d2b4b7dd8e0a1f61adaccb15b9ba6ef83ff97a15%2Ff0007ee189f1ef197d8ee53f_Screenshot_2024-04-05_at_11_54_12_AM.png?alt=media" alt=""><figcaption></figcaption></figure>

## 2. Share with Staff

Share the estimate directly with Painter and Sales users on your team. These users can only see estimates shared with them or ones they created. Select a recipient from the pop-up to send an email notification and make the estimate visible in their estimates tab.

<figure><img src="https://231248629-files.gitbook.io/~/files/v0/b/gitbook-x-prod.appspot.com/o/spaces%2FPyUbJF1GXLjxdJqm89IQ%2Fuploads%2Fgit-blob-905675aba38bb6bb8560102d7c2d9d9958d2e26c%2F563c11341df2613100090961_Screenshot_2024-04-05_at_12_01_43_PM.png?alt=media" alt=""><figcaption></figcaption></figure>

## 3. Create Invoice

Automatically generate an [invoice](/support/invoicing-and-payments/invoices/creating-invoices) from the estimate. The associated invoice is then accessible directly from the estimate.

<figure><img src="https://231248629-files.gitbook.io/~/files/v0/b/gitbook-x-prod.appspot.com/o/spaces%2FPyUbJF1GXLjxdJqm89IQ%2Fuploads%2Fgit-blob-1cd9d607bb22e767be845b17f4ff476c3a8eeaf8%2F24e0d14b0bf8644da06ffd87_Screenshot_2024-04-05_at_12_03_55_PM.png?alt=media" alt=""><figcaption></figcaption></figure>

## 4. Save as Template

Save the current estimate as a reusable [template](/support/customization/templates-and-presets/estimate-templates). Customize the template by removing personal details before saving.

<figure><img src="https://231248629-files.gitbook.io/~/files/v0/b/gitbook-x-prod.appspot.com/o/spaces%2FPyUbJF1GXLjxdJqm89IQ%2Fuploads%2Fgit-blob-f0d681605af3c3fba36c02356f8b8053bb4bd479%2F909452ca7314f899e91c3901_Screenshot_2024-04-05_at_12_05_32_PM.png?alt=media" alt=""><figcaption></figcaption></figure>

## 5. Copy Estimate Link

Generate a custom URL to share the estimate. Use the tracking link to monitor when the recipient views it, or use the preview link for internal team sharing.

<figure><img src="https://231248629-files.gitbook.io/~/files/v0/b/gitbook-x-prod.appspot.com/o/spaces%2FPyUbJF1GXLjxdJqm89IQ%2Fuploads%2Fgit-blob-03185054a56fb20cf3a9c5e30f240044aca91146%2F2c1615ca641bc690f579ecbe_Screenshot_2024-04-05_at_12_06_27_PM.png?alt=media" alt=""><figcaption></figcaption></figure>

## 6. Copy Work Order Link

Generate a live URL to share the work order with your team via email, text, or any communication method. Changes update in real-time.

<figure><img src="https://231248629-files.gitbook.io/~/files/v0/b/gitbook-x-prod.appspot.com/o/spaces%2FPyUbJF1GXLjxdJqm89IQ%2Fuploads%2Fgit-blob-650d7ce918a5b46a142e496c49b9083af71a773b%2F436dad974811a67fdd7d6ad6_Screenshot_2024-04-05_at_12_07_02_PM.png?alt=media" alt=""><figcaption></figcaption></figure>

## 7. Download Estimate & Download Work Order

Click on either option to initiate a download of the estimate to work order in PDF format.

<figure><img src="https://231248629-files.gitbook.io/~/files/v0/b/gitbook-x-prod.appspot.com/o/spaces%2FPyUbJF1GXLjxdJqm89IQ%2Fuploads%2Fgit-blob-aeade8b802fe5e96123065c20b5fe86c48e1f03b%2F39676950edd4e38696891630_Screenshot_2024-04-05_at_12_11_51_PM.png?alt=media" alt=""><figcaption></figcaption></figure>

## 8. Copy Estimate

Select this option to create an exact copy of the estimate. You can then make adjustments and use it for a future proposal.

<figure><img src="https://231248629-files.gitbook.io/~/files/v0/b/gitbook-x-prod.appspot.com/o/spaces%2FPyUbJF1GXLjxdJqm89IQ%2Fuploads%2Fgit-blob-e2c5715691dfa5ac118d7825b851d420accb0155%2Fac16f03c256fdf9f6f1a4b1e_Screenshot_2024-04-05_at_12_08_17_PM.png?alt=media" alt=""><figcaption></figcaption></figure>

## 9. Archive Estimate

[Archive](/support/estimating/managing-estimates-and-work-orders/managing-estimates/archiving-an-estimate) the estimate as a soft delete. Archived estimates remain available in reports and can be [reactivated](/support/estimating/managing-estimates-and-work-orders/managing-estimates/how-to-restore-an-estimate) if a customer changes their mind or you need to mark the job complete.

<figure><img src="https://231248629-files.gitbook.io/~/files/v0/b/gitbook-x-prod.appspot.com/o/spaces%2FPyUbJF1GXLjxdJqm89IQ%2Fuploads%2Fgit-blob-56f92797d6f884c61d907213e71670e22b6853fa%2Fc1fa35acf6ac3b8643a7d329_Screenshot_2024-04-05_at_12_07_52_PM.png?alt=media" alt=""><figcaption></figcaption></figure>

## 10. Delete Estimate

Permanently remove the estimate from your account. This action cannot be undone and the estimate cannot be recovered.

<figure><img src="https://231248629-files.gitbook.io/~/files/v0/b/gitbook-x-prod.appspot.com/o/spaces%2FPyUbJF1GXLjxdJqm89IQ%2Fuploads%2Fgit-blob-ce610cbd9875885147bc9b9e7f683acd935c9b74%2F54a04ce6701f18b6ce19d7ec_Screenshot_2024-04-05_at_12_10_07_PM.png?alt=media" alt=""><figcaption></figcaption></figure>

&#x20;&#x20;

## Related articles

<table data-card-size="large" data-view="cards"><thead><tr><th></th><th></th><th data-hidden data-card-target data-type="content-ref"></th></tr></thead><tbody><tr><td><strong>The Estimate Page</strong></td><td>Tour the estimate page interface including title, status, tabs, company details, contact info, estimate ID, date, and sidebar menu.</td><td><a href="/support/estimating/creating-estimates/introduction-to-the-estimate-page">The Estimate Page</a></td></tr><tr><td><strong>Sidebar Overview</strong></td><td>Navigate the estimate sidebar menu including activity, chat, follow-ups, calculations, presentation, terms, and payment settings.</td><td><a href="/support/estimating/creating-estimates/sidebar-overview">Sidebar Overview</a></td></tr><tr><td><strong>Archiving Estimates</strong></td><td>Archive estimates as a soft delete option to clean up your active list while keeping records accessible for reports.</td><td><a href="/support/estimating/managing-estimates-and-work-orders/managing-estimates/archiving-an-estimate">Archiving Estimates</a></td></tr><tr><td><strong>Filtering the Dashboard</strong></td><td>Learn how to use dashboard filters to refine sales metrics by date range, estimate type, and individual estimator performance.</td><td><a href="/support/dashboard-and-reports/dashboard-search-reporting/filtering-on-the-dashboard">Filtering the Dashboard</a></td></tr></tbody></table>


# Saving & Syncing

Learn how to save and sync estimates to the cloud in PaintScout to prevent data loss and keep your work updated.

PaintScout does not auto-save estimates. Press the **Save** button regularly while working to sync your changes to the cloud and prevent data loss.

You will find the save button on the top right of your estimate when working on a desktop or on the bottom right when using a mobile device.

<figure><img src="https://231248629-files.gitbook.io/~/files/v0/b/gitbook-x-prod.appspot.com/o/spaces%2FPyUbJF1GXLjxdJqm89IQ%2Fuploads%2Fgit-blob-d168f44c178abc2146d825f558aecafe62d98eee%2Fdfd7731a7b96bfd67571ed2e_PaintScout_Edit_Estimate_2023-12-18_at_5.24.26_PM.jpg?alt=media" alt="Screenshot showing the Save button location on the top right of the estimate"><figcaption></figcaption></figure>

While your changes are syncing to the system you may see the save button loading.

<figure><img src="https://231248629-files.gitbook.io/~/files/v0/b/gitbook-x-prod.appspot.com/o/spaces%2FPyUbJF1GXLjxdJqm89IQ%2Fuploads%2Fgit-blob-b3059225560f52135e30209a5c3a89b24a79c923%2F5b7b99843b63734890c14b26_Screen_Recording_2023-12-18_at_05.25.47_PM.gif?alt=media" alt="Animated screenshot showing the Save button loading while changes sync to the cloud"><figcaption></figcaption></figure>

If you try and leave an estimate before saving, we'll do our best to remind you! You may see this message when that happens:

<figure><img src="https://231248629-files.gitbook.io/~/files/v0/b/gitbook-x-prod.appspot.com/o/spaces%2FPyUbJF1GXLjxdJqm89IQ%2Fuploads%2Fgit-blob-4ef91c8728b64a50bb4624da06f82d7d51b6f214%2F8d526aaf222daa0f4c8870e7_Screenshot_2023-12-18_at_5.28.06_PM.png?alt=media" alt="Screenshot showing the unsaved changes warning dialog when leaving an estimate without saving"><figcaption></figcaption></figure>

If you have accidentally closed your browser or powered down your device without saving you will be met with this message and you will be given the option to select **yes** and save the changes or **discard the changes**.

<figure><img src="https://231248629-files.gitbook.io/~/files/v0/b/gitbook-x-prod.appspot.com/o/spaces%2FPyUbJF1GXLjxdJqm89IQ%2Fuploads%2Fgit-blob-83330fe7f6c55f20c7c159803c3b8b4be107c385%2Fcd214f79acac924d3b6d3301_Screenshot_2023-12-18_at_5.30.42_PM.png?alt=media" alt="Screenshot showing the unsaved changes recovery dialog with options to save or discard changes"><figcaption></figcaption></figure>

&#x20;&#x20;

## Related articles

<table data-card-size="large" data-view="cards"><thead><tr><th></th><th></th><th data-hidden data-card-target data-type="content-ref"></th></tr></thead><tbody><tr><td><strong>Estimates</strong></td><td>Common questions about managing, sharing, and tracking estimates in PaintScout including statuses, archiving, PDFs, and customer visibility.</td><td><a href="/support/resources/frequently-asked-questions/estimates">Estimates</a></td></tr><tr><td><strong>Restore an Estimate</strong></td><td>Restore previously sent estimate versions from the activity sidebar when customers request to revert to an earlier quote.</td><td><a href="/support/estimating/managing-estimates-and-work-orders/managing-estimates/how-to-restore-an-estimate">Restore an Estimate</a></td></tr></tbody></table>


# Areas & Rates

Add areas and production rates to your estimates, adjust dimensions, coats, and prep hours for accurate pricing.

Areas and rates are the core building blocks of every PaintScout estimate. Add named spaces, choose room or surface area types, apply production rates, and fine-tune dimensions, coats, and hours when the job needs an override.

## In This Section

* [Adding Areas](/support/estimating/areas-and-rates/adding-areas-to-an-estimate) — Create named spaces, enter dimensions, choose room or surface mode, and add substrates
* [Adding Rates](/support/estimating/areas-and-rates/adding-rates-to-an-estimate) — Apply production rates to surfaces, edit them on the estimate, or create one-off custom rates
* [Adjust Surface Dimensions](/support/estimating/areas-and-rates/how-to-adjust-surface-dimensions) — Override surface measurements or switch to direct sqft or lnft input
* [Adjust Number of Coats](/support/estimating/areas-and-rates/how-to-adjust-the-number-of-coats-for-a-substrate) — Change coat counts on a surface and update pricing automatically
* [Adjust Painting & Prep Hours](/support/estimating/areas-and-rates/how-to-adjust-painting-and-prep-hours) — Fine-tune painting and prep hours when the automatic calculation needs adjustment
* [Prep Hours](/support/estimating/areas-and-rates/prep-hours) — Add manual prep time and have PaintScout calculate the prep cost from your hourly rate

&#x20;&#x20;


# Adding Areas

Add and customize areas (rooms or spaces) to estimates with dimensions, area types, surfaces, and automatic price calculations.

In PaintScout, you build estimates by adding areas — named spaces or rooms where work will be done (e.g., Bedroom, Office, East Wall, Porch). Each area holds dimensions and surfaces that drive automatic price calculations.

## What is an area?

An area is a space or room where the work will be done, such as a Bedroom, Office, East Wall, or Porch.

***

## How do you add an area to an estimate?

1\. On the estimate, click **Add Area or Line Item**

<figure><img src="https://231248629-files.gitbook.io/~/files/v0/b/gitbook-x-prod.appspot.com/o/spaces%2FPyUbJF1GXLjxdJqm89IQ%2Fuploads%2Fgit-blob-6321f42f5b501af20e0e304d145f8cb3522dfab7%2F02aafb30e14442b98d3713d1_Screenshot_2023-12-28_at_3.02.51_PM.png?alt=media" alt="Screenshot showing the Add Area or Line Item button on the estimate"><figcaption></figcaption></figure>

2. Select **Area.**

<figure><img src="https://231248629-files.gitbook.io/~/files/v0/b/gitbook-x-prod.appspot.com/o/spaces%2FPyUbJF1GXLjxdJqm89IQ%2Fuploads%2Fgit-blob-7c5a5ac6c77165f10d9a96975f59bb80e5258632%2Ffc0056b68efc86bac0aa81de_PaintScout_Edit_Estimate_2023-12-28_at_3.14.30_PM.jpg?alt=media" alt="Screenshot showing the Area option selected from the add menu"><figcaption></figcaption></figure>

3. Choose from your list of pre-built areas from your settings or create a custom area.

<figure><img src="https://231248629-files.gitbook.io/~/files/v0/b/gitbook-x-prod.appspot.com/o/spaces%2FPyUbJF1GXLjxdJqm89IQ%2Fuploads%2Fgit-blob-9819a1473751b9abfe44c9b7a230bf4a42b98426%2Fb07a2a977a34f3efa7803567_Screenshot_2024-01-31_at_4.22.09_PM.png?alt=media" alt="Screenshot showing the list of pre-built areas to choose from or create a custom area"><figcaption></figcaption></figure>

4. Once you have chosen an area, you can start customizing the details.

<figure><img src="https://231248629-files.gitbook.io/~/files/v0/b/gitbook-x-prod.appspot.com/o/spaces%2FPyUbJF1GXLjxdJqm89IQ%2Fuploads%2Fgit-blob-ad5f0104c4472cbd865a187131ae1afc288192ae%2F7b976b9bdf5c501ffecabe15_Screenshot_2024-01-31_at_3.55.12_PM.png?alt=media" alt="Screenshot showing the area customization form with name, dimensions, and settings"><figcaption></figcaption></figure>

* **Personalize:** You have the flexibility to customize every field, including the name. Simply click on each box to make edits.
* **Add dimensions:** Input the dimensions of the area in the designated width, length, and height boxes. If you wish to override the automatically calculated linear or square footage, click the **customize dimensions** button. To revert to the default value, click the triangle icon.
* **Select an area type:** Choose **room** to calculate the space as if it has four walls, or **surface** for a single plane (e.g., the front side of a house). You can set the default type per estimate type in your settings.

  <figure><img src="https://231248629-files.gitbook.io/~/files/v0/b/gitbook-x-prod.appspot.com/o/spaces%2FPyUbJF1GXLjxdJqm89IQ%2Fuploads%2Fgit-blob-d5c5694bd31ef3687d9b98dac2133069668b3624%2F5dcffdc3b014f65f587cba87_PaintScout_Edit_Estimate_2024-01-31_at_3.56.02_PM.jpg?alt=media" alt="Screenshot showing the area type selection between Room and Surface"><figcaption></figcaption></figure>

5. Select the surfaces you want to paint. Choose a rate category (e.g., *Walls*), then pick a specific surface (e.g., *8 ft walls*). PaintScout calculates painting hours and price from the production rate and area dimensions. Click **+ Add Substrate** for more surfaces, then click **Add Area** when finished.

<figure><img src="https://231248629-files.gitbook.io/~/files/v0/b/gitbook-x-prod.appspot.com/o/spaces%2FPyUbJF1GXLjxdJqm89IQ%2Fuploads%2Fgit-blob-7d3675e7fe2551da27cd478669fc54340273096f%2Fed3888a4d0a08d130be2e2aa_Screen_Recording_2024-01-31_at_03.57.12_PM.gif?alt=media" alt="Animation showing the process of selecting rate categories and adding substrates to an area"><figcaption></figcaption></figure>

&#x20;&#x20;

## Related articles

<table data-card-size="large" data-view="cards"><thead><tr><th></th><th></th><th data-hidden data-card-target data-type="content-ref"></th></tr></thead><tbody><tr><td><strong>Adding Rates</strong></td><td>Add and edit production rates to estimate surfaces including custom rates, dimensions, products, and advanced pricing options.</td><td><a href="/support/estimating/areas-and-rates/adding-rates-to-an-estimate">Adding Rates</a></td></tr><tr><td><strong>Area Names</strong></td><td>Create and organize reusable area labels like rooms and locations for faster estimate creation with drag-and-drop organization.</td><td><a href="/support/customization/templates-and-presets/area-names">Area Names</a></td></tr></tbody></table>


# Adding Rates

Add and edit production rates to estimate surfaces including custom rates, dimensions, products, and advanced pricing options.

Production rates in PaintScout define how long specific surfaces take to paint and automatically calculate pricing based on dimensions. After adding an area, you apply rates to each surface within it.

## How do you add rates to an estimate?

1\. After setting up an area, pick a rate from the surface categories list. Select a category defined in your settings or create a custom rate.

<figure><img src="https://231248629-files.gitbook.io/~/files/v0/b/gitbook-x-prod.appspot.com/o/spaces%2FPyUbJF1GXLjxdJqm89IQ%2Fuploads%2Fgit-blob-2eba4c65f9b4787fe928cdc7f450b584ce03bcd4%2FScreenshot%202026-08-14%20at%204.31.08%E2%80%AFPM.png?alt=media" alt="Screenshot showing the surface categories list for selecting a rate"><figcaption></figcaption></figure>

2\. Choose an individual surface/rate. Again you can choose from the pre-made rates from your settings, or create a custom rate.

<figure><img src="https://231248629-files.gitbook.io/~/files/v0/b/gitbook-x-prod.appspot.com/o/spaces%2FPyUbJF1GXLjxdJqm89IQ%2Fuploads%2Fgit-blob-2dd6737d31b525500a6dca9cc0c2ca73461fda84%2FScreenshot%202026-08-14%20at%204.32.01%E2%80%AFPM.png?alt=media" alt="Screenshot showing the individual surface and rate selection options"><figcaption></figcaption></figure>

3\. Once you've made your surface selection, it gets added to the area. From there, you can either edit that surface or continue adding more.

<figure><img src="https://231248629-files.gitbook.io/~/files/v0/b/gitbook-x-prod.appspot.com/o/spaces%2FPyUbJF1GXLjxdJqm89IQ%2Fuploads%2Fgit-blob-753d15e6d41eac0b560e4a7832ed5f581624917a%2FScreenshot%202026-08-14%20at%204.32.58%E2%80%AFPM.png?alt=media" alt="Screenshot showing a surface added to the area with options to edit or add more"><figcaption></figcaption></figure>

***

## How to edit a surface

1\. Click directly on the surface or select the three dots to the right:

<figure><img src="https://231248629-files.gitbook.io/~/files/v0/b/gitbook-x-prod.appspot.com/o/spaces%2FPyUbJF1GXLjxdJqm89IQ%2Fuploads%2Fgit-blob-59783e00283e0ef4d16fb22c86ec6fd2f64ed2cd%2FScreenshot%202026-08-14%20at%204.33.30%E2%80%AFPM.png?alt=media" alt="Screenshot showing the three dots menu on a surface for editing options"><figcaption></figcaption></figure>

2\. Modify labels, edit rates, adjust dimensions, switch products, and access advanced options as needed.

* You can also fine-tune prep hours, painting hours, coats, and pricing.

{% hint style="warning" %}
Editing a rate within an estimate only alters that particular rate and won't impact the preset rates stored in the Account Settings.

For instance, if you modify the rate for baseboards from 25lnft/hr to 15lnft/hr while creating an estimate, this change will solely apply to that specific rate within that particular area.
{% endhint %}

<figure><img src="https://231248629-files.gitbook.io/~/files/v0/b/gitbook-x-prod.appspot.com/o/spaces%2FPyUbJF1GXLjxdJqm89IQ%2Fuploads%2Fgit-blob-853ab5efbaf78f5774201b7f5e0c006f98e40536%2FZight%20Recording%202026-08-14%20at%2004.34.42%20PM.gif?alt=media" alt="Animation showing surface editing options including labels, rates, dimensions, products, and hours"><figcaption></figcaption></figure>

***

## Creating Custom Rates

1\. When adding a surface to the area, select **+Custom Rate.**

<figure><img src="https://231248629-files.gitbook.io/~/files/v0/b/gitbook-x-prod.appspot.com/o/spaces%2FPyUbJF1GXLjxdJqm89IQ%2Fuploads%2Fgit-blob-117ca656a7fc4cc5d336e0a5753c0cc8db3f2906%2FScreenshot%202026-08-14%20at%204.31.08%E2%80%AFPM%20(1).png?alt=media" alt="Screenshot showing the Create Custom Rate option in the surface selection menu"><figcaption></figcaption></figure>

2\. You will then be able to create a rate from scratch and customize it.

<figure><img src="https://231248629-files.gitbook.io/~/files/v0/b/gitbook-x-prod.appspot.com/o/spaces%2FPyUbJF1GXLjxdJqm89IQ%2Fuploads%2Fgit-blob-1295153fcb3567f33b50dad73b7039e13283bca1%2FScreenshot%202026-08-14%20at%204.37.28%E2%80%AFPM.png?alt=media" alt="Screenshot showing the custom rate creation form with all customizable fields"><figcaption></figcaption></figure>

***

## Saving a custom rate to your settings

When creating a custom rate, you can choose the option to save it to your settings. The rate then becomes available for future estimates.

{% hint style="info" %}
Saving a custom rate makes it reusable. Changes to the rate on the current estimate remain specific to that estimate.
{% endhint %}

1. Click the three dots next to the rate.
2. Select **Save to settings**.

<figure><img src="https://231248629-files.gitbook.io/~/files/v0/b/gitbook-x-prod.appspot.com/o/spaces%2FPyUbJF1GXLjxdJqm89IQ%2Fuploads%2Fgit-blob-67f1f126bac16f4a71360a84d844f43a37c03ebc%2FScreenshot%202026-08-14%20at%204.43.41%E2%80%AFPM.png?alt=media" alt=""><figcaption></figcaption></figure>

3. You will be prompted to select the **Rate Category** the rate will belong to. [Learn about Rate Categories.](/support/customization/pricing-and-rates/production-rates-section-overview)

<figure><img src="https://231248629-files.gitbook.io/~/files/v0/b/gitbook-x-prod.appspot.com/o/spaces%2FPyUbJF1GXLjxdJqm89IQ%2Fuploads%2Fgit-blob-05975463b5d060627031d2fe28629041f403ef5f%2FZight%20Recording%202026-08-14%20at%2004.46.04%20PM.gif?alt=media" alt=""><figcaption></figcaption></figure>

4. This rate can be found in your **Account Settings > Production Rates > Rate Categories.** This rate can now be applied to future estimates.

<figure><img src="https://231248629-files.gitbook.io/~/files/v0/b/gitbook-x-prod.appspot.com/o/spaces%2FPyUbJF1GXLjxdJqm89IQ%2Fuploads%2Fgit-blob-f1913b4d85bc1bb02d359b1241790dff0fb8f073%2FScreenshot%202026-08-14%20at%204.46.43%E2%80%AFPM.png?alt=media" alt=""><figcaption></figcaption></figure>

&#x20;&#x20;

## Related articles

<table data-card-size="large" data-view="cards"><thead><tr><th></th><th></th><th data-hidden data-card-target data-type="content-ref"></th></tr></thead><tbody><tr><td><strong>Adding Areas</strong></td><td>Add and customize areas (rooms or spaces) to estimates with dimensions, area types, surfaces, and automatic price calculations.</td><td><a href="/support/estimating/areas-and-rates/adding-areas-to-an-estimate">Adding Areas</a></td></tr><tr><td><strong>Area Names</strong></td><td>Create and organize reusable area labels like rooms and locations for faster estimate creation with drag-and-drop organization.</td><td><a href="/support/customization/templates-and-presets/area-names">Area Names</a></td></tr></tbody></table>


# Adjust Surface Dimensions

Override area dimensions on individual surfaces by editing length, width, height or switching to direct sqft/lnft input.

PaintScout lets you override area dimensions on individual surfaces so each surface can have its own measurements without affecting other surfaces in the same area.

Surfaces automatically inherit dimensions from their parent area. Override these by opening the surface and editing the length, width, and height.

<figure><img src="https://231248629-files.gitbook.io/~/files/v0/b/gitbook-x-prod.appspot.com/o/spaces%2FPyUbJF1GXLjxdJqm89IQ%2Fuploads%2Fgit-blob-4df9c9f60cbbd6141e6541150a663872d181486c%2F9a996c019cc47a2ec90b01b5_Screenshot_2023-12-08_at_4.27.09_PM.png?alt=media" alt="Screenshot showing a surface with length, width, and height dimension fields in the estimate area"><figcaption></figcaption></figure>

## How do you switch to direct sqft or lnft input?

1\. To input a direct square footage or linear footage amount instead of length/width/height, click the **switch to sqft/lnft** button on the surface.

{% hint style="info" %}
If you don't see the switch button, [contact us](mailto:support@paintscout.com) to have it enabled.
{% endhint %}

<figure><img src="https://231248629-files.gitbook.io/~/files/v0/b/gitbook-x-prod.appspot.com/o/spaces%2FPyUbJF1GXLjxdJqm89IQ%2Fuploads%2Fgit-blob-252406f17a18f46c1187830446d51820c94a1a1c%2F79cd72e7df3dd4d71c840444_PaintScout_Edit_Estimate_2023-12-08_at_1.34.31_PM.jpg?alt=media" alt="Screenshot showing the switch to sqft/lnft button on a surface in the estimate"><figcaption></figcaption></figure>

2\. Now, you can customize the sqft or lnft for this particular surface without affecting the measurements of other surfaces in the area.

<figure><img src="https://231248629-files.gitbook.io/~/files/v0/b/gitbook-x-prod.appspot.com/o/spaces%2FPyUbJF1GXLjxdJqm89IQ%2Fuploads%2Fgit-blob-84771feed2388ee6121e22c87574977df1b1e9fb%2Fc97c92124cdf3c4ad38230a0_PaintScout_Edit_Estimate_2023-12-08_at_1.35.03_PM.jpg?alt=media" alt="Screenshot showing the customized sqft or lnft input field for an individual surface"><figcaption></figcaption></figure>

&#x20;&#x20;

## Related articles

<table data-card-size="large" data-view="cards"><thead><tr><th></th><th></th><th data-hidden data-card-target data-type="content-ref"></th></tr></thead><tbody><tr><td><strong>Adjust Number of Coats</strong></td><td>Adjust the number of paint coats for individual surfaces using the coats dropdown after configuring rates in account settings.</td><td><a href="/support/estimating/areas-and-rates/how-to-adjust-the-number-of-coats-for-a-substrate">Adjust Number of Coats</a></td></tr><tr><td><strong>Adjust Painting &#x26; Prep Hours</strong></td><td>Manually adjust painting hours and prep time on individual substrates when automatic calculations need fine-tuning.</td><td><a href="/support/estimating/areas-and-rates/how-to-adjust-painting-and-prep-hours">Adjust Painting &amp; Prep Hours</a></td></tr></tbody></table>


# Adjust Number of Coats

Adjust the number of paint coats for individual surfaces using the coats dropdown after configuring rates in account settings.

In PaintScout, you can change how many paint coats are applied to each surface on an estimate. The number of coats affects the calculated painting hours and price.

## How do you change the number of coats?

1\. Click the surface you want to adjust the number of coats for.

<figure><img src="https://231248629-files.gitbook.io/~/files/v0/b/gitbook-x-prod.appspot.com/o/spaces%2FPyUbJF1GXLjxdJqm89IQ%2Fuploads%2Fgit-blob-9e75fc2356436cec6f562ae53d13a83e6501bb56%2F13092ec674606f1bc8eab842_PaintScout_Edit_Estimate_2023-12-28_at_4.04.19_PM.jpg?alt=media" alt="Screenshot showing a surface selected in the estimate for adjusting coats"><figcaption></figcaption></figure>

2\. Use the **Coats** drop-down to select the number of coats for this surface.

<figure><img src="https://231248629-files.gitbook.io/~/files/v0/b/gitbook-x-prod.appspot.com/o/spaces%2FPyUbJF1GXLjxdJqm89IQ%2Fuploads%2Fgit-blob-d5c4250f29756d45a2cbc7865e0d1b1618dfd01f%2F3b45c07bfabe9087498d60ef_Screenshot_2024-01-30_at_9.29.29_AM.png?alt=media" alt="Screenshot showing the Coats dropdown menu for selecting the number of coats on a surface"><figcaption></figcaption></figure>

{% hint style="info" %}
To have the option to select the number of coats on a per-estimate basis you will first need to set a rate for 1, 2, 3, or 4 coats.

You can easily do this in the [Production Rates](https://app.paintscout.com/settings?section=rates-categories) section of your Account Settings.
{% endhint %}

&#x20;&#x20;

## Related articles

<table data-card-size="large" data-view="cards"><thead><tr><th></th><th></th><th data-hidden data-card-target data-type="content-ref"></th></tr></thead><tbody><tr><td><strong>Adjust Surface Dimensions</strong></td><td>Override area dimensions on individual surfaces by editing length, width, height or switching to direct sqft/lnft input.</td><td><a href="/support/estimating/areas-and-rates/how-to-adjust-surface-dimensions">Adjust Surface Dimensions</a></td></tr><tr><td><strong>Adjust Painting &#x26; Prep Hours</strong></td><td>Manually adjust painting hours and prep time on individual substrates when automatic calculations need fine-tuning.</td><td><a href="/support/estimating/areas-and-rates/how-to-adjust-painting-and-prep-hours">Adjust Painting &amp; Prep Hours</a></td></tr></tbody></table>


# Adjust Painting & Prep Hours

Manually adjust painting hours and prep time on individual substrates when automatic calculations need fine-tuning.

PaintScout calculates painting hours automatically from production rates, but you can manually adjust both painting and prep hours on any substrate when the automatic calculations need fine-tuning.

## How do you adjust painting and prep hours?

1. Click the substrate you want to adjust.
2. Make your adjustments in the provided fields:

   <figure><img src="https://231248629-files.gitbook.io/~/files/v0/b/gitbook-x-prod.appspot.com/o/spaces%2FPyUbJF1GXLjxdJqm89IQ%2Fuploads%2Fgit-blob-764d3207bee9b80ad17bd67c80955d54f090cb0f%2Fc4168271d27dbf8fa7dcc65c_PaintScout_Edit_Estimate_2023-12-08_at_5.01.02_PM.jpg?alt=media" alt="Screenshot showing the painting hours and prep hours adjustment fields on a substrate"><figcaption></figcaption></figure>

***

## Things to Note

* The system doesn't automatically calculate prep time; you must add and adjust prep time manually.
* If the variables used in your rate calculation don't involve hours (e.g., sqft/hr, item/hr, etc.), painting hours will not be automatically calculated. In such cases, you'll need to input the hours manually.

&#x20;&#x20;

## Related articles

<table data-card-size="large" data-view="cards"><thead><tr><th></th><th></th><th data-hidden data-card-target data-type="content-ref"></th></tr></thead><tbody><tr><td><strong>Adjust Surface Dimensions</strong></td><td>Override area dimensions on individual surfaces by editing length, width, height or switching to direct sqft/lnft input.</td><td><a href="/support/estimating/areas-and-rates/how-to-adjust-surface-dimensions">Adjust Surface Dimensions</a></td></tr><tr><td><strong>Adjust Number of Coats</strong></td><td>Adjust the number of paint coats for individual surfaces using the coats dropdown after configuring rates in account settings.</td><td><a href="/support/estimating/areas-and-rates/how-to-adjust-the-number-of-coats-for-a-substrate">Adjust Number of Coats</a></td></tr><tr><td><strong>Prep Hours</strong></td><td>Manually add prep hours to substrates in estimates with automatic cost calculation based on your internal hourly rate.</td><td><a href="/support/estimating/areas-and-rates/prep-hours">Prep Hours</a></td></tr><tr><td><strong>Calculate Your Hourly Rate</strong></td><td>Calculate your all-in hourly rate for painting estimates by combining labor wages, materials, overhead costs, and profit margin with step-by-step examples.</td><td><a href="/support/customization/pricing-and-rates/how-to-calculate-your-hourly-rate">Calculate Your Hourly Rate</a></td></tr></tbody></table>


# Prep Hours

Manually add prep hours to substrates in estimates with automatic cost calculation based on your internal hourly rate.

Prep hours in PaintScout must be added manually to each substrate. The system multiplies your prep hours by your internal hourly rate to calculate the prep cost, which is then added to the surface total alongside painting time and materials.

***

## How do you add prep hours to an estimate?

1. Select the substrate to which you want to assign prep hours.
2. Enter the number of prep hours in the designated box. Keep in mind that the hourly rate will be applied to determine the cost. For instance, if you allocate 2 hours of prep for a substrate, it will be **2 hrs x $65 hourly = $130.00** in total for prep.

   <figure><img src="https://231248629-files.gitbook.io/~/files/v0/b/gitbook-x-prod.appspot.com/o/spaces%2FPyUbJF1GXLjxdJqm89IQ%2Fuploads%2Fgit-blob-b87ceb9519ac5d89f63d9e72b2aa0703de75d7f0%2Fe3c6019942e5939dc464dc4c_PaintScout_Edit_Estimate_2023-12-08_at_4.03.25_PM.jpg?alt=media" alt="Screenshot showing the prep hours input field on a substrate with hourly rate calculation"><figcaption></figcaption></figure>
3. Click **Confirm**, and you'll see the prep hours incorporated into your area.

<figure><img src="https://231248629-files.gitbook.io/~/files/v0/b/gitbook-x-prod.appspot.com/o/spaces%2FPyUbJF1GXLjxdJqm89IQ%2Fuploads%2Fgit-blob-369c8c65bf4ab27043314f2b26550bc6211d10d8%2F574283de2e4cb06b8ed87e81_PaintScout_Edit_Estimate_2024-01-31_at_3.49.06_PM.jpg?alt=media" alt="Screenshot showing the prep hours incorporated into the area total on the estimate"><figcaption></figcaption></figure>

&#x20;&#x20;

## Related articles

<table data-card-size="large" data-view="cards"><thead><tr><th></th><th></th><th data-hidden data-card-target data-type="content-ref"></th></tr></thead><tbody><tr><td><strong>Adjust Painting &#x26; Prep Hours</strong></td><td>Manually adjust painting hours and prep time on individual substrates when automatic calculations need fine-tuning.</td><td><a href="/support/estimating/areas-and-rates/how-to-adjust-painting-and-prep-hours">Adjust Painting &amp; Prep Hours</a></td></tr><tr><td><strong>Calculate Your Hourly Rate</strong></td><td>Calculate your all-in hourly rate for painting estimates by combining labor wages, materials, overhead costs, and profit margin with step-by-step examples.</td><td><a href="/support/customization/pricing-and-rates/how-to-calculate-your-hourly-rate">Calculate Your Hourly Rate</a></td></tr></tbody></table>


# Saving Rates & Line Items to Settings

You can now save your custom rates and line items to Settings, so they're available every time you build an estimate, without having to re-enter them.

{% hint style="info" %}
**Note:** This feature is only available to users with permission for account settings.
{% endhint %}

### Why use this

If you regularly use the same rates or line items across jobs, saving them once means you won't have to type them in from scratch each time.&#x20;

### How to save a custom rate or line item

1. Open an **estimate**.
2. Find the rate or line item you want to save.
3. Click the **3 dots** next to it.
4. Select **Save to Settings**.

<figure><img src="https://231248629-files.gitbook.io/~/files/v0/b/gitbook-x-prod.appspot.com/o/spaces%2FPyUbJF1GXLjxdJqm89IQ%2Fuploads%2FWJdGGm0yoKfmOACXckrr%2Fexport-1788543786185.gif?alt=media&amp;token=60391a1f-c9a4-4560-ba4f-fcfd3d97f7b9" alt=""><figcaption></figcaption></figure>

Your saved item will now show up as an option whenever you're building an estimate.

***

### Editing or removing saved items

1. Go back to **Account** **Settings > Production Rates or Line Items**.
2. Click on the item you want to change.
3. Update the details and click **Save**, or click **Delete** to remove it.

Changes you make here won't affect estimates you've already created, only new ones going forward.


# Line Items & Options

Add line items for fixed-price work, create options for customers, and manage change orders.

Not all work fits neatly into dimension-based rates. Use line items for fixed-price or custom-scoped work, options for upsells and alternate scope, and additional work for approved changes after acceptance.

## In This Section

* [Add & Edit Line Items](/support/estimating/line-items-and-options/how-to-add-and-edit-a-line-item) — Add saved or custom line items with pricing, materials, hours, photos, notes, and visibility controls
* [Working With Options](/support/estimating/line-items-and-options/working-with-options) — Move areas or line items into a separate options section for upsells and alternate scope
* [Customer Accepted Options](/support/estimating/line-items-and-options/customer-accepted-options) — Let customers add optional items themselves before they accept the estimate
* [Additional Work/Change Orders](/support/estimating/line-items-and-options/additional-work-change-orders) — Convert items into approved additional work on accepted estimates or invoices

&#x20;&#x20;


# Add & Edit Line Items

Add and customize line items on estimates including pricing options, materials, hours, photos, and notes for detailed project scopes.

A line item in PaintScout is a fixed-price entry for work that does not use dimension-based production rates, such as furniture moving, power washing, or specialty finishes.

## How do you add a line item to an estimate?

1\. Click on the **Add Area or Line Item** button.

<figure><img src="https://231248629-files.gitbook.io/~/files/v0/b/gitbook-x-prod.appspot.com/o/spaces%2FPyUbJF1GXLjxdJqm89IQ%2Fuploads%2Fgit-blob-32573bc9419ff4c1a3fd417c47020dbade2a181b%2FScreenshot%202026-08-17%20at%2010.16.41%E2%80%AFAM.png?alt=media" alt="Screenshot showing the Add Area or Line Item button on the estimate"><figcaption></figcaption></figure>

2\. Choose **Line Item**.

<figure><img src="https://231248629-files.gitbook.io/~/files/v0/b/gitbook-x-prod.appspot.com/o/spaces%2FPyUbJF1GXLjxdJqm89IQ%2Fuploads%2Fgit-blob-b6f700eebe8d4f7267d5ae598df4399ff8d11356%2FScreenshot%202026-08-17%20at%2010.17.20%E2%80%AFAM.png?alt=media" alt="Screenshot showing the Line Item option selected from the add menu"><figcaption></figcaption></figure>

3\. Select a saved line items from your **Account Settings**, or create a custom line item.

<figure><img src="https://231248629-files.gitbook.io/~/files/v0/b/gitbook-x-prod.appspot.com/o/spaces%2FPyUbJF1GXLjxdJqm89IQ%2Fuploads%2Fgit-blob-8a9bffbc796d364e4e674529ae91c630922a804e%2FScreenshot%202026-08-17%20at%2010.18.21%E2%80%AFAM.png?alt=media" alt="Screenshot showing the list of pre-made line items and the option to create a custom line item"><figcaption></figcaption></figure>

***

## What can you customize on a line item?

* **Name and description** for the customer-facing estimate.
* **Pricing** via hourly rate, quantity, or custom options — or no price at all.
* **Materials, hours, photos, and notes** for detailed scoping.
* **Visibility** — hide informational-only items from the work order to keep it tidy.

<figure><img src="https://231248629-files.gitbook.io/~/files/v0/b/gitbook-x-prod.appspot.com/o/spaces%2FPyUbJF1GXLjxdJqm89IQ%2Fuploads%2Fgit-blob-c70202b4f6e7812bea8ad12ac75e004c28a9d81a%2FScreenshot%202026-08-17%20at%2010.20.16%E2%80%AFAM.png?alt=media" alt="Screenshot showing the line item detail form with name, description, pricing, materials, and hours options"><figcaption></figcaption></figure>

***

## Save a custom line item to account settings

When creating a custom line item, choose the option to save it to your settings. The line item then becomes available for future estimates.

{% hint style="info" %}
Saving a custom line item makes it reusable. Changes to the line item on the current estimate remain specific to that estimate.
{% endhint %}

1. Click the three dots next to the line item.
2. Select **Save to settings**.

<figure><img src="https://231248629-files.gitbook.io/~/files/v0/b/gitbook-x-prod.appspot.com/o/spaces%2FPyUbJF1GXLjxdJqm89IQ%2Fuploads%2Fgit-blob-a754e64a23e7757e8b9733556ebe8d50d800d534%2FScreenshot%202026-08-17%20at%2010.23.16%E2%80%AFAM.png?alt=media" alt=""><figcaption></figcaption></figure>

3. You will be prompted to select the **Estimate Type(s)** the line item will belong to. [Learn about Estimate Types.](/support/customization/templates-and-presets/what-are-estimate-types)

<figure><img src="https://231248629-files.gitbook.io/~/files/v0/b/gitbook-x-prod.appspot.com/o/spaces%2FPyUbJF1GXLjxdJqm89IQ%2Fuploads%2Fgit-blob-71daf3feed83861fc6e934838e103de106f01125%2FScreenshot%202026-08-17%20at%2010.26.07%E2%80%AFAM.png?alt=media" alt="" width="563"><figcaption></figcaption></figure>

4. The saved line item can be found in your **Account Settings → Line Items.** This line item can now be applied to future estimates.

<figure><img src="https://231248629-files.gitbook.io/~/files/v0/b/gitbook-x-prod.appspot.com/o/spaces%2FPyUbJF1GXLjxdJqm89IQ%2Fuploads%2Fgit-blob-2198886586c36a0b23fc622bb8c4a2a1f5d7a56e%2FScreenshot%202026-08-17%20at%2010.27.50%E2%80%AFAM.png?alt=media" alt=""><figcaption></figcaption></figure>

&#x20;&#x20;

## Related articles

<table data-card-size="large" data-view="cards"><thead><tr><th></th><th></th><th data-hidden data-card-target data-type="content-ref"></th></tr></thead><tbody><tr><td><strong>Line Items Overview</strong></td><td>Create reusable line items for fixed-price services, quantities, and custom charges.</td><td><a href="/support/customization/templates-and-presets/line-items-overview">Line Items Overview</a></td></tr><tr><td><strong>Working With Options</strong></td><td>Create optional add-on items or services on estimates that customers can choose to include before accepting their quote.</td><td><a href="/support/estimating/line-items-and-options/working-with-options">Working With Options</a></td></tr></tbody></table>


# Working With Options

Create optional add-on items or services on estimates that customers can choose to include before accepting their quote.

Options in PaintScout are extra items or services listed separately from the estimate total. Customers can choose to include options before accepting their quote, making them ideal for upsells and add-on services.

## What is an option?

An option is an item or service not included in the estimate total. It appears in a separate section, letting the customer decide whether to add it.

## How do you make an item into an option?

1\. Choose the item(s) you want to make into an option by clicking the checkbox on the left-hand side. Then select **Make Option** from the bottom toolbar.

<figure><img src="https://231248629-files.gitbook.io/~/files/v0/b/gitbook-x-prod.appspot.com/o/spaces%2FPyUbJF1GXLjxdJqm89IQ%2Fuploads%2Fgit-blob-b218731de0103e8051a404211ace1e29448dfb17%2F6dda51af9674c77e6ca1360d_PaintScout_Edit_Estimate_2024-06-20_at_2_38_55_PM.jpg?alt=media" alt="Screenshot showing items selected with checkboxes and the Make Option button in the bottom toolbar"><figcaption></figcaption></figure>

2\. Options will be displayed at the bottom of your estimate, underneath the total box. It will appear this way from the customer's view as well, so they can see the options separately from the other items on the estimate.

<figure><img src="https://231248629-files.gitbook.io/~/files/v0/b/gitbook-x-prod.appspot.com/o/spaces%2FPyUbJF1GXLjxdJqm89IQ%2Fuploads%2Fgit-blob-bdd87edfad0fdb3b3309074a80381cf268ddb561%2F22be3c3dfa5ea2a80fd93170_Screenshot_2024-06-20_at_2_41_11_PM.png?alt=media" alt="Screenshot showing options displayed at the bottom of the estimate underneath the total box"><figcaption></figcaption></figure>

{% hint style="info" %}
You can also create areas and items directly in the options section by clicking + **Add area or line item.**
{% endhint %}

## How do you move an option back to the estimate?

If you would like to move an option back to the estimate, so it's included in the total, click the checkbox to the left of it, then press **Move to** **Estimate.**

<figure><img src="https://231248629-files.gitbook.io/~/files/v0/b/gitbook-x-prod.appspot.com/o/spaces%2FPyUbJF1GXLjxdJqm89IQ%2Fuploads%2Fgit-blob-80c3d7577f947a6990d1a89f668911ae07886a1d%2F74498295596f34ade624072c_PaintScout_Edit_Estimate_2024-06-20_at_2_44_07_PM.jpg?alt=media" alt="Screenshot showing an option selected with checkbox and the Move to Estimate button to include it in the total"><figcaption></figcaption></figure>

&#x20;&#x20;

## Related articles

<table data-card-size="large" data-view="cards"><thead><tr><th></th><th></th><th data-hidden data-card-target data-type="content-ref"></th></tr></thead><tbody><tr><td><strong>Line Items Overview</strong></td><td>Create reusable line items for fixed-price services, quantities, and custom charges.</td><td><a href="/support/customization/templates-and-presets/line-items-overview">Line Items Overview</a></td></tr><tr><td><strong>Add &#x26; Edit Line Items</strong></td><td>Add and customize line items on estimates including pricing options, materials, hours, photos, and notes for detailed project scopes.</td><td><a href="/support/estimating/line-items-and-options/how-to-add-and-edit-a-line-item">Add &amp; Edit Line Items</a></td></tr><tr><td><strong>Customer Accepted Options</strong></td><td>Enable customers to add optional items directly to their estimate before accepting through the customer-facing interface.</td><td><a href="/support/estimating/line-items-and-options/customer-accepted-options">Customer Accepted Options</a></td></tr><tr><td><strong>Additional Work/Change Orders</strong></td><td>Add change orders and additional work to accepted estimates or invoices with customer approval and signature workflows.</td><td><a href="/support/estimating/line-items-and-options/additional-work-change-orders">Additional Work/Change Orders</a></td></tr></tbody></table>


# Customer Accepted Options

Enable customers to add optional items directly to their estimate before accepting through the customer-facing interface.

Customer Accepted Options is a PaintScout feature that lets customers add optional items to their estimate themselves before accepting, turning your options into self-service upsells.

{% embed url="<https://www.youtube.com/watch?v=J89RYuQRg_k>" %}

## What are customer accepted options?

Customer Accepted Options gives your customers the ability to move optional items directly to the estimate before accepting.

***

## How do you set up customer accepted options?

1\. Go to your Account Settings and navigate to the **Estimates > Settings** section.

2\. Enable the **Customer Accepted Options** option.

<figure><img src="https://231248629-files.gitbook.io/~/files/v0/b/gitbook-x-prod.appspot.com/o/spaces%2FPyUbJF1GXLjxdJqm89IQ%2Fuploads%2Fgit-blob-da5c8800e46386aeec7b77aec69a301e19828f15%2F1b06aaea8e8aa5a37c5837db_Screenshot_2023-12-11_at_5.15.30_PM.png?alt=media" alt="Screenshot showing the Customer Accepted Options toggle enabled in Account Settings"><figcaption></figcaption></figure>

{% hint style="info" %}
Please note this change will take effect for **both new and existing estimates**. Allowing all estimates the ability to add available options to their estimate.
{% endhint %}

***

## How do you create an option?

1. Click on the three dots to the right of an area, line item, or group.
2. Select **Make Option.**

   <figure><img src="https://231248629-files.gitbook.io/~/files/v0/b/gitbook-x-prod.appspot.com/o/spaces%2FPyUbJF1GXLjxdJqm89IQ%2Fuploads%2Fgit-blob-ae5003821aafadce2a2119b6d8bce40f725ea09f%2F71a81ea48a27922792d4a448_PaintScout_Edit_Estimate_2024-02-06_at_4.27.51_PM.jpg?alt=media" alt="Screenshot showing the Make Option selection from the three dots menu on an item"><figcaption></figcaption></figure>
3. Your selection will now show in the **Options** section underneath the total.

<figure><img src="https://231248629-files.gitbook.io/~/files/v0/b/gitbook-x-prod.appspot.com/o/spaces%2FPyUbJF1GXLjxdJqm89IQ%2Fuploads%2Fgit-blob-6b2002f5ab5b4f5bcb87ebd95a781ccf350e42ff%2F2a3e46727b97489c4f5e2269_Screenshot_2023-11-02_at_4.38.04_PM.png?alt=media" alt="Screenshot showing the Options section underneath the estimate total"><figcaption></figcaption></figure>

***

## How do customers accept options?

1. Once your customer has received their estimate they can view the available add-ons and click **+Add Option** if they would like to include any in their final estimate.

   <figure><img src="https://231248629-files.gitbook.io/~/files/v0/b/gitbook-x-prod.appspot.com/o/spaces%2FPyUbJF1GXLjxdJqm89IQ%2Fuploads%2Fgit-blob-7d88123bc102eb7d4534fcc02992485fe644bb10%2F029fe341f7a43adef1511b88_PaintScout_Edit_Estimate_2024-02-06_at_4.38.26_PM.jpg?alt=media" alt="Screenshot showing the Add Option button on the customer-facing estimate for optional items"><figcaption></figcaption></figure>
2. Added options will now show in the **Options Added** section where they can be removed by selecting **-Remove.**

   <figure><img src="https://231248629-files.gitbook.io/~/files/v0/b/gitbook-x-prod.appspot.com/o/spaces%2FPyUbJF1GXLjxdJqm89IQ%2Fuploads%2Fgit-blob-00281a4dad7da218f8753b878df1dce7ebfbc15e%2Fcf8d654dacc671a48bdf3a0c_PaintScout_Edit_Estimate_2024-02-06_at_4.39.55_PM.jpg?alt=media" alt="Screenshot showing the Options Added section with the Remove button for each option"><figcaption></figcaption></figure>
3. Once your customer is happy with their selections they can virtually accept the estimate!
4. After acceptance, the approved options will show in the **Options Accepted** section and a designated line will show the value in the subtotal box.

   <figure><img src="https://231248629-files.gitbook.io/~/files/v0/b/gitbook-x-prod.appspot.com/o/spaces%2FPyUbJF1GXLjxdJqm89IQ%2Fuploads%2Fgit-blob-a0516d25d1a8c26995609b8b00807f7d3055dc75%2F0f8932a4ebc213adaec08384_Screenshot_2023-11-02_at_4.47.48_PM.png?alt=media" alt="Screenshot showing the Options Accepted section with the value displayed in the subtotal box"><figcaption></figcaption></figure>
5. You can also see the Options Added in the menu sidebar under **Calculations.**

   <figure><img src="https://231248629-files.gitbook.io/~/files/v0/b/gitbook-x-prod.appspot.com/o/spaces%2FPyUbJF1GXLjxdJqm89IQ%2Fuploads%2Fgit-blob-25833a8c6cebbd767ddac737a31da5d8ea9720f8%2Fd6cd8cfcdc04cb8308e4e545_PaintScout_Edit_Estimate_2024-02-06_at_4.54.53_PM.jpg?alt=media" alt="Screenshot showing the Options Added in the Calculations section of the sidebar menu"><figcaption></figcaption></figure>

&#x20;&#x20;

## Related articles

<table data-card-size="large" data-view="cards"><thead><tr><th></th><th></th><th data-hidden data-card-target data-type="content-ref"></th></tr></thead><tbody><tr><td><strong>Working With Options</strong></td><td>Create optional add-on items or services on estimates that customers can choose to include before accepting their quote.</td><td><a href="/support/estimating/line-items-and-options/working-with-options">Working With Options</a></td></tr><tr><td><strong>Additional Work/Change Orders</strong></td><td>Add change orders and additional work to accepted estimates or invoices with customer approval and signature workflows.</td><td><a href="/support/estimating/line-items-and-options/additional-work-change-orders">Additional Work/Change Orders</a></td></tr><tr><td><strong>Additional Work Report</strong></td><td>Track all approved change orders and extra work added to estimates and invoices with approval dates and totals.</td><td><a href="/support/dashboard-and-reports/reports/additional-work-report">Additional Work Report</a></td></tr><tr><td><strong>Options Accepted Report</strong></td><td>View all customer self-accepted options with acceptance dates, estimate details, and totals for each selected upgrade.</td><td><a href="/support/dashboard-and-reports/reports/options-accepted-report">Options Accepted Report</a></td></tr></tbody></table>


# Additional Work/Change Orders

Add change orders and additional work to accepted estimates or invoices with customer approval and signature workflows.

PaintScout's Additional Work feature lets you add change orders to accepted estimates or invoices when customers request extra work after a project starts.

## How does additional work function?

Once an estimate is accepted, you add change orders to the **Additional Work** section. These changes require approval from the customer, office, estimator, or whoever is responsible before they affect the total.

You can add additional work to both estimates and invoices. If you invoice out of PaintScout, add additional work only to the invoice.

## How do you add additional work to an estimate or invoice?

1\. Create an Area or Line Item as an option.

<figure><img src="https://231248629-files.gitbook.io/~/files/v0/b/gitbook-x-prod.appspot.com/o/spaces%2FPyUbJF1GXLjxdJqm89IQ%2Fuploads%2Fgit-blob-77780d2dbcc1aa145702628ef55c7b616c8d6372%2F8ddca95e6cc1944e5f6d144d_Screenshot_2024-06-20_at_2_16_36_PM.png?alt=media" alt="Screenshot showing creating an area or line item as an option on the estimate"><figcaption></figcaption></figure>

2\. Select the item and choose **Move to Additional Work** from the toolbar that has appeared along the bottom of the screen.

<figure><img src="https://231248629-files.gitbook.io/~/files/v0/b/gitbook-x-prod.appspot.com/o/spaces%2FPyUbJF1GXLjxdJqm89IQ%2Fuploads%2Fgit-blob-06d080b939a1c2b78a7b4f8b348d92114186882f%2Fc174039afcc5cda467089d6f_PaintScout_Edit_Invoice_2024-06-20_at_2_17_23_PM.jpg?alt=media" alt="Screenshot showing the Move to Additional Work option in the bottom toolbar"><figcaption></figcaption></figure>

3\. The additional work will now appear in a **Pending Additional Work** section separate from the rest of the items on the estimate/invoice. The additional work will not be officially added to the estimate/invoice until it has been approved.

<figure><img src="https://231248629-files.gitbook.io/~/files/v0/b/gitbook-x-prod.appspot.com/o/spaces%2FPyUbJF1GXLjxdJqm89IQ%2Fuploads%2Fgit-blob-9f666ba486c1fca889beebbf7a3a66c5d53dc06f%2F44920d611ceb02a2c336a9b1_Screenshot_2024-06-20_at_2_18_44_PM.png?alt=media" alt="Screenshot showing the Pending Additional Work section on the estimate"><figcaption></figcaption></figure>

4\. You can accept the additional items in two ways:

* Click the orange **Option Approval Required** button to sign and approve the item(s). This is great for on-site approval.

  <figure><img src="https://231248629-files.gitbook.io/~/files/v0/b/gitbook-x-prod.appspot.com/o/spaces%2FPyUbJF1GXLjxdJqm89IQ%2Fuploads%2Fgit-blob-7d252867f50edd5ca9c7378120baa10181cd6304%2F704b184157f13b7ad06226a7_PaintScout_Edit_Invoice_2024-06-20_at_2_19_19_PM.jpg?alt=media" alt="Screenshot showing the orange Option Approval Required button for on-site approval"><figcaption></figcaption></figure>
* Alternatively, you can send the estimate to the customer. They will now see a new button along the top to **Accept Additional Items.**

  <figure><img src="https://231248629-files.gitbook.io/~/files/v0/b/gitbook-x-prod.appspot.com/o/spaces%2FPyUbJF1GXLjxdJqm89IQ%2Fuploads%2Fgit-blob-76d1a0714f38b62bac90fe46ac7d7a1caa8f90af%2F055470056b156377d79e28cb_PaintScout_Invoice_2024-06-20_at_2_20_46_PM.jpg?alt=media" alt="Screenshot showing the Accept Additional Items button on the customer-facing estimate"><figcaption></figcaption></figure>

5\. A window will appear where the customer can virtually sign and accept the additional work.

<figure><img src="https://231248629-files.gitbook.io/~/files/v0/b/gitbook-x-prod.appspot.com/o/spaces%2FPyUbJF1GXLjxdJqm89IQ%2Fuploads%2Fgit-blob-455679fe144d47144c0c2b6afb8fdcbd66b0b493%2Fa6076f59f0adcbc8646c2614_Screenshot_2024-06-20_at_12_05_05_PM.png?alt=media" alt="Screenshot showing the virtual signature window for accepting additional work"><figcaption></figcaption></figure>

6\. The additional work will then show as accepted (along with the date) and added to the total of the estimate/invoice.

<figure><img src="https://231248629-files.gitbook.io/~/files/v0/b/gitbook-x-prod.appspot.com/o/spaces%2FPyUbJF1GXLjxdJqm89IQ%2Fuploads%2Fgit-blob-75d41b0b2dee5ba0dfcdf0d78dadf7cbb350755c%2F62b7e8c6576c1a627e4af3b5_PaintScout_Invoice_2024-06-20_at_2_23_13_PM.jpg?alt=media" alt="Screenshot showing accepted additional work with acceptance date and updated total"><figcaption></figcaption></figure>

{% hint style="info" %}
If you use QuickBooks Online, net-negative Additional Work automatically creates a credit memo. See [QuickBooks Online](/support/integrations/accounting/quickbooks-online-integration) for details.
{% endhint %}

## Related articles

<table data-card-size="large" data-view="cards"><thead><tr><th></th><th></th><th data-hidden data-card-target data-type="content-ref"></th></tr></thead><tbody><tr><td><strong>Working With Options</strong></td><td>Create optional add-on items or services on estimates that customers can choose to include before accepting their quote.</td><td><a href="/support/estimating/line-items-and-options/working-with-options">Working With Options</a></td></tr><tr><td><strong>Customer Accepted Options</strong></td><td>Enable customers to add optional items directly to their estimate before accepting through the customer-facing interface.</td><td><a href="/support/estimating/line-items-and-options/customer-accepted-options">Customer Accepted Options</a></td></tr></tbody></table>


# Organizing Estimates

Organize your estimates using grouping, hidden items, copy features, and media attachments.

Keep your estimates clean and professional by organizing content intentionally. Group related items, hide internal details from customers, copy repeated scope quickly, and attach photos for customer and crew context.

## In This Section

* [Grouping Items](/support/estimating/organizing-estimates/grouping-items) — Group areas, surfaces, or line items into clearer sections for customers and your team
* [Hidden Items](/support/estimating/organizing-estimates/hidden-items) — Hide surfaces from the customer while keeping their hours and pricing in the totals and on the work order
* [Using the Copy Feature](/support/estimating/organizing-estimates/how-to-use-the-copy-feature) — Duplicate areas or line items, then adjust measurements and item-based counts as needed
* [Adding Media](/support/estimating/organizing-estimates/adding-media) — Upload photos, PDFs, and videos, review thumbnails, and manage file details
* [Viewing & Editing Media](/support/estimating/organizing-estimates/viewing-and-editing-media) — Preview photos, PDFs, and videos, edit images inline, and review multi-page PDFs

&#x20;&#x20;


# Grouping Items

Group surfaces, areas, or line items together to organize estimates by floor, house side, surface type, or custom categories.

Grouping in PaintScout lets you combine related areas, surfaces, or line items into a single named group on your estimate. This makes estimates cleaner and easier for customers to read.

## What is grouping?

The grouping function brings together a set of surfaces or areas to organize your estimate. Common examples:

* Arrange your estimate by floors: Main Floor, Upstairs, Basement, and more.
* Break down each side of a house: Front, Left, Right, Back, and then group them to display as the Whole House.
* Group by surface type: Group up all the trim components together (baseboards, windows, door frames)

***

## How do you make groups?

1\. Start by selecting the areas, surfaces, or line items you want to group by clicking the checkboxes to the left.

<figure><img src="https://231248629-files.gitbook.io/~/files/v0/b/gitbook-x-prod.appspot.com/o/spaces%2FPyUbJF1GXLjxdJqm89IQ%2Fuploads%2Fgit-blob-452a50930335e0523fdafa2a8b11ddeb08e4ccdf%2F0c0927a175c44433d338a26b_Screenshot_2023-12-06_at_2.32.38_PM.png?alt=media" alt="Screenshot showing items selected with checkboxes for grouping on the estimate"><figcaption></figcaption></figure>

2\. Once you have chosen all the items you want to group, select the **Group** option from the toolbar at the bottom of your screen.

<figure><img src="https://231248629-files.gitbook.io/~/files/v0/b/gitbook-x-prod.appspot.com/o/spaces%2FPyUbJF1GXLjxdJqm89IQ%2Fuploads%2Fgit-blob-bc7517cf703dac5c505fdea15dd3bac85e5941c3%2F0917de89516109bd61f70e07_PaintScout_Edit_Estimate_2023-12-06_at_2.32.51_PM.jpg?alt=media" alt="Screenshot showing the Group option in the bottom toolbar after selecting items"><figcaption></figcaption></figure>

3\. A pop-up will appear, where you can then edit your group. You can add a name, adjust the price, and customize the description.

<figure><img src="https://231248629-files.gitbook.io/~/files/v0/b/gitbook-x-prod.appspot.com/o/spaces%2FPyUbJF1GXLjxdJqm89IQ%2Fuploads%2Fgit-blob-1abb23cb1b54485ca95dae54f9c25031285f1ebc%2F8a07f6f50ac6230ef3b7b81f_Screenshot_2023-12-06_at_2.36.46_PM.png?alt=media" alt="Screenshot showing the group editing popup with name, price, and description fields"><figcaption></figcaption></figure>

4\. Scroll down on the window, and you'll find options to add photos to the group or edit individual areas/items by clicking the three dots.

<figure><img src="https://231248629-files.gitbook.io/~/files/v0/b/gitbook-x-prod.appspot.com/o/spaces%2FPyUbJF1GXLjxdJqm89IQ%2Fuploads%2Fgit-blob-a206736502717b75170e5f9412406a98121aeee3%2F28d62a5e5c890d3dd33e62a7_PaintScout_Edit_Estimate_2023-12-06_at_2.39.59_PM.jpg?alt=media" alt="Screenshot showing group options for adding photos and editing individual areas or items"><figcaption></figcaption></figure>

5\. Finally, save your group and this is how it will appear:

<figure><img src="https://231248629-files.gitbook.io/~/files/v0/b/gitbook-x-prod.appspot.com/o/spaces%2FPyUbJF1GXLjxdJqm89IQ%2Fuploads%2Fgit-blob-83c168501ac021d90f39b0094ee9b352a6931b4b%2F03a5afba3706862ce50f0c5b_Screenshot_2023-12-06_at_2.41.54_PM.png?alt=media" alt="Screenshot showing the saved group as it appears on the estimate"><figcaption></figcaption></figure>

***

## How do you edit a group?

1\. Click directly on the group **or** press the three dots on the right side to edit and make changes to the group.

<figure><img src="https://231248629-files.gitbook.io/~/files/v0/b/gitbook-x-prod.appspot.com/o/spaces%2FPyUbJF1GXLjxdJqm89IQ%2Fuploads%2Fgit-blob-ec12259ffbeed4604a17b58698f039a08f9cb91b%2Ffecaca836827643f62d3cb16_PaintScout_Edit_Estimate_2023-12-06_at_2.49.20_PM.jpg?alt=media" alt="Screenshot showing the group with the three dots menu for editing options"><figcaption></figcaption></figure>

2\. You can then click the three dots to the right of the included area you would like to edit.

***

## How do you add more items to a group?

1\. If you've got an existing group, check the box to the left, and also select any additional areas or surfaces you want to include in the group.

2\. After that, hit the **Add to Group** option from the toolbar at the bottom.

<figure><img src="https://231248629-files.gitbook.io/~/files/v0/b/gitbook-x-prod.appspot.com/o/spaces%2FPyUbJF1GXLjxdJqm89IQ%2Fuploads%2Fgit-blob-e3dab13c8104f36a54896aedc243af970e8b7b31%2Fd5b5ea14aae78ec61696d01d_PaintScout_Edit_Estimate_2023-12-06_at_2.54.26_PM.jpg?alt=media" alt="Screenshot showing the Add to Group option in the toolbar for adding items to an existing group"><figcaption></figcaption></figure>

**Please note that once you have grouped items, you can only add similar items to the group.**

* Areas can be grouped with other areas.
* Surfaces can be grouped with other surfaces.

For example, if you group 2 areas (rooms) together and then switch to surface view, you cannot add surfaces to that group, only other areas!

***

## How do you ungroup items?

You can ungroup items in three ways:

* Use the checkbox to highlight the group, then press **Ungroup**.

  <figure><img src="https://231248629-files.gitbook.io/~/files/v0/b/gitbook-x-prod.appspot.com/o/spaces%2FPyUbJF1GXLjxdJqm89IQ%2Fuploads%2Fgit-blob-2a2f3dfa5b6c2eb715506cf2bd85eee80c36bb49%2F4ab844f92c557fed369d317c_PaintScout_Edit_Estimate_2023-12-06_at_2.56.35_PM.jpg?alt=media" alt="Screenshot showing the Ungroup option in the toolbar after selecting a group with the checkbox"><figcaption></figcaption></figure>
* Click on the group, as though you are going to edit it, and then press **Ungroup Items.**

  <figure><img src="https://231248629-files.gitbook.io/~/files/v0/b/gitbook-x-prod.appspot.com/o/spaces%2FPyUbJF1GXLjxdJqm89IQ%2Fuploads%2Fgit-blob-11001e956ac2f6fadf775fe97f1f378399d9668c%2F45bc007402eb439d22b91708_PaintScout_Edit_Estimate_2023-12-06_at_2.58.01_PM.jpg?alt=media" alt="Screenshot showing the Ungroup Items button inside the group editor"><figcaption></figcaption></figure>
* Click the three dots on the far right side of the group, then select **Ungroup.**

  <figure><img src="https://231248629-files.gitbook.io/~/files/v0/b/gitbook-x-prod.appspot.com/o/spaces%2FPyUbJF1GXLjxdJqm89IQ%2Fuploads%2Fgit-blob-679d56d6957789c4ef773093c57ccba6b4f789a7%2F9049dc535dee98fa355063fa_PaintScout_Edit_Estimate_2023-12-06_at_2.59.56_PM.jpg?alt=media" alt="Screenshot showing the Ungroup option in the three dots menu on the group"><figcaption></figcaption></figure>

&#x20;&#x20;

## Related articles

<table data-card-size="large" data-view="cards"><thead><tr><th></th><th></th><th data-hidden data-card-target data-type="content-ref"></th></tr></thead><tbody><tr><td><strong>Hidden Items</strong></td><td>Hide surfaces from customer estimates while keeping hours and pricing in totals and showing items on work orders.</td><td><a href="/support/estimating/organizing-estimates/hidden-items">Hidden Items</a></td></tr><tr><td><strong>Using the Copy Feature</strong></td><td>Speed up estimating by duplicating areas or line items using the copy feature to avoid rebuilding each from scratch.</td><td><a href="/support/estimating/organizing-estimates/how-to-use-the-copy-feature">Using the Copy Feature</a></td></tr></tbody></table>


# Hidden Items

Hide surfaces from customer estimates while keeping hours and pricing in totals and showing items on work orders.

Hidden Items in PaintScout let you include surfaces in your estimate totals without showing them to the customer. This keeps prep work and other internal items priced correctly while keeping the estimate clean.

## What are hidden items?

Hidden items include specific surfaces in your estimate's pricing without displaying them in the estimate description. Their hours and cost still count toward the total, and they appear on the work order for your crew.

***

## How do you hide items on an estimate?

1. On the surface, scroll down to the **Advanced Options** section. (You can also set this as the default for a rate in your [Advanced Production Rate Options](/support/customization/pricing-and-rates/advanced-production-rate-options).)
2. Select the **Hide from Customer** box.

<figure><img src="https://231248629-files.gitbook.io/~/files/v0/b/gitbook-x-prod.appspot.com/o/spaces%2FPyUbJF1GXLjxdJqm89IQ%2Fuploads%2Fgit-blob-23f56a735f0d69bf39616f2cff07d39da8e89c58%2F3f865e12ee82f99bfa8ba0cc_PaintScout_Settings_2024-04-04_at_4_38_42_PM.jpg?alt=media" alt="Screenshot showing the Hide from Customer checkbox in the Advanced Options section of a surface"><figcaption></figcaption></figure>

You'll notice that hidden items are marked with an **X** symbol. This makes it easy to identify which items will be hidden on your estimate.

<figure><img src="https://231248629-files.gitbook.io/~/files/v0/b/gitbook-x-prod.appspot.com/o/spaces%2FPyUbJF1GXLjxdJqm89IQ%2Fuploads%2Fgit-blob-f58bdff995b7378fc9be6837043488c0c84afd5c%2Fc21f876e9b5156eb187058a4_PaintScout_Edit_Estimate_2024-04-04_at_4_40_46_PM.jpg?alt=media" alt="Screenshot showing hidden items marked with an X symbol on the estimate"><figcaption></figcaption></figure>

***

## What happens to hidden items?

* Hidden items will ***not*** show up in your estimate description.
* The hours and pricing related to the hidden item are still included in the total price and overall hours.
* Hidden items ***will*** be visible on the [work order](/support/estimating/managing-estimates-and-work-orders/work-orders/working-with-work-orders).

***

## What happens when all surfaces in an area are hidden?

When you hide ***all*** surfaces in an area, a warning message appears:

<figure><img src="https://231248629-files.gitbook.io/~/files/v0/b/gitbook-x-prod.appspot.com/o/spaces%2FPyUbJF1GXLjxdJqm89IQ%2Fuploads%2Fgit-blob-14c28d7b1545e4b3c77d30461b43aeaad6922441%2F575ffe933236d9023a0c768d_Screenshot_2024-04-04_at_4_42_25_PM.png?alt=media" alt="Screenshot showing the warning message when all surfaces in an area are hidden"><figcaption></figcaption></figure>

The content in this section won't appear in the estimate, but the pricing and hours will continue to contribute to the total cost. **This area can now be viewed and edited from the work order.**

Your estimate will also show a banner along the top to indicate that hidden items are present:

<figure><img src="https://231248629-files.gitbook.io/~/files/v0/b/gitbook-x-prod.appspot.com/o/spaces%2FPyUbJF1GXLjxdJqm89IQ%2Fuploads%2Fgit-blob-1eeb12f2c302de2b165950fa4c2a955ec00b53f5%2Fb2a1496c2c2c3d9193a16541_Screenshot_2023-10-16_at_12.29.16_PM.png?alt=media" alt="Screenshot showing the banner indicating hidden items are present on the estimate"><figcaption></figcaption></figure>

&#x20;&#x20;

## Related articles

<table data-card-size="large" data-view="cards"><thead><tr><th></th><th></th><th data-hidden data-card-target data-type="content-ref"></th></tr></thead><tbody><tr><td><strong>Grouping Items</strong></td><td>Group surfaces, areas, or line items together to organize estimates by floor, house side, surface type, or custom categories.</td><td><a href="/support/estimating/organizing-estimates/grouping-items">Grouping Items</a></td></tr><tr><td><strong>Using the Copy Feature</strong></td><td>Speed up estimating by duplicating areas or line items using the copy feature to avoid rebuilding each from scratch.</td><td><a href="/support/estimating/organizing-estimates/how-to-use-the-copy-feature">Using the Copy Feature</a></td></tr></tbody></table>


# Using the Copy Feature

Speed up estimating by duplicating areas or line items using the copy feature to avoid rebuilding each from scratch.

The copy feature in PaintScout duplicates areas or line items within an estimate, saving time when multiple rooms or items share similar configurations.

## How do you copy an area or line item?

1. Locate the Area or Line Item you want to copy.
2. Click on the three dots icon to the right of the area or line item.
3. From the dropdown menu, select **Copy**. This will instantly duplicate the area or line item.
4. Once copied, you can rename the area, update measurements, and adjust surface details to fit the new space requirements.

* Sqft and lnft based surfaces will automatically recalculate based on the new measurements
* Item-based rates will need to be manually adjusted.

<figure><img src="https://231248629-files.gitbook.io/~/files/v0/b/gitbook-x-prod.appspot.com/o/spaces%2FPyUbJF1GXLjxdJqm89IQ%2Fuploads%2Fgit-blob-e895b5553c9384ed1b688527f97a0d0403e48882%2F1237075844_a5bb7a3766d6ff268771e7c8144f?alt=media" alt="Screenshot showing the three-dot menu with the Copy option to duplicate an area or line item"><figcaption></figcaption></figure>

&#x20;&#x20;

## Related articles

<table data-card-size="large" data-view="cards"><thead><tr><th></th><th></th><th data-hidden data-card-target data-type="content-ref"></th></tr></thead><tbody><tr><td><strong>Grouping Items</strong></td><td>Group surfaces, areas, or line items together to organize estimates by floor, house side, surface type, or custom categories.</td><td><a href="/support/estimating/organizing-estimates/grouping-items">Grouping Items</a></td></tr><tr><td><strong>Hidden Items</strong></td><td>Hide surfaces from customer estimates while keeping hours and pricing in totals and showing items on work orders.</td><td><a href="/support/estimating/organizing-estimates/hidden-items">Hidden Items</a></td></tr></tbody></table>


# Adding Media

Add photos, PDFs, and videos to estimates and work orders, review thumbnail previews, and manage file details inline.

Attach photos, PDFs, and videos to estimates, invoices, and work orders with PaintScout's Media Viewer. Uploads appear as thumbnails so you can review files before opening them.

***

## How do you add media to estimates, work orders and invoices?

1. Click the **area** or **line item** where you want to add media.
2. Click **Add Media**.
3. In the **Add File** dialog, choose one or more files from your device or a connected source.

* With the **Operations add-on**, you can pull deal images into a linked estimate without leaving the estimate page. [Learn more about media on deals](/support/operations/deals/media-on-deals#use-deal-images-on-linked-estimates)
* With the **CompanyCam** integration, you can select original or annotated media from your CompanyCam library. [Learn more about CompanyCam](/support/integrations/media-and-files/companycam-integration)

<figure><img src="https://231248629-files.gitbook.io/~/files/v0/b/gitbook-x-prod.appspot.com/o/spaces%2FPyUbJF1GXLjxdJqm89IQ%2Fuploads%2Fgit-blob-61210c37a0bfc71ca74c8e969cb5c6d0728817e5%2FZight%20Recording%202026-06-19%20at%2009.59.13%20AM%20(1).gif?alt=media" alt="Screenshot showing the Add File dialog with upload options and connected media sources"><figcaption></figcaption></figure>

4. The files appear as thumbnails in the attachment panel.
5. Click a thumbnail to open it in the viewer.
6. Add or edit the file’s **title** and **description**. Then choose where it appears — on the estimate, work order, or both.

* For PDFs, you can scroll through pages and zoom in or out.
* For videos, use the inline player or open the video in a new browser tab.

Supported file types include JPEG, PNG, GIF, HEIC, PDF, MP4, MOV, and WebM.

<figure><img src="https://231248629-files.gitbook.io/~/files/v0/b/gitbook-x-prod.appspot.com/o/spaces%2FPyUbJF1GXLjxdJqm89IQ%2Fuploads%2Fgit-blob-6f6e4c1053567d617ee6a8580dea59263d8e394a%2FZight%20Recording%202026-06-19%20at%2010.05.10%20AM.gif?alt=media" alt="Screenshot showing uploaded media thumbnails with title, description, and visibility options"><figcaption></figcaption></figure>

***

## What can you do from the Media Viewer?

From the Media Viewer, you can:

* Review photos, PDFs, and videos at a glance.
* Open any file from its thumbnail.
* Play videos in the viewer.
* Open any photo, PDF, or video in a new browser tab.

Photos, PDFs, and videos help confirm scope for customers and give your crew more context.

{% hint style="success" %}
The media viewer also appears when uploading files to contacts and companies.
{% endhint %}

&#x20;&#x20;

## Related articles

<table data-card-size="large" data-view="cards"><thead><tr><th></th><th></th><th data-hidden data-card-target data-type="content-ref"></th></tr></thead><tbody><tr><td><strong>CompanyCam</strong></td><td>Connect CompanyCam to access project photos directly in your PaintScout estimates</td><td><a href="/support/integrations/media-and-files/companycam-integration">CompanyCam</a></td></tr><tr><td><strong>Dropbox</strong></td><td>Connect Dropbox to automatically upload estimate and work order PDFs to cloud storage</td><td><a href="/support/integrations/media-and-files/dropbox-integration">Dropbox</a></td></tr></tbody></table>


# Viewing & Editing Media

Preview photos, PDFs, and videos, edit images inline, and view multi-page PDFs.

PaintScout’s Media Viewer lets you preview photos, PDFs, and videos in one place. You can edit images, review multi-page PDFs, play videos, and open files full screen.

***

## Opening the media viewer

1. On an estimate, invoice, or work order, click the **area** or **line item** with media. Or scroll to the **Media** section.
2. Click the file **thumbnail**.
3. The file opens in the viewer.
4. Click the **expand** icon in the top right to open the photo, PDF, or video in a new browser tab.

* Use **Change** to replace an image.
* Use **Delete** to remove the selected photo, PDF, or video.

The media viewer shows all uploads as thumbnails. You can review files before opening them.

{% hint style="info" %}
Drag the viewer margins to make thumbnails larger or smaller.
{% endhint %}

<figure><img src="https://231248629-files.gitbook.io/~/files/v0/b/gitbook-x-prod.appspot.com/o/spaces%2FPyUbJF1GXLjxdJqm89IQ%2Fuploads%2Fgit-blob-5302711d624d41b14bf4e73a7981019323a5c197%2FZight%20Recording%202026-06-19%20at%2010.15.18%20AM.gif?alt=media" alt="Media viewer showing file thumbnails and the selected file preview"><figcaption></figcaption></figure>

***

## Edit an image

Any user who can edit the estimate, invoice, or work order can also edit its images.

{% hint style="info" %}
Images added from [CompanyCam](/support/integrations/media-and-files/companycam-integration) can be viewed and replaced, but they can’t be edited in PaintScout.
{% endhint %}

1. Select an image in the media viewer.
2. Click **Edit**.
3. Use the available tools to:

* Add text.
* Add shapes and arrows.
* Crop or rotate the image.
* Adjust brightness and contrast.
* Click the <img src="https://231248629-files.gitbook.io/~/files/v0/b/gitbook-x-prod.appspot.com/o/spaces%2FPyUbJF1GXLjxdJqm89IQ%2Fuploads%2Fgit-blob-9712b60fe34067a8e7059c1b94a828368cce4dde%2FScreenshot%202026-06-19%20at%2010.53.31%E2%80%AFAM.png?alt=media" alt="" data-size="line"> icon to select and adjust your edits.

4. Use **Undo**, **Redo**, or **Clear** while editing.
5. Save your changes.

{% hint style="warning" %}
Saved image edits update everywhere that image is used. If the image appears on an estimate or invoice, customers will also see the edited version.
{% endhint %}
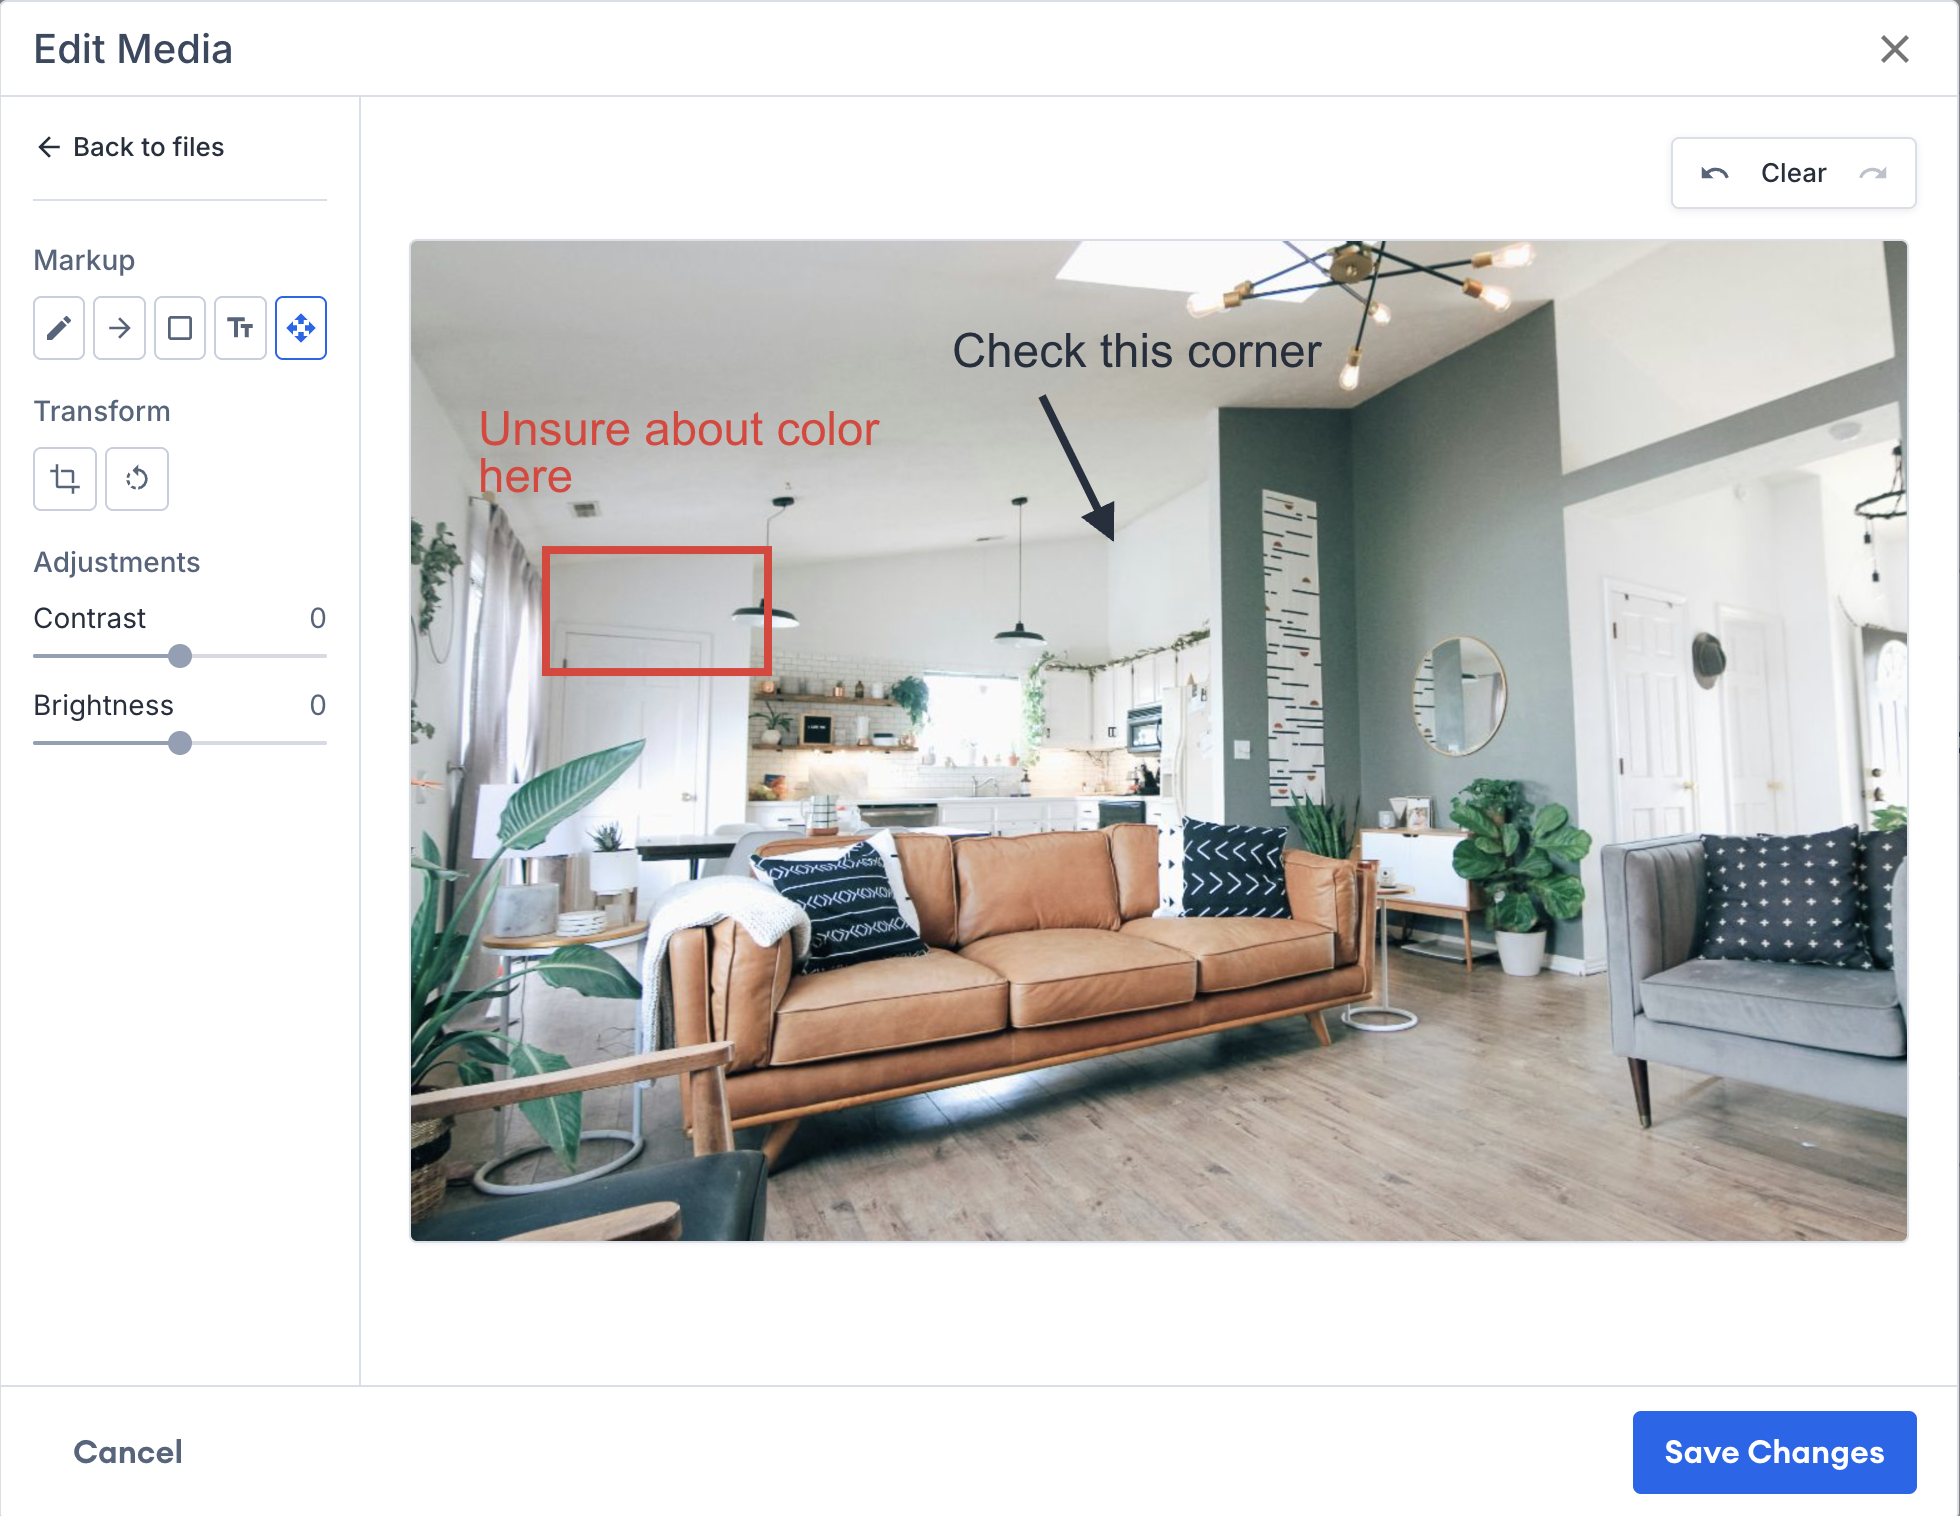
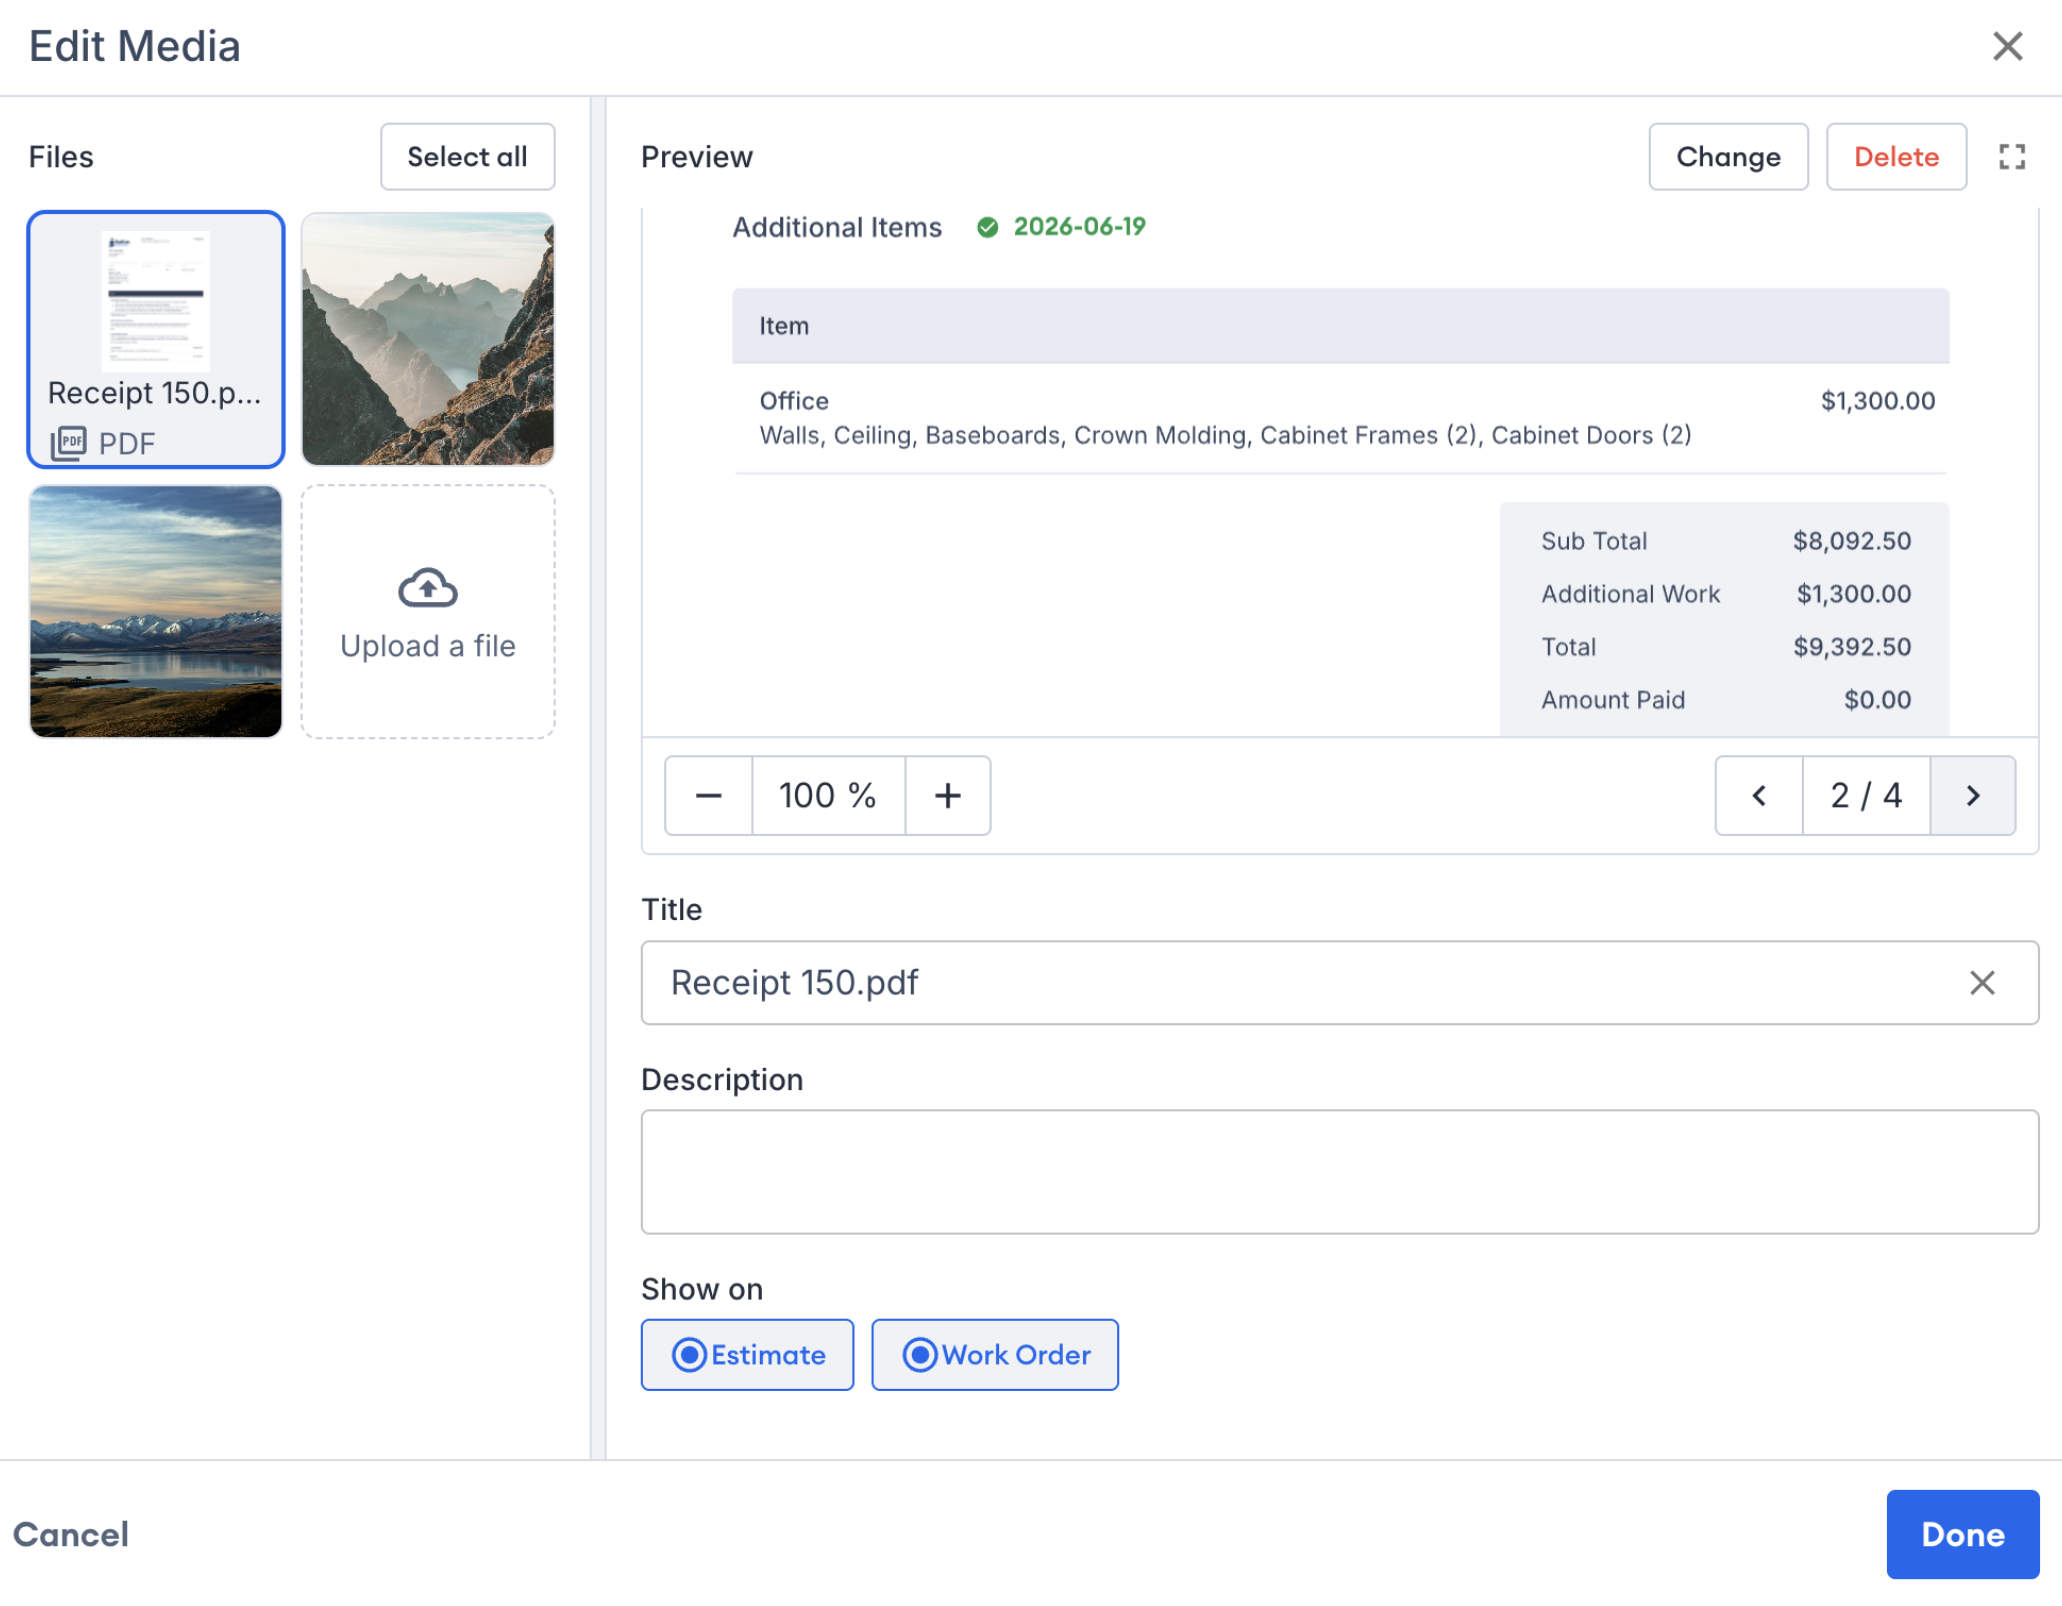
<figure><img src="https://231248629-files.gitbook.io/~/files/v0/b/gitbook-x-prod.appspot.com/o/spaces%2FPyUbJF1GXLjxdJqm89IQ%2Fuploads%2Fgit-blob-0bc4cb8213c5a831da7d71c475b49262ed4a79bc%2FScreenshot%202026-06-19%20at%2010.23.27%E2%80%AFAM.png?alt=media" alt="Image editor showing annotation, crop, and adjustment tools"><figcaption></figcaption></figure>

***

## View a PDF

When you open a PDF, you can:

* Preview the full PDF.
* Scroll through every page within the viewer.
* Jump to a specific page.
* Edit the title and description.

{% hint style="info" %}
PDFs can be viewed, but not edited.
{% endhint %}

<figure><img src="https://231248629-files.gitbook.io/~/files/v0/b/gitbook-x-prod.appspot.com/o/spaces%2FPyUbJF1GXLjxdJqm89IQ%2Fuploads%2Fgit-blob-5d6d123512622eb4daa23b23bd0b8e8cc8cf7706%2FScreenshot%202026-06-19%20at%2010.54.37%E2%80%AFAM.png?alt=media" alt="PDF open in the media viewer with page navigation and preview controls"><figcaption></figcaption></figure>

## Play a video

Select a video thumbnail to play it in the media viewer. Video thumbnails show a play badge.

* Use the player controls to start, pause, or seek through the video
* Click **expand** to open it in a new browser tab.

<figure><img src="https://231248629-files.gitbook.io/~/files/v0/b/gitbook-x-prod.appspot.com/o/spaces%2FPyUbJF1GXLjxdJqm89IQ%2Fuploads%2Fgit-blob-f2fd0b0f8b0c5e0f148624ddfafc6832541928cc%2FScreenshot%202026-08-17%20at%2011.19.55%E2%80%AFAM.png?alt=media" alt=""><figcaption></figcaption></figure>

***

### Syncing CompanyCam Markups

If you add a [CompanyCam](/support/integrations/media-and-files/companycam-integration) photo to an estimate, invoice, or deal, you can sync later markups.

1. Select the image in the media viewer.
2. Click **Sync**.

<figure><img src="https://231248629-files.gitbook.io/~/files/v0/b/gitbook-x-prod.appspot.com/o/spaces%2FPyUbJF1GXLjxdJqm89IQ%2Fuploads%2Fgit-blob-e9fba3218212f2fd46f054337cc886d4c16d97aa%2FScreenshot%202026-08-17%20at%2011.12.52%E2%80%AFAM.png?alt=media" alt=""><figcaption></figcaption></figure>

3. If CompanyCam has a markup not reflected in PaintScout, you’ll see an update prompt.

* Choosing **Keep Original** hides future update prompts for that image.

<figure><img src="https://231248629-files.gitbook.io/~/files/v0/b/gitbook-x-prod.appspot.com/o/spaces%2FPyUbJF1GXLjxdJqm89IQ%2Fuploads%2Fgit-blob-cea9e204c27d5f64445ceb916cde50583f95051f%2FScreenshot%202026-08-17%20at%2011.16.22%E2%80%AFAM.png?alt=media" alt=""><figcaption></figcaption></figure>

&#x20;&#x20;

***

## Related articles

* [Adding Media](/support/estimating/organizing-estimates/adding-media) — Upload photos, PDFs, and videos, review thumbnails, and manage file details
* [Media Attachments in Operations](/support/operations/deals/media-on-deals) — Use the same media tools on deals, contacts, and companies
* [Working With Work Orders](/support/estimating/managing-estimates-and-work-orders/work-orders/working-with-work-orders) — Share crew-facing documents with the right attachments


# Notes & Communication

Add notes to estimates for internal use, customer communication, and crew instructions.

Use notes to keep job details organized for the right audience. PaintScout supports private estimator notes, crew-facing work order notes, and other note types for customer, contact, and status-specific context.

## In This Section

* [Notes Overview](/support/estimating/notes-and-communication/notes-in-paintscout) — Compare client, crew, estimator, contact, and status change notes and where each one appears
* [Estimator Notes](/support/estimating/notes-and-communication/estimator-notes) — Keep private job details in an internal scratchpad hidden from customers and work orders
* [Crew Notes](/support/estimating/notes-and-communication/adding-crew-notes) — Add internal instructions to areas, surfaces, line items, or the work order for your crew

&#x20;&#x20;


# Notes Overview

Learn about all types of notes in PaintScout including client notes, crew notes, estimator notes, contact notes, and status change notes.

PaintScout has five types of notes, each visible to different audiences: client notes, crew notes, estimator notes, contact notes, and status change notes. Choose the right type based on who needs to see the information.

## Client Notes

### Estimate Notes

You can leave a note that will appear on the estimate underneath the totals box. Open the sidebar menu on your right and select **Advanced,** then leave your note under the **Client Note** section.

<figure><img src="https://231248629-files.gitbook.io/~/files/v0/b/gitbook-x-prod.appspot.com/o/spaces%2FPyUbJF1GXLjxdJqm89IQ%2Fuploads%2Fgit-blob-0a069066a724baace8f95a31de087b96e0671d38%2F20dc8554dccd79714f388d3d_Screen_Shot_2023-07-04_at_10.22.11_AM.png?alt=media" alt="Screenshot showing the Client Note section under Advanced in the sidebar menu"><figcaption></figcaption></figure>

### Area Notes

If you want to add a note to your customer about a specific area, open the area > click the **edit** at the top > **Notes** button > **Client Note**.

<figure><img src="https://231248629-files.gitbook.io/~/files/v0/b/gitbook-x-prod.appspot.com/o/spaces%2FPyUbJF1GXLjxdJqm89IQ%2Fuploads%2Fgit-blob-32416a3da34c5cf7380266461a0a0dbe8cb2acd3%2Fa0e92c39a7e22e1af598a99d_Screen_Recording_2023-07-04_at_11.41.08_AM.gif?alt=media" alt="Animated walkthrough showing how to add a client note to a specific area via the Edit and Notes buttons"><figcaption></figcaption></figure>

***

## Crew Notes

👀 **Crew notes are only visible to your team and will not be seen by your customers.**

### General Notes

You can add crew-related information or any important details for your production team in the **Crew Note** section on work orders.

To update the general crew note, navigate to the work order and select the **Edit Crew Note** button or the pencil icon.

<figure><img src="https://231248629-files.gitbook.io/~/files/v0/b/gitbook-x-prod.appspot.com/o/spaces%2FPyUbJF1GXLjxdJqm89IQ%2Fuploads%2Fgit-blob-810fdb4b7858aa4e01da180db04b02d44f5a1ff0%2F389cf1b0e2e8118b20bb0f13_Screen_Shot_2023-07-04_at_11.13.28_AM.png?alt=media" alt="Screenshot showing the general Crew Note section on the work order with the Edit Crew Note button"><figcaption></figcaption></figure>

### Surface Notes

You can leave crew notes on individual surfaces by clicking on an area, selecting the surface, and scrolling to the **Crew Note** section (or click the notes button at the bottom).

<figure><img src="https://231248629-files.gitbook.io/~/files/v0/b/gitbook-x-prod.appspot.com/o/spaces%2FPyUbJF1GXLjxdJqm89IQ%2Fuploads%2Fgit-blob-8ab8067b3641c34ef3a50ebf8986a4e85dac6119%2F184c13bd0d5ef6ef639043a9_PaintScout_Edit_Estimate_2023-12-27_at_4.59.40_PM.jpg?alt=media" alt="Screenshot showing the Crew Note input field on an individual surface within an area"><figcaption></figcaption></figure>

The note will appear on the work order under the surface.

<figure><img src="https://231248629-files.gitbook.io/~/files/v0/b/gitbook-x-prod.appspot.com/o/spaces%2FPyUbJF1GXLjxdJqm89IQ%2Fuploads%2Fgit-blob-f500aec0394179954a675157fab5792e2373e1ac%2Ff60a1dddbc086f420b760df6_Screen_Shot_2023-07-04_at_10.33.36_AM.png?alt=media" alt="Screenshot showing a surface crew note displayed on the work order under the surface"><figcaption></figcaption></figure>

### Area Notes

You can add a crew note to an entire area by clicking the area > **Edit** at the top > **Notes** button > fill in your information in the **Crew Note** box.

<figure><img src="https://231248629-files.gitbook.io/~/files/v0/b/gitbook-x-prod.appspot.com/o/spaces%2FPyUbJF1GXLjxdJqm89IQ%2Fuploads%2Fgit-blob-417264539015809f4cf3bfb39a6977896358a105%2F3f7c86ecaf055ba74f99e227_Screen_Recording_2023-07-04_at_11.34.57_AM.gif?alt=media" alt="Animated walkthrough showing how to add a crew note to an area via Edit, Notes, and the Crew Note box"><figcaption></figcaption></figure>

The note will appear on the work order under the area.

<figure><img src="https://231248629-files.gitbook.io/~/files/v0/b/gitbook-x-prod.appspot.com/o/spaces%2FPyUbJF1GXLjxdJqm89IQ%2Fuploads%2Fgit-blob-293367bf922927ad8406dbc94ca232eb84b5e65b%2F9db55417c74163187fd16f1a_Image_2023-07-04_at_11.36.50_AM.jpg?alt=media" alt="Screenshot showing a highlighted area crew note displayed on the work order"><figcaption></figcaption></figure>

{% hint style="info" %}
If you would like your Crew Notes to be highlighted as seen above, [reach out to our support team](mailto:support@paintscout.com) to have the feature activated!
{% endhint %}

***

## Estimator Notes

During your initial walk-through, you can use the Estimator Notes section as your virtual scratch pad to jot down important details. These notes remain completely internal and are only visible to other PaintScout users. They will not be shown on the work order or estimate.

To add Estimator notes, click the **Notes** tab within your estimate.

<figure><img src="https://231248629-files.gitbook.io/~/files/v0/b/gitbook-x-prod.appspot.com/o/spaces%2FPyUbJF1GXLjxdJqm89IQ%2Fuploads%2Fgit-blob-c3640a45abe4525cc58f820b58173edfe82a3f4d%2F075619f41575bc1832613da5_Screen_Shot_2023-07-04_at_11.09.49_AM.png?alt=media" alt="Screenshot showing the Estimator Notes tab used as an internal scratch pad"><figcaption></figcaption></figure>

***

## Contact Notes

You can use the Notes section on contact profiles to leave important information about your customers. These contact notes are strictly internal and will not be visible on the work order or estimate. However, they will show up on the exported report of your contact list.

To add a contact note, simply edit the contact directly on the estimate or go to their profile under the People tab and use the provided Notes section.

<figure><img src="https://231248629-files.gitbook.io/~/files/v0/b/gitbook-x-prod.appspot.com/o/spaces%2FPyUbJF1GXLjxdJqm89IQ%2Fuploads%2Fgit-blob-5ff3bd4af3ab47ca42e46c6744c04c0cab227cc7%2F6535a5c817c968bfe8655e74_Screen_Shot_2023-07-04_at_10.13.52_AM.png?alt=media" alt="Screenshot showing the Notes section on a contact profile for internal customer notes"><figcaption></figcaption></figure>

***

## Status Change Notes

Sometimes, you may need to indicate the reasons behind a customer's decision, such as a declined estimate or putting it on hold. In such cases, you can leave a note by clicking the **Status** in the estimate and typing your message in the **Status Change Reason Box**.

These notes won't be displayed on the estimate or work order but will appear as an internal banner along the top of the estimate, visible to other PaintScout users.

<figure><img src="https://231248629-files.gitbook.io/~/files/v0/b/gitbook-x-prod.appspot.com/o/spaces%2FPyUbJF1GXLjxdJqm89IQ%2Fuploads%2Fgit-blob-8555774b9083487121dda063ffe2b2ddafe49b99%2Fe525268c46398088b86a04ab_Screen_Shot_2023-07-04_at_11.12.38_AM.png?alt=media" alt="Screenshot showing the Status Change Reason box for adding internal notes when changing estimate status"><figcaption></figcaption></figure>

&#x20;&#x20;

## Related articles

<table data-card-size="large" data-view="cards"><thead><tr><th></th><th></th><th data-hidden data-card-target data-type="content-ref"></th></tr></thead><tbody><tr><td><strong>Estimator Notes</strong></td><td>Use estimator notes as a personal scratchpad for internal job details that remain hidden from customers and work orders.</td><td><a href="/support/estimating/notes-and-communication/estimator-notes">Estimator Notes</a></td></tr><tr><td><strong>Crew Notes</strong></td><td>Add crew notes to areas, surfaces, line items, or work orders to communicate important information hidden from customers.</td><td><a href="/support/estimating/notes-and-communication/adding-crew-notes">Crew Notes</a></td></tr></tbody></table>


# Estimator Notes

Use estimator notes as a personal scratchpad for internal job details that remain hidden from customers and work orders.

Estimator Notes are a private scratchpad in PaintScout for recording internal job details. These notes are hidden from customers and do not appear on estimates or work orders.

## What are estimator notes?

Estimator notes let you jot down important details about a job for your own reference. They are invisible to customers and crew.

## How do you access estimator notes?

1\. Click the **Notes** tab at the top of your estimate.

<figure><img src="https://231248629-files.gitbook.io/~/files/v0/b/gitbook-x-prod.appspot.com/o/spaces%2FPyUbJF1GXLjxdJqm89IQ%2Fuploads%2Fgit-blob-1fdcbaa1e74f51d324580c05aba18b68b7868183%2F5c4962a791ffdc4b585261c6_PaintScout_Edit_Estimate_2023-12-22_at_11.03.31_AM.jpg?alt=media" alt="Screenshot showing the Notes tab at the top of the estimate"><figcaption></figcaption></figure>

2\. Add your notes in the provided box:

<figure><img src="https://231248629-files.gitbook.io/~/files/v0/b/gitbook-x-prod.appspot.com/o/spaces%2FPyUbJF1GXLjxdJqm89IQ%2Fuploads%2Fgit-blob-7352d403cc88c28568569f95a85265a06217c71c%2F590e6a69c35039c9b58ac1ca_Screenshot_2023-12-22_at_11.05.21_AM.png?alt=media" alt="Screenshot showing the estimator notes text entry box for adding personal notes"><figcaption></figcaption></figure>

## What should you put in estimator notes?

Use estimator notes for any information related to the customer or project that you need to reference later. Common uses include:

* Measurements and dimensions you took on-site
* Customer preferences or special requests (e.g., specific finishes, color choices)
* Material or product notes
* Instructions for your team
* Follow-up reminders (e.g., schedule a second site visit)
* Deadlines or scheduling constraints

&#x20;&#x20;

## Related articles

<table data-card-size="large" data-view="cards"><thead><tr><th></th><th></th><th data-hidden data-card-target data-type="content-ref"></th></tr></thead><tbody><tr><td><strong>Notes Overview</strong></td><td>Learn about all types of notes in PaintScout including client notes, crew notes, estimator notes, contact notes, and status change notes.</td><td><a href="/support/estimating/notes-and-communication/notes-in-paintscout">Notes Overview</a></td></tr><tr><td><strong>Crew Notes</strong></td><td>Add crew notes to areas, surfaces, line items, or work orders to communicate important information hidden from customers.</td><td><a href="/support/estimating/notes-and-communication/adding-crew-notes">Crew Notes</a></td></tr></tbody></table>


# Crew Notes

Add crew notes to areas, surfaces, line items, or work orders to communicate important information hidden from customers.

Crew notes in PaintScout are internal notes hidden from customers that appear only on work orders. Use them to communicate important job details to your production team.

## What is a crew note?

A crew note is a note hidden from the customer that only shows on the work order. You can write crew notes in four different places:

## Option 1: On an Area

Include a note for your team about an entire area such as the office.

1\. Open the area and select the **add notes** button along the bottom.

<figure><img src="https://231248629-files.gitbook.io/~/files/v0/b/gitbook-x-prod.appspot.com/o/spaces%2FPyUbJF1GXLjxdJqm89IQ%2Fuploads%2Fgit-blob-e6edf01e6e6efdb6816655b05e883057ae015919%2F6aa73fab27531dae50b21ed9_PaintScout_Edit_Estimate_2024-01-31_at_4.48.41_PM.jpg?alt=media" alt="Screenshot showing the Add Notes button at the bottom of an area"><figcaption></figcaption></figure>

2\. Include your note in the **crew note** section.

<figure><img src="https://231248629-files.gitbook.io/~/files/v0/b/gitbook-x-prod.appspot.com/o/spaces%2FPyUbJF1GXLjxdJqm89IQ%2Fuploads%2Fgit-blob-d4c0ac944c87c34df5ccf0dbf905c15850af084a%2F4bf074bc1a2499b0aae79f49_Screenshot_2023-12-28_at_4.25.18_PM.png?alt=media" alt="Screenshot showing the crew note text entry section on an area"><figcaption></figcaption></figure>

3\. This note will show on the work order at the bottom of the area.

<figure><img src="https://231248629-files.gitbook.io/~/files/v0/b/gitbook-x-prod.appspot.com/o/spaces%2FPyUbJF1GXLjxdJqm89IQ%2Fuploads%2Fgit-blob-b0d495c82eb5a84099c0664440e2f1ab41758055%2F2aece7e5a9919cde1ca1e291_PaintScout_Edit_Estimate_2023-12-28_at_4.26.12_PM.jpg?alt=media" alt="Screenshot showing the crew note displayed on the work order at the bottom of the area"><figcaption></figcaption></figure>

***

## Option 2: On a Surface

1\. Open the surface you would like to add a crew note to and click the **Notes** button. Include your note in the **crew note** section.

<figure><img src="https://231248629-files.gitbook.io/~/files/v0/b/gitbook-x-prod.appspot.com/o/spaces%2FPyUbJF1GXLjxdJqm89IQ%2Fuploads%2Fgit-blob-5b0d0a3c91883b75647cc6fa14ffdca94c237436%2F31b43c288ecb3aebdedbe1c9_PaintScout_Edit_Estimate_2023-12-28_at_4.32.36_PM.jpg?alt=media" alt="Screenshot showing the Notes button and crew note section on a surface"><figcaption></figcaption></figure>

2\. This note will appear on the work order below the given surface.

<figure><img src="https://231248629-files.gitbook.io/~/files/v0/b/gitbook-x-prod.appspot.com/o/spaces%2FPyUbJF1GXLjxdJqm89IQ%2Fuploads%2Fgit-blob-91febe6af85fd28b27d34123f0e1c46a76d11c60%2Fc802388e2eb34bae5be55622_PaintScout_Edit_Estimate_2023-12-28_at_4.35.51_PM.jpg?alt=media" alt="Screenshot showing the crew note displayed on the work order below the surface"><figcaption></figcaption></figure>

***

## Option 3: On a Line Item

1\. Open the line item and select the **Notes** button to add your crew note.

<figure><img src="https://231248629-files.gitbook.io/~/files/v0/b/gitbook-x-prod.appspot.com/o/spaces%2FPyUbJF1GXLjxdJqm89IQ%2Fuploads%2Fgit-blob-0b373a4ad335502f7d2b1474188c35fd8f3b328e%2F64672a7604d9af4b62f65a12_PaintScout_Edit_Estimate_2023-12-28_at_4.38.47_PM.jpg?alt=media" alt="Screenshot showing the Notes button and crew note section on a line item"><figcaption></figcaption></figure>

2\. This note will appear on the work order below the line item.

<figure><img src="https://231248629-files.gitbook.io/~/files/v0/b/gitbook-x-prod.appspot.com/o/spaces%2FPyUbJF1GXLjxdJqm89IQ%2Fuploads%2Fgit-blob-48fd6355f2b906ee0efeb0cfe859f95f69b5cf2b%2F0b412d7904d54b115b25e6d4_Screenshot_2023-12-28_at_4.39.55_PM.png?alt=media" alt="Screenshot showing the crew note displayed on the work order below the line item"><figcaption></figcaption></figure>

***

## Option 4: At the top of the Work Order

Toggle to the **work order** page, and add a general note at the top!

<figure><img src="https://231248629-files.gitbook.io/~/files/v0/b/gitbook-x-prod.appspot.com/o/spaces%2FPyUbJF1GXLjxdJqm89IQ%2Fuploads%2Fgit-blob-8bbe67974552a3ed64f06476d32c88d048b8cba3%2Fe5c722cfb827424827b985ca_PaintScout_Edit_Estimate_2023-12-28_at_4.43.12_PM.jpg?alt=media" alt="Screenshot showing the general crew note field at the top of the work order"><figcaption></figcaption></figure>

***

## Other Options:

* Establish default crew notes by crafting a crew note for a surface in your settings. This ensures that these notes consistently show up whenever the surface is added to new estimates.
* If you'd like your crew notes to stand out more, we can highlight them in yellow. Just reach out to our [support team](mailto:support@paintscout.com)!

  <figure><img src="https://231248629-files.gitbook.io/~/files/v0/b/gitbook-x-prod.appspot.com/o/spaces%2FPyUbJF1GXLjxdJqm89IQ%2Fuploads%2Fgit-blob-cbeb77cd9b9c656342e7983c549c7811c6fba81d%2F08ee13dd776fb45054d3b2eb_Image_2022-06-14_at_2.20.21_PM.jpg?alt=media" alt="Screenshot showing crew notes highlighted in yellow on the work order"><figcaption></figcaption></figure>

&#x20;&#x20;

## Related articles

<table data-card-size="large" data-view="cards"><thead><tr><th></th><th></th><th data-hidden data-card-target data-type="content-ref"></th></tr></thead><tbody><tr><td><strong>Notes Overview</strong></td><td>Learn about all types of notes in PaintScout including client notes, crew notes, estimator notes, contact notes, and status change notes.</td><td><a href="/support/estimating/notes-and-communication/notes-in-paintscout">Notes Overview</a></td></tr><tr><td><strong>Estimator Notes</strong></td><td>Use estimator notes as a personal scratchpad for internal job details that remain hidden from customers and work orders.</td><td><a href="/support/estimating/notes-and-communication/estimator-notes">Estimator Notes</a></td></tr><tr><td><strong>Share With Your Team</strong></td><td>Share estimates and work orders with your team via email, live links, or downloadable PDFs for seamless collaboration.</td><td><a href="/support/estimating/sending-and-acceptance/how-to-share-estimates-and-work-orders-with-your-team">Share With Your Team</a></td></tr><tr><td><strong>Working With Work Orders</strong></td><td>Create and manage work orders with hour breakdowns, crew notes, hours display options, downloading, and sharing with your team.</td><td><a href="/support/estimating/managing-estimates-and-work-orders/work-orders/working-with-work-orders">Working With Work Orders</a></td></tr></tbody></table>


# Sending & Acceptance

Send estimates to customers, understand how they view and accept proposals, and collect signatures.

Once your estimate is ready, send it with the right delivery and acceptance flow. This section covers email and text delivery, customer preview and acceptance, onsite signatures, and sharing estimates or work orders with your team.

## In This Section

* [Sending Estimates](/support/estimating/sending-and-acceptance/sending-estimates) — Send estimates by email or text, customize the message, and control follow-up settings
* [How Customers View & Accept](/support/estimating/sending-and-acceptance/how-customers-view-accept-estimates) — See how customers open the estimate, review terms, download it, and accept online
* [Accepting On Site](/support/estimating/sending-and-acceptance/accepting-estimates-on-site) — Present the estimate in person with preview mode and capture a signature on the spot
* [How Signatures Work](/support/estimating/sending-and-acceptance/how-signatures-work) — Understand estimator and customer signatures, where they come from, and how they appear on accepted estimates
* [Share With Your Team](/support/estimating/sending-and-acceptance/how-to-share-estimates-and-work-orders-with-your-team) — Share estimates and work orders by email, live link, PDF, or staff sharing permissions

&#x20;&#x20;


# Sending Estimates

Send estimates to customers via email or text with customizable subject lines, body content, and follow-up settings.

PaintScout sends estimates to customers via email or text message with a customizable subject line, body content, and follow-up schedule. Click the **Send** button to get started.

<figure><img src="https://231248629-files.gitbook.io/~/files/v0/b/gitbook-x-prod.appspot.com/o/spaces%2FPyUbJF1GXLjxdJqm89IQ%2Fuploads%2Fgit-blob-8b7be9ac2db53f8d62485a586b8788e8ee4a322a%2F0edc91cfc7c215ff76ed105c_PaintScout_Edit_Estimate_2024-05-13_at_4_10_14_PM.jpg?alt=media" alt="Screenshot showing the Send button on the estimate page"><figcaption></figcaption></figure>

A pop-up window will appear:

* On the right, you can view how the estimate will look when you send it. If you would like to preview the full estimate with additional presentation pages you can click the drop-down beside the send menu and select **preview.**
* On the left, you can edit your email message and other settings before sending it.

<figure><img src="https://231248629-files.gitbook.io/~/files/v0/b/gitbook-x-prod.appspot.com/o/spaces%2FPyUbJF1GXLjxdJqm89IQ%2Fuploads%2Fgit-blob-576e7bbbd94cc0aa49cf697ccab45b616245b2bc%2Fe7ba593fbf793d5aa619c110_Screenshot_2024-05-13_at_4_12_01_PM.png?alt=media" alt="Screenshot showing the send estimate pop-up with email settings on the left and estimate preview on the right"><figcaption></figcaption></figure>

Within this window you can customize:

* **Recipients** — edit the customer's email or add additional recipients.
* **Text message** — toggle the slider to also send via text.
* **Email content** — personalize the subject and body.
* **Follow-ups** — customize or disable follow-up messages for this estimate.

Once you are happy with the email and your settings press the **Send Estimate** button.

<figure><img src="https://231248629-files.gitbook.io/~/files/v0/b/gitbook-x-prod.appspot.com/o/spaces%2FPyUbJF1GXLjxdJqm89IQ%2Fuploads%2Fgit-blob-3b4ac88fc64c853b14d3de85ee160ed4852494ec%2F457cd024cfd896c81fbc1228_PaintScout_Edit_Estimate_2024-05-13_at_4_17_08_PM.jpg?alt=media" alt="Screenshot showing the Send Estimate button and email customization options including recipients, subject, and follow-ups"><figcaption></figcaption></figure>

{% hint style="info" %}
If you frequently send a similar email, consider creating it as an [email template](/support/email-and-communication/email-settings/how-to-create-an-email-template) to save time.
{% endhint %}

&#x20;&#x20;

## Related articles

<table data-card-size="large" data-view="cards"><thead><tr><th></th><th></th><th data-hidden data-card-target data-type="content-ref"></th></tr></thead><tbody><tr><td><strong>How Customers View &#x26; Accept</strong></td><td>See exactly what your customers experience when they receive, view, and electronically accept an estimate through the email link or on-site preview.</td><td><a href="/support/estimating/sending-and-acceptance/how-customers-view-accept-estimates">How Customers View &amp; Accept</a></td></tr><tr><td><strong>My Customer Didn't Receive Their Estimate</strong></td><td>Troubleshoot why your customer didn't receive their PaintScout estimate email and learn how to resend or share it directly.</td><td><a href="/support/resources/frequently-asked-questions/my-customer-didnt-receive-their-estimate">My Customer Didn't Receive Their Estimate</a></td></tr><tr><td><strong>Chat Overview</strong></td><td>Enable real-time chat communication with clients directly on estimates, with email notifications and conversation tracking built in.</td><td><a href="/support/email-and-communication/email-settings/chat-overview">Chat Overview</a></td></tr><tr><td><strong>Auto Follow-Ups</strong></td><td>Set up automated follow-up messages via email or text based on estimate status triggers to improve quote acceptance rates.</td><td><a href="/support/email-and-communication/email-settings/auto-follow-ups">Auto Follow-Ups</a></td></tr></tbody></table>


# How Customers View & Accept

See exactly what your customers experience when they receive, view, and electronically accept an estimate through the email link or on-site preview.

When you send a PaintScout estimate, customers receive an email with a link to view, download, and electronically accept the estimate online.

## How do customers view their estimates?

Customers receive the estimate via email with a clickable link. The link opens a webpage where they can view the entire estimate.

<figure><img src="https://231248629-files.gitbook.io/~/files/v0/b/gitbook-x-prod.appspot.com/o/spaces%2FPyUbJF1GXLjxdJqm89IQ%2Fuploads%2Fgit-blob-ac686228016659fbc84cd5a56baea6dd5b967cc9%2Fa00f77218be34e03fc6885a0_Screenshot_2024-06-20_at_12_01_38_PM.png?alt=media" alt="Screenshot showing the customer email with a link to view the estimate"><figcaption></figcaption></figure>

They can scroll through the estimate, check out the presentation pages, and read your full Terms and Conditions.

At the top of the page, there's a **More** drop-down menu. This allows the customer to print the estimate, download it as a PDF, or decline (if you have that option enabled in your settings).

## How do customers accept an estimate?

Customers click the **Accept** button at the top of their screen. A pop-up appears where they electronically sign their signature.

<figure><img src="https://231248629-files.gitbook.io/~/files/v0/b/gitbook-x-prod.appspot.com/o/spaces%2FPyUbJF1GXLjxdJqm89IQ%2Fuploads%2Fgit-blob-455679fe144d47144c0c2b6afb8fdcbd66b0b493%2Fa6076f59f0adcbc8646c2614_Screenshot_2024-06-20_at_12_05_05_PM.png?alt=media" alt="Screenshot showing the Accept button and electronic signature popup for estimate acceptance"><figcaption></figcaption></figure>

Below the signature, there is an **Acceptance Disclaimer**, which you can customize in your **Account Settings > Estimates > Disclaimers**.

Once the customer accepts the estimate, its status in PaintScout will update to **Accepted**. This change will also show up in the Activity section of your sidebar menu.

{% hint style="info" %}
If you want to receive notifications when an estimate is accepted, visit **Your Profile > Notifications.**
{% endhint %}

## How do you preview an estimate as the customer sees it?

Expand the drop-down beside the **Send** button and select **Preview/Accept** to see the customer's view.

<figure><img src="https://231248629-files.gitbook.io/~/files/v0/b/gitbook-x-prod.appspot.com/o/spaces%2FPyUbJF1GXLjxdJqm89IQ%2Fuploads%2Fgit-blob-01dc972e0c7f3472dadedbec4fa4d7383b658a9c%2Fb525e5f408fc8bd4886e595a_PaintScout_Edit_Estimate_2024-06-20_at_11_56_49_AM.jpg?alt=media" alt="Screenshot showing the Preview/Accept option in the dropdown beside the Send button"><figcaption></figcaption></figure>

This is also a great way to present your estimate onsite! You can click the **Accept** button to gather a signature on the spot.

Select **Back to Estimate** from the bottom toolbar to return to PaintScout from preview mode.

<figure><img src="https://231248629-files.gitbook.io/~/files/v0/b/gitbook-x-prod.appspot.com/o/spaces%2FPyUbJF1GXLjxdJqm89IQ%2Fuploads%2Fgit-blob-a1484d0adadd4104da30b75fe91666b9bd79f126%2F27a3628a323b3ec07886ab9b_PaintScout_Edit_Estimate_2024-06-20_at_12_07_06_PM.jpg?alt=media" alt="Screenshot showing the Back to Estimate button in the bottom toolbar of preview mode"><figcaption></figcaption></figure>

&#x20;&#x20;

## Related articles

<table data-card-size="large" data-view="cards"><thead><tr><th></th><th></th><th data-hidden data-card-target data-type="content-ref"></th></tr></thead><tbody><tr><td><strong>Sending Estimates</strong></td><td>Send estimates to customers via email or text with customizable subject lines, body content, and follow-up settings.</td><td><a href="/support/estimating/sending-and-acceptance/sending-estimates">Sending Estimates</a></td></tr><tr><td><strong>My Customer Didn't Receive Their Estimate</strong></td><td>Troubleshoot why your customer didn't receive their PaintScout estimate email and learn how to resend or share it directly.</td><td><a href="/support/resources/frequently-asked-questions/my-customer-didnt-receive-their-estimate">My Customer Didn't Receive Their Estimate</a></td></tr><tr><td><strong>How Signatures Work</strong></td><td>How digital signatures work in PaintScout including setting up your signature, how customers e-sign to accept estimates, and managing signatures on accepted documents.</td><td><a href="/support/estimating/sending-and-acceptance/how-signatures-work">How Signatures Work</a></td></tr><tr><td><strong>Accepting On Site</strong></td><td>Present estimates to customers on-site and capture electronic signatures immediately to speed up the sales process.</td><td><a href="/support/estimating/sending-and-acceptance/accepting-estimates-on-site">Accepting On Site</a></td></tr></tbody></table>


# Accepting On Site

Present estimates to customers on-site and capture electronic signatures immediately to speed up the sales process.

PaintScout lets you present estimates to customers in person and capture their electronic signature on the spot, skipping the email-and-wait process entirely.

## How do you accept an estimate on site?

1\. Click the drop-down arrow beside the send button and select **Preview/Accept.**

<figure><img src="https://231248629-files.gitbook.io/~/files/v0/b/gitbook-x-prod.appspot.com/o/spaces%2FPyUbJF1GXLjxdJqm89IQ%2Fuploads%2Fgit-blob-5c53d5cd47abf60392d0200d241dc4d1df51a20b%2F222d0d701ad707c4d2d7c25d_PaintScout_Edit_Estimate_2024-06-20_at_12_12_26_PM.jpg?alt=media" alt=""><figcaption></figcaption></figure>

2\. A preview of the estimate will appear for you to review with the customer. Turn your tablet or phone around to walk through the presentation together. When the customer is ready, click the **Accept** button in the top right corner.

<figure><img src="https://231248629-files.gitbook.io/~/files/v0/b/gitbook-x-prod.appspot.com/o/spaces%2FPyUbJF1GXLjxdJqm89IQ%2Fuploads%2Fgit-blob-2576913b135c8a4f40819f52c6b9524b1656c7c4%2F29bd9a06f7ccab1e6f921ae2_PaintScout_Edit_Estimate_2024-06-20_at_12_55_15_PM.jpg?alt=media" alt=""><figcaption></figcaption></figure>

3\. A signature pop-up appears where the customer signs electronically. Click **Accept Estimate** to finalize.

<figure><img src="https://231248629-files.gitbook.io/~/files/v0/b/gitbook-x-prod.appspot.com/o/spaces%2FPyUbJF1GXLjxdJqm89IQ%2Fuploads%2Fgit-blob-0c2f559c43ca562096f9dd77da0532bb43f8afde%2Fbc3421fd56738297e62ae292_PaintScout_Edit_Estimate_2024-06-20_at_12_56_33_PM.jpg?alt=media" alt=""><figcaption></figcaption></figure>

4\. The estimate will now show an **Accepted** status in PaintScout. It’s a good idea to email the estimate to the customer so they have a copy for their records too!

<figure><img src="https://231248629-files.gitbook.io/~/files/v0/b/gitbook-x-prod.appspot.com/o/spaces%2FPyUbJF1GXLjxdJqm89IQ%2Fuploads%2Fgit-blob-5cb9ad319816da1b083e8f86cc0412de6427acb0%2F70184eaab02fc0d96b572918_Screenshot_2024-06-20_at_12_59_52_PM.png?alt=media" alt=""><figcaption></figcaption></figure>

&#x20;&#x20;

## Related articles

<table data-card-size="large" data-view="cards"><thead><tr><th></th><th></th><th data-hidden data-card-target data-type="content-ref"></th></tr></thead><tbody><tr><td><strong>How Customers View &#x26; Accept</strong></td><td>See exactly what your customers experience when they receive, view, and electronically accept an estimate through the email link or on-site preview.</td><td><a href="/support/estimating/sending-and-acceptance/how-customers-view-accept-estimates">How Customers View &amp; Accept</a></td></tr><tr><td><strong>How Signatures Work</strong></td><td>How digital signatures work in PaintScout including setting up your signature, how customers e-sign to accept estimates, and managing signatures on accepted documents.</td><td><a href="/support/estimating/sending-and-acceptance/how-signatures-work">How Signatures Work</a></td></tr></tbody></table>


# How Signatures Work

How digital signatures work in PaintScout including setting up your signature, how customers e-sign to accept estimates, and managing signatures on accepted documents.

PaintScout uses digital signatures on estimates: the estimator's signature comes from their profile, and the customer signs electronically when accepting. Both signatures appear on the accepted estimate.

## How do you set up signatures?

Each user must first sign their signature in the **Profile** section.

<figure><img src="https://231248629-files.gitbook.io/~/files/v0/b/gitbook-x-prod.appspot.com/o/spaces%2FPyUbJF1GXLjxdJqm89IQ%2Fuploads%2Fgit-blob-f34909c825fc366c11daa8ea905be70a2fb4b6bc%2F8925085086c649b9cd051788_PaintScout_Profile_2024-08-16_at_3_50_18_PM.jpg?alt=media" alt="Screenshot showing the signature field in the user Profile section"><figcaption></figcaption></figure>

Once an estimate is sent, your customer can digitally sign to accept the project by clicking the **accept** **estimate** button.

<figure><img src="https://231248629-files.gitbook.io/~/files/v0/b/gitbook-x-prod.appspot.com/o/spaces%2FPyUbJF1GXLjxdJqm89IQ%2Fuploads%2Fgit-blob-617ac1520aa64f7dbfb147b6ca14c479f1e7151a%2F05bf8c2327ad78b61bf479b1_Zight_Recording_2024-08-16_at_03_57_21_PM.gif?alt=media" alt="Animation showing a customer digitally signing to accept an estimate"><figcaption></figcaption></figure>

Both signatures will be automatically populated, along with the acceptance date at the bottom of the estimate.

<figure><img src="https://231248629-files.gitbook.io/~/files/v0/b/gitbook-x-prod.appspot.com/o/spaces%2FPyUbJF1GXLjxdJqm89IQ%2Fuploads%2Fgit-blob-c360b26eae37e59e643dad6d8253a3e36a6aaa82%2Ff02ab0bf6b327e0c9c416f18_Screenshot_2024-08-16_at_3_59_18_PM.png?alt=media" alt="Screenshot showing both estimator and customer signatures with the acceptance date on the estimate"><figcaption></figcaption></figure>

## How to force populate the estimator signature

If you would like the estimator's signature to be included before sending the estimate, simply click on the estimator's name at the top of the quote and re-select their name from the popup.

<figure><img src="https://231248629-files.gitbook.io/~/files/v0/b/gitbook-x-prod.appspot.com/o/spaces%2FPyUbJF1GXLjxdJqm89IQ%2Fuploads%2Fgit-blob-9ba735596feb797fe044e5a7ad83e0f33c008f01%2Fb0d192303bbe9ddd9643a238_Zight_Recording_2024-08-16_at_04_09_21_PM.gif?alt=media" alt="Animation showing how to force populate the estimator signature by re-selecting their name"><figcaption></figcaption></figure>

&#x20;&#x20;

## Related articles

<table data-card-size="large" data-view="cards"><thead><tr><th></th><th></th><th data-hidden data-card-target data-type="content-ref"></th></tr></thead><tbody><tr><td><strong>How Customers View &#x26; Accept</strong></td><td>See exactly what your customers experience when they receive, view, and electronically accept an estimate through the email link or on-site preview.</td><td><a href="/support/estimating/sending-and-acceptance/how-customers-view-accept-estimates">How Customers View &amp; Accept</a></td></tr><tr><td><strong>Accepting On Site</strong></td><td>Present estimates to customers on-site and capture electronic signatures immediately to speed up the sales process.</td><td><a href="/support/estimating/sending-and-acceptance/accepting-estimates-on-site">Accepting On Site</a></td></tr><tr><td><strong>Update Your Signature</strong></td><td>How to draw or upload your signature for use on accepted estimates and contracts</td><td><a href="/support/account-settings/your-profile/how-to-update-your-signature">Update Your Signature</a></td></tr><tr><td><strong>Profile Overview</strong></td><td>Manage your personal profile including photo, contact info, password, signature, and notifications</td><td><a href="/support/account-settings/your-profile/your-profile-overview">Profile Overview</a></td></tr></tbody></table>


# Share With Your Team

Share estimates and work orders with your team via email, live links, or downloadable PDFs for seamless collaboration.

PaintScout provides three ways to share estimates and work orders with your team: email, live links, and downloadable PDFs. Different [user types and permissions](/support/account-settings/users-and-permissions/user-permissions) determine what each team member can access.

{% tabs %}
{% tab title="Sharing (Sales/Team)" %}
As a Sales or Team user with sharing permissions, you can share estimates and work orders using any of the three methods below. You also have access to the **Share with Staff** action to make estimates visible to specific Painter users.

1. [Send as an Email](#id-1.-send-as-an-email)
2. [Share as a Live Link](#id-2.-share-as-a-live-link)
3. [Download a PDF](#id-3.-download-a-pdf)
   {% endtab %}

{% tab title="Receiving (Painter)" %}
Painter users can receive estimates, invoices, and work orders as shared links from Sales or Team users.

**To set up notifications:**

1. Go to **Your Profile** → **Notifications**.
2. Enable the relevant sharing notifications.

**What to expect from shared links:**

* Open the shared document directly from the link.
* View the full document content included in that link.
* Use the link outside the Painter app experience.

Shared links are separate from Painter permissions inside the app.
{% endtab %}
{% endtabs %}

***

## 1. Send as an Email

* Open the estimate or work order you want to share.
* If you are wanting to share the Estimate please ensure you are on the **Estimate** tab.
* If you are wanting to share the Work Order, please ensure you are on the **Work Order** tab. Once you're ready, click on the **Send** button.
* In the **To:** field, enter your client or team member's email address and customize the email template as needed. When you are ready, press send and your estimate or work order will be on its way to their inbox!

<figure><img src="https://231248629-files.gitbook.io/~/files/v0/b/gitbook-x-prod.appspot.com/o/spaces%2FPyUbJF1GXLjxdJqm89IQ%2Fuploads%2Fgit-blob-bcc7bf7e01eda14e1f0cb6bc71b056d15518e9b5%2Fff2a748b06d13797f2fbc0b2_Screen_Recording_2023-05-12_at_10.50.08_AM.gif?alt=media" alt="Animated walkthrough showing how to send an estimate or work order via email"><figcaption></figcaption></figure>

***

## 2. Share as a Live Link

Sometimes, real-time collaboration is key. With PaintScout, you can share estimates or work orders as live links, allowing your team to stay up to date with the latest updates as they occur.

* Click on the drop-down menu next to the **Send** button and choose either **Copy Estimate Link** or **Copy Work Order Link.**
* Once you've done that, you can paste the link in an email, text message, or Slack channel message to share it with your team.
* They can simply click on the link to access the estimate, and any changes you make will be visible to them in real-time.

<figure><img src="https://231248629-files.gitbook.io/~/files/v0/b/gitbook-x-prod.appspot.com/o/spaces%2FPyUbJF1GXLjxdJqm89IQ%2Fuploads%2Fgit-blob-6fb58cfa419345bbf4ed07637a3f7f77eab116be%2F3466acdfaae9062ee3236faa_Screen_Recording_2023-05-12_at_12.47.06_PM.gif?alt=media" alt="Animated walkthrough showing how to copy an estimate or work order link for sharing"><figcaption></figcaption></figure>

***

## 3. Download a PDF

If you prefer a more traditional approach, PaintScout lets you download estimates or work orders as PDF documents.

* Click on the drop-down menu next to the **Send** button and select **Download PDF** for the estimate *or* work order.
* Once you have the PDF file, you can email it directly to your team or print it out for their reference.

<figure><img src="https://231248629-files.gitbook.io/~/files/v0/b/gitbook-x-prod.appspot.com/o/spaces%2FPyUbJF1GXLjxdJqm89IQ%2Fuploads%2Fgit-blob-cc712449cf1b56e0037a6c68097a26c63c3dd899%2F33aaa010ed602e2f27d5a85f_Screen_Recording_2023-05-12_at_12.49.34_PM.gif?alt=media" alt="Animated walkthrough showing how to download an estimate or work order as a PDF"><figcaption></figcaption></figure>

&#x20;&#x20;

## Related articles

<table data-card-size="large" data-view="cards"><thead><tr><th></th><th></th><th data-hidden data-card-target data-type="content-ref"></th></tr></thead><tbody><tr><td><strong>Custom Permissions</strong></td><td>Configure access levels for Sales, Team, and Painter users using custom permissions to control what team members can view and edit.</td><td><a href="/support/account-settings/users-and-permissions/user-permissions">Custom Permissions</a></td></tr><tr><td><strong>Working With Work Orders</strong></td><td>Create and manage work orders with hour breakdowns, crew notes, hours display options, downloading, and sharing with your team.</td><td><a href="/support/estimating/managing-estimates-and-work-orders/work-orders/working-with-work-orders">Working With Work Orders</a></td></tr><tr><td><strong>Crew Notes</strong></td><td>Add crew notes to areas, surfaces, line items, or work orders to communicate important information hidden from customers.</td><td><a href="/support/estimating/notes-and-communication/adding-crew-notes">Crew Notes</a></td></tr></tbody></table>


# Managing estimates & work orders

Manage sent estimates, version history, search, exports, and crew-facing work orders in PaintScout.

Use this section after an estimate is built and sent. It covers how to manage estimate records, review history, restore earlier versions, and share clear work orders with your crew.

## In This Section

* [Managing Estimates](/support/estimating/managing-estimates-and-work-orders/managing-estimates) — Review activity, restore versions, search records, export results, and archive estimates
* [Work Orders](/support/estimating/managing-estimates-and-work-orders/work-orders) — Create crew-facing work orders, control hours and notes, share them, and support another language when needed

## Recommended first reads

* [Search for an Estimate](/support/estimating/managing-estimates-and-work-orders/managing-estimates/how-to-search-for-an-estimate) — Find the right estimate fast by customer, address, value, or estimate ID
* [Restore an Estimate](/support/estimating/managing-estimates-and-work-orders/managing-estimates/how-to-restore-an-estimate) — Revert to an earlier sent version when scope or pricing needs to roll back
* [Working With Work Orders](/support/estimating/managing-estimates-and-work-orders/work-orders/working-with-work-orders) — Open, adjust, download, and share work orders with your team

&#x20;&#x20;

## Related articles

* [Estimate Actions](/support/estimating/creating-estimates/estimate-actions) — Use estimate actions like preview, copy links, download PDFs, and archive
* [Share With Your Team](/support/estimating/sending-and-acceptance/how-to-share-estimates-and-work-orders-with-your-team) — Share estimates and work orders by email, live link, or PDF
* [Dashboard](/support/dashboard-and-reports/dashboard-search-reporting) — Review broader estimate performance and business activity


# Managing Estimates

Manage your estimates with activity tracking, version history, search, export, restoration, and archiving.

{% hint style="success" %}
**Start here:** Use [Search for an Estimate](/support/estimating/managing-estimates-and-work-orders/managing-estimates/how-to-search-for-an-estimate) when you need to quickly find a job, customer, or estimate ID.
{% endhint %}

This section helps you manage estimates after they are created and sent. Review activity, work with sent-version history, find records quickly, export filtered results, and archive estimates without losing reporting access.

## What you can do in Managing Estimates

* Review estimate and invoice activity.
* Restore or download previous estimate versions.
* Search, filter, and export estimate records.
* Archive inactive estimates without losing reporting access.

## In This Section

* [Estimate & Invoice Activity](/support/estimating/managing-estimates-and-work-orders/managing-estimates/estimate-invoice-activity) — Review sends, views, acceptances, payment events, and other activity from the dashboard or sidebar
* [Restore an Estimate](/support/estimating/managing-estimates-and-work-orders/managing-estimates/how-to-restore-an-estimate) — Restore a previously sent estimate snapshot and replace the current version when needed
* [Download a Previous Version](/support/estimating/managing-estimates-and-work-orders/managing-estimates/how-to-download-a-previous-version-of-an-estimate) — Download an earlier sent estimate as a PDF from the activity history
* [Archiving Estimates](/support/estimating/managing-estimates-and-work-orders/managing-estimates/archiving-an-estimate) — Archive estimates to remove them from your active list while keeping them available for reports
* [Search for an Estimate](/support/estimating/managing-estimates-and-work-orders/managing-estimates/how-to-search-for-an-estimate) — Find estimates by contact name, estimate ID, address, value, or advanced search filters
* [Filter & Export Estimates](/support/estimating/managing-estimates-and-work-orders/managing-estimates/how-to-filter-estimates-and-export) — Apply multiple search criteria and export matching estimates to CSV

{% hint style="info" %}
Need broader performance data? See [Dashboard](/support/dashboard-and-reports/dashboard-search-reporting) and [Reports](/support/dashboard-and-reports/reports).
{% endhint %}

&#x20;&#x20;


# Estimate & Invoice Activity

Track estimate and invoice events including creation, sending, viewing, acceptance, and payments in the activity log.

The activity log in PaintScout tracks every event on an estimate or invoice — creation, sending, viewing, acceptance, and payments. Access it from the dashboard or within any individual estimate or invoice.

## Where do you find activity on the dashboard?

The **activity** section on your dashboard shows recent events across all estimates.

<figure><img src="https://231248629-files.gitbook.io/~/files/v0/b/gitbook-x-prod.appspot.com/o/spaces%2FPyUbJF1GXLjxdJqm89IQ%2Fuploads%2Fgit-blob-173aee7d93abb95f07b76a84fb84d15eb4c26c89%2Ffbeee023045bd6967eeb3d08_Screenshot_2023-12-19_at_2.11.46_PM.png?alt=media" alt="Screenshot showing the activity section on the dashboard with recent estimate events"><figcaption></figcaption></figure>

***

## How do you view activity on an estimate?

Open the sidebar menu and select the **Activity** tab to see all events for that specific estimate, including when customers viewed or interacted with it.

| Activity Types                                                                                                                                                                                                                                                                                                                                                                                                                                                                                                                                                                                                                                                   | Screenshot                                                                                                                                                                                                                                                                                                                                                            |
| ---------------------------------------------------------------------------------------------------------------------------------------------------------------------------------------------------------------------------------------------------------------------------------------------------------------------------------------------------------------------------------------------------------------------------------------------------------------------------------------------------------------------------------------------------------------------------------------------------------------------------------------------------------------- | --------------------------------------------------------------------------------------------------------------------------------------------------------------------------------------------------------------------------------------------------------------------------------------------------------------------------------------------------------------------- |
| <p><strong>Estimate Sent:</strong> Find out when the estimate was sent, what the email contained, and even restore the estimate to this version if needed.<br><br><strong>Estimate Viewed:</strong> Track when and how long your customer checked out the estimate.<br><br><strong>Estimate Accepted:</strong> Keep tabs on when your customer accepted the estimate, complete with their signature.<br><br><strong>Thank You Message Sent:</strong> Verify that the automatic thank-you message reached your customer.<br><br><strong>Payment Added:</strong> Spot the moment a successful payment is made via Stripe or reported directly on the estimate.</p> | ![Screenshot showing the estimate activity log in the sidebar with sent, viewed, accepted, and payment events](https://231248629-files.gitbook.io/~/files/v0/b/gitbook-x-prod.appspot.com/o/spaces%2FPyUbJF1GXLjxdJqm89IQ%2Fuploads%2Fgit-blob-5a3b5bd17abb6217198d55b90208c4eda072010e%2F3adc8fb1efc023922298265c_Screenshot_2023-12-19_at_9.28.35_AM.png?alt=media) |

***

## What activity is tracked on invoices?

Invoice activity tracks payment requests, payments received, customer viewing, and invoice sending.

| Activity Types                                                                                                                                                                                                                                                                                                                                                                                     | Screenshot                                                                                                                                                                                                                                                                                                                                                |
| -------------------------------------------------------------------------------------------------------------------------------------------------------------------------------------------------------------------------------------------------------------------------------------------------------------------------------------------------------------------------------------------------- | --------------------------------------------------------------------------------------------------------------------------------------------------------------------------------------------------------------------------------------------------------------------------------------------------------------------------------------------------------- |
| <p><strong>Payment Requested:</strong> View the specifics of payment requests sent to the customer.<br><br><strong>Payment Added:</strong> Find out when a payment has been made on the invoice.<br><br><strong>Invoice Viewed:</strong> Keep tabs on when and how long your customer viewed the invoice.<br><br><strong>Invoice Sent:</strong> See the details for when the invoice was sent.</p> | ![Screenshot showing the invoice activity log with payment requests, payments, and viewing events](https://231248629-files.gitbook.io/~/files/v0/b/gitbook-x-prod.appspot.com/o/spaces%2FPyUbJF1GXLjxdJqm89IQ%2Fuploads%2Fgit-blob-bd3454eab34908d98f27a19afd3b848f8456f13a%2Fad35d6c91a0bddc84c1e4ec9_Screenshot_2023-12-19_at_2.50.20_PM.png?alt=media) |

&#x20;&#x20;

## Related articles

<table data-card-size="large" data-view="cards"><thead><tr><th></th><th></th><th data-hidden data-card-target data-type="content-ref"></th></tr></thead><tbody><tr><td><strong>Restore an Estimate</strong></td><td>Restore previously sent estimate versions from the activity sidebar when customers request to revert to an earlier quote.</td><td><a href="/support/estimating/managing-estimates-and-work-orders/managing-estimates/how-to-restore-an-estimate">Restore an Estimate</a></td></tr><tr><td><strong>Download a Previous Version</strong></td><td>Download PDF versions of previously sent estimates from the activity sidebar to retrieve earlier quote versions.</td><td><a href="/support/estimating/managing-estimates-and-work-orders/managing-estimates/how-to-download-a-previous-version-of-an-estimate">Download a Previous Version</a></td></tr></tbody></table>


# Restore an Estimate

Restore previously sent estimate versions from the activity sidebar when customers request to revert to an earlier quote.

PaintScout saves a snapshot every time you send an estimate. You can restore any previously sent version from the activity sidebar, overwriting the current version with the earlier one.

***

## For Estimators

### How to restore a previous estimate in PaintScout

1. **Access the Menu Sidebar:** While in the estimate you will find the menu sidebar to the right of your screen. Click on it to open the menu options.

   <figure><img src="https://231248629-files.gitbook.io/~/files/v0/b/gitbook-x-prod.appspot.com/o/spaces%2FPyUbJF1GXLjxdJqm89IQ%2Fuploads%2Fgit-blob-f0149deb86ded66b94ee0d20b7e60cefab85f569%2Fa64497ad540e390b66a66d93_PaintScout_Edit_Estimate_2024-04-05_at_1_57_41_PM.jpg?alt=media" alt="Screenshot showing the menu sidebar on the right side of the estimate screen"><figcaption></figcaption></figure>
2. **Select Activity**: Within the menu sidebar, locate and click on the **Activity** option. This will provide you with a log of all your interactions and actions within PaintScout for the specific estimate.

   <figure><img src="https://231248629-files.gitbook.io/~/files/v0/b/gitbook-x-prod.appspot.com/o/spaces%2FPyUbJF1GXLjxdJqm89IQ%2Fuploads%2Fgit-blob-7e94bb945502ba59decdeef94a13faa70a4826b0%2F0ba15f44312bfc91950f22e8_PaintScout_Edit_Estimate_2024-04-05_at_1_58_50_PM.jpg?alt=media" alt="Screenshot showing the Activity option selected in the sidebar menu"><figcaption></figcaption></figure>
3. **Locate Sent Activity**: In the Activity section, you will find a record of every time you have emailed the estimate to your customer. This is displayed under the **Sent** activity. Scroll through the list and identify the version of the estimate you wish to restore.

   <figure><img src="https://231248629-files.gitbook.io/~/files/v0/b/gitbook-x-prod.appspot.com/o/spaces%2FPyUbJF1GXLjxdJqm89IQ%2Fuploads%2Fgit-blob-93d71dc8e717403f57262682ef5536da0bbf3470%2F358e738f866d2206ffe41705_Screenshot_2024-04-05_at_1_59_37_PM.png?alt=media" alt="Screenshot showing Sent activity entries in the Activity log with version history"><figcaption></figcaption></figure>
4. **Restore the Estimate:** Once you have identified the desired version, click on it. A pop-up window will appear, allowing you to review the estimate before restoration. Take your time to ensure it's the correct version. When you are ready, select the **Restore Estimate** button at the bottom of the pop-up screen.

   <figure><img src="https://231248629-files.gitbook.io/~/files/v0/b/gitbook-x-prod.appspot.com/o/spaces%2FPyUbJF1GXLjxdJqm89IQ%2Fuploads%2Fgit-blob-ba7c2ac9b4c17e608168d283fc7248a2e4ab1b37%2F90c998498514eff8e688b3ac_PaintScout_Edit_Estimate_2024-04-05_at_2_00_25_PM.jpg?alt=media" alt="Screenshot showing the Restore Estimate pop-up with a preview and the Restore Estimate button"><figcaption></figcaption></figure>
5. **Confirmation and Navigation:** By restoring the estimate, any changes you made to the current version will be overwritten. After clicking the **Restore Estimate** button, PaintScout will navigate you back to your estimate screen, displaying the restored version!

   <figure><img src="https://231248629-files.gitbook.io/~/files/v0/b/gitbook-x-prod.appspot.com/o/spaces%2FPyUbJF1GXLjxdJqm89IQ%2Fuploads%2Fgit-blob-74af4b343b5061e8d706f0ad4c5807a33090848d%2F0ca3d9b6754cf2ed8348d845_Screen_Recording_2024-04-05_at_02_01_32_PM.gif?alt=media" alt="Animated walkthrough showing the full process of restoring a previous estimate version"><figcaption></figcaption></figure>

***

## For Customers

If a customer requests to revert to a previous version of their estimate, follow the steps above to restore it. Once restored, re-send the estimate to the customer so they receive the updated version in their email. The customer will always see the most recently sent version when they open their estimate link.

&#x20;&#x20;

## Related articles

<table data-card-size="large" data-view="cards"><thead><tr><th></th><th></th><th data-hidden data-card-target data-type="content-ref"></th></tr></thead><tbody><tr><td><strong>Estimate &#x26; Invoice Activity</strong></td><td>Track estimate and invoice events including creation, sending, viewing, acceptance, and payments in the activity log.</td><td><a href="/support/estimating/managing-estimates-and-work-orders/managing-estimates/estimate-invoice-activity">Estimate &amp; Invoice Activity</a></td></tr><tr><td><strong>Download a Previous Version</strong></td><td>Download PDF versions of previously sent estimates from the activity sidebar to retrieve earlier quote versions.</td><td><a href="/support/estimating/managing-estimates-and-work-orders/managing-estimates/how-to-download-a-previous-version-of-an-estimate">Download a Previous Version</a></td></tr><tr><td><strong>Saving &#x26; Syncing</strong></td><td>Learn how to save and sync estimates to the cloud in PaintScout to prevent data loss and keep your work updated.</td><td><a href="/support/estimating/creating-estimates/saving-syncing-estimates">Saving &amp; Syncing</a></td></tr><tr><td><strong>Estimates</strong></td><td>Common questions about managing, sharing, and tracking estimates in PaintScout including statuses, archiving, PDFs, and customer visibility.</td><td><a href="/support/resources/frequently-asked-questions/estimates">Estimates</a></td></tr></tbody></table>


# Download a Previous Version

Download PDF versions of previously sent estimates from the activity sidebar to retrieve earlier quote versions.

PaintScout saves a snapshot of your estimate each time you send it. You can download any previously sent version as a PDF from the activity log.

1. Open the sidebar menu to your right and select **Activity.**
2. Select the **Sent** activity of the version you want to download.
3. Click the **Download PDF** button to start the download.

<figure><img src="https://231248629-files.gitbook.io/~/files/v0/b/gitbook-x-prod.appspot.com/o/spaces%2FPyUbJF1GXLjxdJqm89IQ%2Fuploads%2Fgit-blob-df33af9d1155f3091d23b37c7bb94e5f98062a8d%2Fb4383c0afe3b4e0b3b1db69c_PaintScout_Edit_Estimate_2024-04-05_at_2_44_22_PM.jpg?alt=media" alt=""><figcaption></figcaption></figure>

&#x20;&#x20;

## Related articles

<table data-card-size="large" data-view="cards"><thead><tr><th></th><th></th><th data-hidden data-card-target data-type="content-ref"></th></tr></thead><tbody><tr><td><strong>Estimate &#x26; Invoice Activity</strong></td><td>Track estimate and invoice events including creation, sending, viewing, acceptance, and payments in the activity log.</td><td><a href="/support/estimating/managing-estimates-and-work-orders/managing-estimates/estimate-invoice-activity">Estimate &amp; Invoice Activity</a></td></tr><tr><td><strong>Restore an Estimate</strong></td><td>Restore previously sent estimate versions from the activity sidebar when customers request to revert to an earlier quote.</td><td><a href="/support/estimating/managing-estimates-and-work-orders/managing-estimates/how-to-restore-an-estimate">Restore an Estimate</a></td></tr></tbody></table>


# Archiving Estimates

Archive estimates as a soft delete option to clean up your active list while keeping records accessible for reports.

Archiving is a soft delete in PaintScout that removes estimates from your active list while keeping them accessible for reports. Archived estimates can be reactivated at any time.

## How do you archive an estimate?

1. On the estimate, click on **Send dropdown.**
2. Choose **Archive Estimate.**
3. A banner will appear at the top of the estimate, confirming that it has been successfully archived.

<figure><img src="https://231248629-files.gitbook.io/~/files/v0/b/gitbook-x-prod.appspot.com/o/spaces%2FPyUbJF1GXLjxdJqm89IQ%2Fuploads%2Fgit-blob-261c5a2fb8bdbb42e9f9e81f71e46198987aa036%2FZight%20Recording%202026-07-21%20at%2002.20.37%20PM.gif?alt=media" alt="Animation showing the process of archiving an estimate from the dropdown menu"><figcaption></figcaption></figure>

&#x20;&#x20;

## Related articles

* [Estimate Actions](/support/estimating/creating-estimates/estimate-actions) — Use the action menu to copy, preview, and archive estimates.
* [Filtering the Dashboard](/support/dashboard-and-reports/dashboard-search-reporting/filtering-on-the-dashboard) — Narrow dashboard results by date, type, and estimator.
* [Creating Invoices](/support/invoicing-and-payments/invoices/creating-invoices) — Create invoices and archive them when they are no longer active.

## Related articles

<table data-card-size="large" data-view="cards"><thead><tr><th></th><th></th><th data-hidden data-card-target data-type="content-ref"></th></tr></thead><tbody><tr><td><strong>Estimate Actions</strong></td><td>Explore all estimate actions including preview, share with staff, create invoice, save as template, copy links, download, and archive.</td><td><a href="/support/estimating/creating-estimates/estimate-actions">Estimate Actions</a></td></tr><tr><td><strong>Filtering the Dashboard</strong></td><td>Learn how to use dashboard filters to refine sales metrics by date range, estimate type, and individual estimator performance.</td><td><a href="/support/dashboard-and-reports/dashboard-search-reporting/filtering-on-the-dashboard">Filtering the Dashboard</a></td></tr></tbody></table>


# Search for an Estimate

Find estimates quickly using search by contact name, estimate ID, job address, value, or advanced filtering with export options.

In PaintScout, you can find any estimate by searching for the contact name, estimate ID, job address, or project value.

## How to search for an estimate

1\. Click the **Estimates** tab at the top of your page.

2\. Type your search term in the **search bar**. You can search by *contact name, estimate ID* (#), *job address, or value of the project*.

**Example 1**: Searching for an estimate where the contact's name begins with **Lon** - all estimates with Lon in the contact name appear:

<figure><img src="https://231248629-files.gitbook.io/~/files/v0/b/gitbook-x-prod.appspot.com/o/spaces%2FPyUbJF1GXLjxdJqm89IQ%2Fuploads%2Fgit-blob-5952e17dda022721c154fb8945c61d1180f98eb8%2Fdf45df2bd226d8e19099d9fc_Screen_Shot_2019-09-09_at_11.45.49_AM.png?alt=media" alt="Screenshot showing estimate search results filtered by contact name matching Lon"><figcaption></figcaption></figure>

**Example 2:** Searching for an estimate using a specific estimate ID (#).

<figure><img src="https://231248629-files.gitbook.io/~/files/v0/b/gitbook-x-prod.appspot.com/o/spaces%2FPyUbJF1GXLjxdJqm89IQ%2Fuploads%2Fgit-blob-f64ae7628cb51d67e91612465d203172b1f00830%2F8388a7ad7deb07fef66afec9_Screen_Shot_2019-09-09_at_11.47.41_AM.png?alt=media" alt="Screenshot showing estimate search results when searching by a specific estimate ID number"><figcaption></figcaption></figure>

***

## How do I use advanced search to refine results?

1\. Click the **Advanced Search & Export** button on the right side of the search bar.

<figure><img src="https://231248629-files.gitbook.io/~/files/v0/b/gitbook-x-prod.appspot.com/o/spaces%2FPyUbJF1GXLjxdJqm89IQ%2Fuploads%2Fgit-blob-ed81ef3cc7a06feba270f66ca2e18ade44208ad0%2F2d905ae8a9711335dc97a503_PaintScout_Estimates_2023-12-18_at_5.08.37_PM.jpg?alt=media" alt="Screenshot showing the Advanced Search and Export button on the right side of the Estimates search bar"><figcaption></figcaption></figure>

2\. The search parameters expand, revealing additional filter options.\
**Example**: Finding *Interior* estimates between *Jan 1st and Feb 29th, 2024.*

<figure><img src="https://231248629-files.gitbook.io/~/files/v0/b/gitbook-x-prod.appspot.com/o/spaces%2FPyUbJF1GXLjxdJqm89IQ%2Fuploads%2Fgit-blob-0c9cc3067c4d9191cf24c1b7b0f24c844edc0832%2F67cfdba2e5da21b4a7ab614a_Screen_Recording_2024-03-18_at_08_06_17_AM-2.gif?alt=media" alt="Animated screenshot showing the advanced search parameters being set to filter for Interior estimates within a date range"><figcaption></figcaption></figure>

3\. Click **Search** to display results. Click the **x** on any filter tag to remove it.

<figure><img src="https://231248629-files.gitbook.io/~/files/v0/b/gitbook-x-prod.appspot.com/o/spaces%2FPyUbJF1GXLjxdJqm89IQ%2Fuploads%2Fgit-blob-de2f6f7a068871813e19599fa6516486f1396fcf%2F7c3fa772c0747f7ae3ea559c_PaintScout_Estimates_2024-03-18_at_8_05_19_AM.jpg?alt=media" alt="Screenshot showing filtered estimate search results with active filter tags that can be removed by clicking the x"><figcaption></figcaption></figure>

4\. Click **Export** to download a .CSV file of the results to your device.

&#x20;&#x20;

## Related articles

<table data-card-size="large" data-view="cards"><thead><tr><th></th><th></th><th data-hidden data-card-target data-type="content-ref"></th></tr></thead><tbody><tr><td><strong>Filtering the Dashboard</strong></td><td>Learn how to use dashboard filters to refine sales metrics by date range, estimate type, and individual estimator performance.</td><td><a href="/support/dashboard-and-reports/dashboard-search-reporting/filtering-on-the-dashboard">Filtering the Dashboard</a></td></tr><tr><td><strong>Filter &#x26; Export Estimates</strong></td><td>Use advanced search criteria to filter estimates and export results to CSV files for external analysis and record keeping.</td><td><a href="/support/estimating/managing-estimates-and-work-orders/managing-estimates/how-to-filter-estimates-and-export">Filter &amp; Export Estimates</a></td></tr></tbody></table>


# Filter & Export Estimates

Use advanced search criteria to filter estimates and export results to CSV files for external analysis and record keeping.

PaintScout's Advanced Search lets you filter estimates by multiple criteria and export the results as a .CSV file.

1. Click the **Estimates** tab and select the **Filter** button.

   <figure><img src="https://231248629-files.gitbook.io/~/files/v0/b/gitbook-x-prod.appspot.com/o/spaces%2FPyUbJF1GXLjxdJqm89IQ%2Fuploads%2Fgit-blob-249f561ff47db715a84ca52ae3b0053880e24bab%2F0619387ea914a69a7fb86eee_PaintScout_Estimates_2024-02-07_at_4.35.03_PM.jpg?alt=media" alt="Screenshot showing the Estimates tab with the Advanced Search and Export button highlighted"><figcaption></figcaption></figure>
2. Enter your search criteria.

   <figure><img src="https://231248629-files.gitbook.io/~/files/v0/b/gitbook-x-prod.appspot.com/o/spaces%2FPyUbJF1GXLjxdJqm89IQ%2Fuploads%2Fgit-blob-1b144d77e72b590370633660553c923919da9287%2Fb66c3d62dcca73c47056fb86_Screen_Recording_2024-03-18_at_08_09_33_AM.gif?alt=media" alt="Animated screenshot showing how to input specific search criteria in the advanced search fields"><figcaption></figcaption></figure>
3. Click **Search** to display matching estimates, or click **Export** to download a .CSV file of the results.

***

## What is a CSV file?

A CSV (comma-separated values) file is a plain text file where data fields are separated by commas.

For example:

*Mary Smith,* [***mary@example.com***](mailto:mary@example.com)*, 123-456-7890, 123 Somewhere Street NW.*

CSV files are useful because they transfer data between programs easily. You can open them with Microsoft Excel, Apple Numbers, Google Sheets, or any text editor.

&#x20;&#x20;

## Related articles

<table data-card-size="large" data-view="cards"><thead><tr><th></th><th></th><th data-hidden data-card-target data-type="content-ref"></th></tr></thead><tbody><tr><td><strong>Filtering the Dashboard</strong></td><td>Learn how to use dashboard filters to refine sales metrics by date range, estimate type, and individual estimator performance.</td><td><a href="/support/dashboard-and-reports/dashboard-search-reporting/filtering-on-the-dashboard">Filtering the Dashboard</a></td></tr><tr><td><strong>Search for an Estimate</strong></td><td>Find estimates quickly using search by contact name, estimate ID, job address, value, or advanced filtering with export options.</td><td><a href="/support/estimating/managing-estimates-and-work-orders/managing-estimates/how-to-search-for-an-estimate">Search for an Estimate</a></td></tr></tbody></table>


# Work Orders

Create, share, and translate work orders for your crew with job details, notes, and language support options.

Work orders are crew-facing documents generated from your estimate content. They show your team what needs to be done without exposing customer pricing. You can control hours and notes, share the work order in several ways, and support crews who need another language.

## In This Section

* [Working With Work Orders](/support/estimating/managing-estimates-and-work-orders/work-orders/working-with-work-orders) — Open the work order, control hours display, add crew notes, download it, and share it with your team
* [Translating Work Orders to Another Language](/support/estimating/managing-estimates-and-work-orders/work-orders/translating-work-orders-to-another-language) — Use browser translation tools or add manual crew notes in another language for your crew

&#x20;&#x20;


# Working With Work Orders

Create and manage work orders with hour breakdowns, crew notes, hours display options, downloading, and sharing with your team.

A work order in PaintScout is a crew-facing document that shows the breakdown of painting hours, surfaces, products, and crew notes for a project — without exposing customer pricing.

## What is a work order?

A work order provides all project execution details including painting hours per surface and related notes. It is generated automatically as you build your estimate.

***

## How do you find the work order?

Click the **Work Order** tab at the top of your estimate. The work order generates automatically as you build the estimate.

<figure><img src="https://231248629-files.gitbook.io/~/files/v0/b/gitbook-x-prod.appspot.com/o/spaces%2FPyUbJF1GXLjxdJqm89IQ%2Fuploads%2Fgit-blob-b85372cd7e68f872809055c4231824f6bf0bd3cb%2Fa83083d44e6067150e708a29_PaintScout_Edit_Estimate_2024-04-05_at_3_03_21_PM.jpg?alt=media" alt="Screenshot showing the Work Order tab at the top of the estimate page"><figcaption></figcaption></figure>

There will be a breakdown of the total number of hours it will take to complete each area of the project, along with the individual surfaces.

<figure><img src="https://231248629-files.gitbook.io/~/files/v0/b/gitbook-x-prod.appspot.com/o/spaces%2FPyUbJF1GXLjxdJqm89IQ%2Fuploads%2Fgit-blob-1a2bf2f0183c84b776e4fe3c892ab53a4b50aad5%2Fdab4b6828392d6393f1201fd_Image_2022-08-16_at_11.25.17_AM.jpg?alt=media" alt="Screenshot showing the work order with a breakdown of hours for each area and individual surface"><figcaption></figcaption></figure>

***

## How do you control hours display on work orders?

Edit the total number of hours by clicking “Total Hours” and updating the value.

<figure><img src="https://231248629-files.gitbook.io/~/files/v0/b/gitbook-x-prod.appspot.com/o/spaces%2FPyUbJF1GXLjxdJqm89IQ%2Fuploads%2Fgit-blob-f144ce688203ef6676f413505dc91c622df34eb7%2F1827570313_9c754ce10470d75f6730b8e31c3f?alt=media" alt="Screenshot showing the Total Hours field on the work order that can be clicked to edit"><figcaption></figcaption></figure>

You can also select from three different options when it comes to showing or hiding your work order hours across both Area and Surface views:

<figure><img src="https://231248629-files.gitbook.io/~/files/v0/b/gitbook-x-prod.appspot.com/o/spaces%2FPyUbJF1GXLjxdJqm89IQ%2Fuploads%2Fgit-blob-9347b4989d6024d730b22a476c904fa22a78f064%2F1827978546_17b4e3e2d4bbf5e0d7862093d95b?alt=media" alt="Screenshot showing the three hours display options: Show all hours, Hide item hours, and Hide all hours"><figcaption></figcaption></figure>

* **Show all hours:** Displays both the hours for each individual item and the total hours on the work order.
* **Hide item hours:** Hides the hours associated with each item while still showing total project hours.
* **Hide all hours:** Hides all hour details on the work order, including both item-level and total hours.

*Example of "Hide item hours":*

<figure><img src="https://231248629-files.gitbook.io/~/files/v0/b/gitbook-x-prod.appspot.com/o/spaces%2FPyUbJF1GXLjxdJqm89IQ%2Fuploads%2Fgit-blob-ce6878857624459e6f58a9c8340f5394fe4050ca%2F1827568698_e5855f400f21176b22eb76b2071a?alt=media" alt="Screenshot showing a work order with the Hide item hours option applied, displaying only total hours"><figcaption></figcaption></figure>

*Example of "Hide all hours":*

<figure><img src="https://231248629-files.gitbook.io/~/files/v0/b/gitbook-x-prod.appspot.com/o/spaces%2FPyUbJF1GXLjxdJqm89IQ%2Fuploads%2Fgit-blob-eb1c7c0303a795b4c7803c9c273bdd785d22b353%2F1828939768_36b4f991fd8d7c64acb0dcf3075a?alt=media" alt="Screenshot showing a work order with the Hide all hours option applied, with no hours visible"><figcaption></figcaption></figure>

***

## How do you add crew notes to a work order?

Crew notes communicate information to your production team. They do not appear on the customer-facing estimate. Add notes in three places:

1\. **At the top of the Work Order:** Click the **Edit Crew Note** button and add in your note.

<figure><img src="https://231248629-files.gitbook.io/~/files/v0/b/gitbook-x-prod.appspot.com/o/spaces%2FPyUbJF1GXLjxdJqm89IQ%2Fuploads%2Fgit-blob-2095cabbb38b1fc387ef1bc82d173c3069b2e530%2F347e8f0cf67ba6c4e24179a6_PaintScout_Edit_Estimate_2024-04-05_at_3_09_46_PM.jpg?alt=media" alt="Screenshot showing the Edit Crew Note button at the top of the work order"><figcaption></figcaption></figure>

2\. **On specific areas (like rooms or spaces):** Click on the area and select the **add notes** button along the bottom. Type your note in the **Crew Note** box.

<figure><img src="https://231248629-files.gitbook.io/~/files/v0/b/gitbook-x-prod.appspot.com/o/spaces%2FPyUbJF1GXLjxdJqm89IQ%2Fuploads%2Fgit-blob-a8315d130b02f92aabcace707038d04d1bc5de80%2F534e2307fa6fd524c96c6504_Screen_Recording_2024-04-05_at_03_15_55_PM.gif?alt=media" alt="Animated walkthrough showing how to add a crew note to a specific area using the add notes button"><figcaption></figcaption></figure>

3\. **On individual surfaces:** Click on a surface, scroll down to the crew note box, and add your note there. This can be done from the estimate or work order!

<figure><img src="https://231248629-files.gitbook.io/~/files/v0/b/gitbook-x-prod.appspot.com/o/spaces%2FPyUbJF1GXLjxdJqm89IQ%2Fuploads%2Fgit-blob-8246280ae1df82414e63f397ee84705fc6c7b722%2F6abe8aeb45d72682d2faa61e_Screen_Recording_2024-04-05_at_03_18_49_PM.gif?alt=media" alt="Animated walkthrough showing how to add a crew note to an individual surface"><figcaption></figcaption></figure>

***

## How do you download a work order?

Click the drop-down arrow beside the send button and choose **Download Work Order** to save it as a PDF.

<figure><img src="https://231248629-files.gitbook.io/~/files/v0/b/gitbook-x-prod.appspot.com/o/spaces%2FPyUbJF1GXLjxdJqm89IQ%2Fuploads%2Fgit-blob-a35d4f40be5b91a5aa3e3751762b97bd0d737aab%2F29f3a373119d6973d7c60d22_Screen_Recording_2022-08-17_at_10.51.57_AM.gif?alt=media" alt="Animated walkthrough showing how to download a work order as a PDF from the send button dropdown"><figcaption></figcaption></figure>

***

## How do you share work orders with your team?

Share work orders using any of these three methods:

1\. By Email or Text: Click the **Send** button and then email or text the work order.

2\. Share the work order link with your team. Click the drop-down arrow beside the send button and choose **Copy Work Order Link**, then provide that URL to your team.

<figure><img src="https://231248629-files.gitbook.io/~/files/v0/b/gitbook-x-prod.appspot.com/o/spaces%2FPyUbJF1GXLjxdJqm89IQ%2Fuploads%2Fgit-blob-4debd64a3158b87e927e622a073c192290385468%2F4a065c4e83870100f5c17b7a_Screen_Recording_2022-08-17_at_10.47.59_AM.gif?alt=media" alt="Animated walkthrough showing how to copy the work order link from the send button dropdown for sharing"><figcaption></figcaption></figure>

3\. Click the drop-down arrow beside the send button and choose **'Download Work Order'** - this will download as a PDF that you can then share with your team.

***

## Layout & Options

If you would like any of the following options enabled, please [contact our support team.](mailto:support@paintscout.com)

* Your crew notes to be highlighted in yellow
* Your work to show in a single column as opposed to the default 2-column layout.

&#x20;&#x20;

## Related articles

<table data-card-size="large" data-view="cards"><thead><tr><th></th><th></th><th data-hidden data-card-target data-type="content-ref"></th></tr></thead><tbody><tr><td><strong>Share With Your Team</strong></td><td>Share estimates and work orders with your team via email, live links, or downloadable PDFs for seamless collaboration.</td><td><a href="/support/estimating/sending-and-acceptance/how-to-share-estimates-and-work-orders-with-your-team">Share With Your Team</a></td></tr><tr><td><strong>Crew Notes</strong></td><td>Add crew notes to areas, surfaces, line items, or work orders to communicate important information hidden from customers.</td><td><a href="/support/estimating/notes-and-communication/adding-crew-notes">Crew Notes</a></td></tr><tr><td><strong>Product Rounding</strong></td><td>Understand how PaintScout rounds product quantities on estimates and work orders, and configure rounding to match your purchasing needs.</td><td><a href="/support/customization/products/product-rounding">Product Rounding</a></td></tr><tr><td><strong>Assign a Product to a Rate</strong></td><td>Link default products to production rates so material calculations happen automatically when adding surfaces to estimates.</td><td><a href="/support/customization/products/how-to-assign-a-product-to-a-rate">Assign a Product to a Rate</a></td></tr></tbody></table>


# Translating Work Orders to Another Language

Translate work orders using browser translation tools or add manual crew notes in another language for your team.

## Option 1: Use the Google Translate Chrome Extension <a href="#h_f73546455d" id="h_f73546455d"></a>

[Google Translate for Chrome](https://chromewebstore.google.com/detail/google-translate/aapbdbdomjkkjkaonfhkkikfgjllcleb)

Once you have downloaded the extension, here's how to translate your page!

<figure><img src="https://231248629-files.gitbook.io/~/files/v0/b/gitbook-x-prod.appspot.com/o/spaces%2FPyUbJF1GXLjxdJqm89IQ%2Fuploads%2Fgit-blob-eaa0f7fc3b20d28f7a9a4d281cf4d279cf1941a4%2F2ce082fa169c0296f32d0a1a_Screen_Recording_2021-10-12_at_11.07.59_AM.gif?alt=media" alt="Animated walkthrough showing a work order page being translated in Chrome using the Google Translate extension"><figcaption></figcaption></figure>

Here are some notes about it:

* Downloading or Sending links to Work Orders would *not* have the translations... It's only on the browser that you have the translator running. You should be able to print with the translations on though.
* We aren’t liable for any of the translations. They would be provided by Google Translate, which we have no control over. It's just doing the same thing as copying/pasting text into <https://translate.google.com/>

## Option 2: Add a Crew Note in another language <a href="#h_601732d4a2" id="h_601732d4a2"></a>

You can add a crew note to any production rate or line item.

<figure><img src="https://231248629-files.gitbook.io/~/files/v0/b/gitbook-x-prod.appspot.com/o/spaces%2FPyUbJF1GXLjxdJqm89IQ%2Fuploads%2Fgit-blob-803866e870dc802750b17eb6a52ce16e5279a9d0%2F2f67a030c50d17395816cf47_Screen_Recording_2021-10-12_at_11.13.48_AM.gif?alt=media" alt="Animated walkthrough showing how to add a crew note in another language to a production rate or line item"><figcaption></figcaption></figure>

These notes will only show on the work order for your team to see.

<figure><img src="https://231248629-files.gitbook.io/~/files/v0/b/gitbook-x-prod.appspot.com/o/spaces%2FPyUbJF1GXLjxdJqm89IQ%2Fuploads%2Fgit-blob-0ecd89090d178d282e11b066a23e248b1aa40add%2F8352e5c09c57de63d75ab66e_PaintScout_Edit_Estimate_2024-06-21_at_11_05_11_AM.jpg?alt=media" alt="Screenshot showing a crew note written in another language displayed on the work order"><figcaption></figcaption></figure>

Here are some notes about it:

* You are manually adding the translations to the crew notes. It won't automatically translate the area label or product etc.
* You won't really be able to avoid *some* English on the page.\
  ​

&#x20;&#x20;


# Invoices

Create invoices from estimates, send them to customers, and track payments in PaintScout.

Invoices help you turn accepted estimates into billable documents and track payments. This section covers invoice creation, payment requests, payment tracking, updates to the payments experience, and common invoicing questions.

{% hint style="success" %}
**Start here:** Begin with [Create and Send an Invoice](/support/invoicing-and-payments/invoices/creating-invoices) for the step-by-step workflow.
{% endhint %}

## In this section

* [Why PaintScout Invoicing](/support/invoicing-and-payments/invoices/invoicing-with-paintscout) — Learn how invoices, payment requests, online payments, and payment tracking work together
* [Create and Send an Invoice](/support/invoicing-and-payments/invoices/creating-invoices) — Create invoices from accepted estimates manually or automatically, then send them to customers
* [Payments Table Overview](/support/invoicing-and-payments/invoices/payments-table-overview) — Find the right workflow for each payment task
* [What’s New in Payments](/support/invoicing-and-payments/invoices/payments-table-overview/whats-new-in-payments) — Explore the updated Payments Table, refunds, payment statuses, and reporting
* [Invoicing FAQ](/support/invoicing-and-payments/invoices/invoicing-faq) — Find answers about creating, editing, and managing invoices

&#x20;&#x20;


# Why PaintScout Invoicing?

Create invoices, manage payment requests, and track payments in PaintScout

{% hint style="success" %}
**Start here:** New to invoicing? Begin with [Create and Send an Invoice](/support/invoicing-and-payments/invoices/creating-invoices) for a step-by-step walkthrough.
{% endhint %}

Getting paid should be as smooth as writing the estimate. PaintScout's invoicing features let you convert accepted estimates into invoices, send payment requests, collect card or ACH payments, record offline payments, and track every dollar from deposit to final balance without leaving the platform.

{% hint style="info" %}
A new payments experience is rolling out in stages. Depending on your account, you may see refreshed payment labels, new statuses, refund tools, and updated reports.

See [What’s New in Payments](/support/invoicing-and-payments/invoices/payments-table-overview/whats-new-in-payments) for the rollout details.
{% endhint %}

## How Invoicing Works in PaintScout

The invoicing workflow in PaintScout is designed to flow naturally from your estimates:

1. **Create an invoice.** Once a customer accepts an estimate, you can [create and send an invoice](/support/invoicing-and-payments/invoices/creating-invoices) directly from that estimate. PaintScout pulls in the accepted scope, pricing, and customer details automatically, so there is no re-entering data.
2. **Send payment requests.** A [payment request](/support/invoicing-and-payments/payment-requests/how-to-create-a-payment-request) is a specific ask for money — whether it is a deposit before work begins, a progress payment, or the final balance. You can send multiple payment requests against a single invoice to break the job into manageable payment milestones.
3. **Collect payments.** When connected to [PaintScout Payments](/support/invoicing-and-payments/payments/paintscout-payments) or [Stripe](/support/invoicing-and-payments/payments/payment-processing-with-stripe), your customers can pay online by clicking the invoice link. You can also record cash, check, or other offline payments manually. If you offer financing through [Wisetack](/support/integrations/financing/wisetack-integration), customers can apply from supported estimates and invoices.
4. **Track everything.** The [Payments Table](/support/invoicing-and-payments/invoices/payments-table-overview) shows payment requests, recorded payments, and payment details in one place. You may also see statuses like **Processing**, **Failed**, and **Refunded**.

## Key Invoicing Features

* **Deposit requests** — [Create a payment request](/support/invoicing-and-payments/payment-requests/how-to-create-a-payment-request) before starting work to secure the job and protect your cash flow.
* **Multiple payment requests** — Break a large job into deposit, progress, and final payment milestones.
* **Flexible payment collection** — Request a payment, [record a manual payment](/support/invoicing-and-payments/recording-payments/how-to-manually-add-a-payment), or take card or ACH payments directly from the invoice.
* **Payment tracking and statuses** — Review what is requested, successful, processing, failed, or refunded in the [Payments Table](/support/invoicing-and-payments/invoices/payments-table-overview), based on your rollout.
* **Refund support** — [Refund](/support/invoicing-and-payments/refund-a-payment) eligible successful payments when refunds are enabled on your account.
* **Customer payment experience** — Learn [how customers make a payment](/support/invoicing-and-payments/payment-requests/how-customers-make-a-payment) so you can walk them through the process if they have questions.
* **Payment request management** — [Delete](/support/invoicing-and-payments/payment-requests/how-to-delete-a-payment-request) or [resolve payment requests](/support/invoicing-and-payments/payment-requests/how-to-mark-a-payment-request-as-paid) as needed to keep your invoice records accurate.

## Tips for Faster Payments

* **Connect a payment processor.** Online payments through [PaintScout Payments](/support/invoicing-and-payments/payments/paintscout-payments) or [Stripe](/support/invoicing-and-payments/payments/payment-processing-with-stripe) reduce the time between sending an invoice and getting paid.
* **Request deposits up front.** A deposit secures the customer's commitment and improves your cash flow before materials are purchased.
* **Send invoices promptly.** The sooner a customer receives an invoice after accepting an estimate, the sooner they are likely to pay.
* **Enable payment notifications.** Turn on payment-received emails in your [profile settings](/support/account-settings/your-profile/setting-up-email-notifications) so you know the moment money comes in.

&#x20;&#x20;

## Related articles

<table data-card-size="large" data-view="cards"><thead><tr><th></th><th></th><th data-hidden data-card-target data-type="content-ref"></th></tr></thead><tbody><tr><td><strong>Payment Methods</strong></td><td>Configure the list of accepted payment methods that appear on invoices such as check, cash, credit card, and other options.</td><td><a href="/support/customization/templates-and-presets/adding-payment-methods">Payment Methods</a></td></tr></tbody></table>


# Create and Send an Invoice

Create invoices from estimates manually or automatically, then send them to customers for payment.

In PaintScout, invoices are created directly from estimates. You can create them manually or have them generated automatically when an estimate is accepted.

Depending on your settings, you can also create an invoice from scratch.

***

## How to Create an Invoice Manually

1. Open an estimate.
2. Click the dropdown next to **Send**.
3. Select **Create Invoice**.

<figure><img src="https://231248629-files.gitbook.io/~/files/v0/b/gitbook-x-prod.appspot.com/o/spaces%2FPyUbJF1GXLjxdJqm89IQ%2Fuploads%2Fgit-blob-ff325e141c36c01bf572c52a011e0a83685a569c%2FScreenshot%202026-08-04%20at%204.31.13%E2%80%AFPM.png?alt=media" alt="Screenshot showing the Create Invoice option in the dropdown menu beside the Send button"><figcaption></figcaption></figure>

4. PaintScout generates the invoice from the estimate.

{% hint style="danger" %}
Estimates and invoices are **not** live documents - after creation, changes made to an estimate will also have to be manually changed on the invoice and vice versa.

To reduce extra manual work, we recommend creating an invoice after an estimate has been accepted.
{% endhint %}

***

## Automatic Invoice Generation

PaintScout can automatically create an invoice when an estimate is accepted. This saves a step if you always invoice after acceptance.

To enable this:

1. Go to **Account Settings** > **Invoices**
2. Toggle on **Automatic Invoice Generation**

See [Invoice Settings](/support/customization/templates-and-presets/invoice-settings) for full details.

{% hint style="info" %}
When deposits are enabled, an invoice also generates automatically after the customer accepts and pays their deposit via credit card. The deposit is recorded on the invoice and the remaining balance is shown.
{% endhint %}

***

## What Carries Over from the Estimate

When you create an invoice, PaintScout copies the following from the estimate:

* **Contact information** — customer name, email, address
* **Accepted line items and areas** — all items the customer agreed to
* **Pricing** — totals, taxes, and discounts as calculated on the estimate
* **Options** — only customer-accepted options are included
* **Additional work** — any approved additional work items

***

## Send an Invoice

1. Open the invoice and click **Send**.
2. Write or review the email message.
3. Click **Send** to email the invoice to your customer.

<figure><img src="https://231248629-files.gitbook.io/~/files/v0/b/gitbook-x-prod.appspot.com/o/spaces%2FPyUbJF1GXLjxdJqm89IQ%2Fuploads%2Fgit-blob-7e037a4367f532ffb4366c21dce4ad76c020fd67%2FZight%20Recording%202026-08-04%20at%2004.29.41%20PM.gif?alt=media" alt="Animated screenshot showing the process of sending an invoice via email to a customer"><figcaption></figcaption></figure>

&#x20;&#x20;

## Related articles

<table data-card-size="large" data-view="cards"><thead><tr><th></th><th></th><th data-hidden data-card-target data-type="content-ref"></th></tr></thead><tbody><tr><td><strong>Invoice Settings</strong></td><td>Configure invoice due dates and enable automatic invoice generation when estimates are accepted in PaintScout.</td><td><a href="/support/customization/templates-and-presets/invoice-settings">Invoice Settings</a></td></tr><tr><td><strong>All Invoices Report</strong></td><td>View and manage all invoices in your account with status breakdowns, payment tracking, and cash flow monitoring tools.</td><td><a href="/support/dashboard-and-reports/reports/all-invoices-report">All Invoices Report</a></td></tr><tr><td><strong>Outstanding Invoices Report</strong></td><td>Monitor unpaid invoices and accounts receivable to ensure timely payments and maintain healthy cash flow management.</td><td><a href="/support/dashboard-and-reports/reports/outstanding-invoices-report">Outstanding Invoices Report</a></td></tr></tbody></table>


# Payments Table Overview

Find the right workflow to request, record, take, refund, and review invoice payments.

The Payments Table helps you request, record, refund, and review payments on an invoice.

<figure><img src="https://231248629-files.gitbook.io/~/files/v0/b/gitbook-x-prod.appspot.com/o/spaces%2FPyUbJF1GXLjxdJqm89IQ%2Fuploads%2Fgit-blob-abe6b1870e32e9130383105c779a9753a0820915%2FScreenshot%202026-07-07%20at%209.07.36%E2%80%AFAM.png?alt=media" alt="Screenshot showing the Payments Table located between the Invoice and Options sections on an invoice"><figcaption></figcaption></figure>

***

## Choose a payment task

Use the Payments Table to track every payment activity on an invoice.

* [Record a Manual Payment](/support/invoicing-and-payments/recording-payments/how-to-manually-add-a-payment) — Record cash, check, or electronic transfer payments.
* [Create a Payment Request](/support/invoicing-and-payments/payment-requests/how-to-create-a-payment-request) — Request a deposit, progress payment, or balance from your customer.
* [Take a Credit Card Payment](/support/invoicing-and-payments/payments/manual-credit-card-payments) — Take a card payment directly on the invoice.
* [Take an ACH/EFT Payment](/support/invoicing-and-payments/payments/take-an-ach-eft-payment) — Take a bank payment directly on the invoice.
* [Resolving Payment Requests](/support/invoicing-and-payments/payment-requests/how-to-mark-a-payment-request-as-paid) — Review online payments or record an offline payment against a request.
* [Refund a Payment](/support/invoicing-and-payments/refund-a-payment) — Process full or partial refunds for eligible payments.
* [Payment Receipts](/support/invoicing-and-payments/payment-receipts) — Download an invoice payment receipt.

***

## Payment statuses

**Requested** — A payment request was sent and is waiting on payment.

**Successful** — The payment was received and settled.

**Processing** — The processor is still confirming the payment. ACH or EFT payments can take up to 5 business days.

**Failed** — The processor declined the payment. Manual payments do not fail.

**Refunded** — A paid payment was refunded.

&#x20;&#x20;

## Related articles

<table data-card-size="large" data-view="cards"><thead><tr><th></th><th></th><th data-hidden data-card-target data-type="content-ref"></th></tr></thead><tbody><tr><td><strong>Create and Send an Invoice</strong></td><td>Create invoices from estimates manually or automatically, then send them to customers for payment.</td><td><a href="/support/invoicing-and-payments/invoices/creating-invoices">Create and Send an Invoice</a></td></tr></tbody></table>


# What’s New in Payments

Explore the updated Payments Table, payment statuses, refunds, and payment reporting.

We've refreshed the payments experience across estimates, invoices, and deals. Here's what's new, and what it means for you.

***

## What’s new

* View the refreshed Payments Table across estimates, invoices, and deals.
* See clearer payment method labels, including debit card labels.
* Identify **Deposit**, **Progress**, and **Final** payments at a glance.
* Record payments, mark requests as successful, and delete manual payments from the table menu.
* Refund eligible payments from the table or Payment Details.

<figure><img src="https://231248629-files.gitbook.io/~/files/v0/b/gitbook-x-prod.appspot.com/o/spaces%2FPyUbJF1GXLjxdJqm89IQ%2Fuploads%2Fgit-blob-6bcdfe6835cdb9ee6de220ca2b8267a43969f9df%2FScreenshot%202026-07-07%20at%2010.10.57%E2%80%AFAM.png?alt=media" alt="Refreshed Payments Table showing payment types and actions"><figcaption></figcaption></figure>

***

## Track each payment’s status

The Payments Table now shows the full payment lifecycle:

* **Requested** — The customer has not paid yet.
* **Processing** — The processor is confirming the payment.
* **Successful** — The payment was received and settled.
* **Failed** — The processor declined the payment.
* **Refunded** — The payment was refunded.

<figure><img src="https://231248629-files.gitbook.io/~/files/v0/b/gitbook-x-prod.appspot.com/o/spaces%2FPyUbJF1GXLjxdJqm89IQ%2Fuploads%2Fgit-blob-830f66405f4d767a1737968f04a2fdb55fcd7f19%2FScreenshot%202026-07-07%20at%2010.11.47%E2%80%AFAM.png?alt=media" alt=""><figcaption></figcaption></figure>

***

## Refund payments

You can now issue refunds right from the payments table, payment details, or deal payments — no need to jump into the portal. Once a refund goes through, you'll get a clear **Refunded** status and a matching refund receipt.

Only **Successful** payments can be refunded. Start a refund from the payment menu or **Payment details**.

[PaintScout Payments](/support/invoicing-and-payments/payments/paintscout-payments) supports full and partial refunds for credit card and ACH payments. You can also record manual refunds in PaintScout.

Refund [Stripe](/support/invoicing-and-payments/payments/payment-processing-with-stripe) payments through the Stripe portal as these cannot be processed on PaintScout.

***

## ACH payments show real-time status

Instead of a payment just sitting there, you'll now see a **Processing** status until an ACH payment actually lands.

If a card or ACH payment doesn't go through, you'll see a **Failed** status along with the reason why (like insufficient funds or an expired card), so you know exactly what happened without digging.

***

## New Email Templates & Notifications

You can now customize the messages customers see when an ACH payment is processing, or when a payment fails or gets refunded, so they know what's happening without needing to reach out to you.

<figure><img src="https://231248629-files.gitbook.io/~/files/v0/b/gitbook-x-prod.appspot.com/o/spaces%2FPyUbJF1GXLjxdJqm89IQ%2Fuploads%2Fgit-blob-200bf6b40ec211d272c0cb97c548ca999933cd49%2FScreenshot%202026-07-07%20at%2010.13.26%E2%80%AFAM.png?alt=media" alt="Payment email templates for processing, failed, and refunded payments"><figcaption></figcaption></figure>

Manage ACH processing and failed-payment notifications in your **Profile**.

<figure><img src="https://231248629-files.gitbook.io/~/files/v0/b/gitbook-x-prod.appspot.com/o/spaces%2FPyUbJF1GXLjxdJqm89IQ%2Fuploads%2Fgit-blob-1495b5916958778b7aa91c5ff33e839f23c2f43f%2FScreenshot%202026-07-07%20at%2010.14.09%E2%80%AFAM.png?alt=media" alt="Payment notification settings"><figcaption></figcaption></figure>

***

## Your reporting gives you better insights

The refreshed [Payments Report](/support/dashboard-and-reports/reports/payments-collected-report) breaks down successful, failed, processing, and refunded payments.

<figure><img src="https://231248629-files.gitbook.io/~/files/v0/b/gitbook-x-prod.appspot.com/o/spaces%2FPyUbJF1GXLjxdJqm89IQ%2Fuploads%2Fgit-blob-b098677b49e8a6dd1d5c9c6e4958675a27536862%2FScreenshot%202026-07-07%20at%2010.16.06%E2%80%AFAM.png?alt=media" alt="Payments Report with payment status breakdown"><figcaption></figcaption></figure>

The updated [Payment Requests Report](/support/dashboard-and-reports/reports/payment-requests-report) helps you review open and completed requests.

<figure><img src="https://231248629-files.gitbook.io/~/files/v0/b/gitbook-x-prod.appspot.com/o/spaces%2FPyUbJF1GXLjxdJqm89IQ%2Fuploads%2Fgit-blob-631cd8d1f4793a0936eb5561108811c5ade802b9%2FScreenshot%202026-07-07%20at%2010.18.36%E2%80%AFAM.png?alt=media" alt="Payment Requests Report"><figcaption></figcaption></figure>

<details>

<summary><strong>Why did my payment fail?</strong></summary>

Payment failures come from the payment processor. Common reasons include insufficient funds, an expired card, or a decline from the customer's bank.

When available on your account, the activity log shows a **Payment has failed** entry with the processor reason.

</details>

<details>

<summary><strong>Can I refund a payment that is still processing?</strong></summary>

No. Only payments with a **Successful** status can be refunded.

</details>

<details>

<summary><strong>Can I issue a partial refund?</strong></summary>

Yes. Partial refunds are available for PaintScout Payments and manual payments. Stripe refunds are not available in PaintScout.

</details>

<details>

<summary><strong>Why can't I refund Stripe in PaintScout?</strong></summary>

Stripe refunds are still completed in Stripe. Open the payment menu and choose the Stripe portal option when it appears on your account.
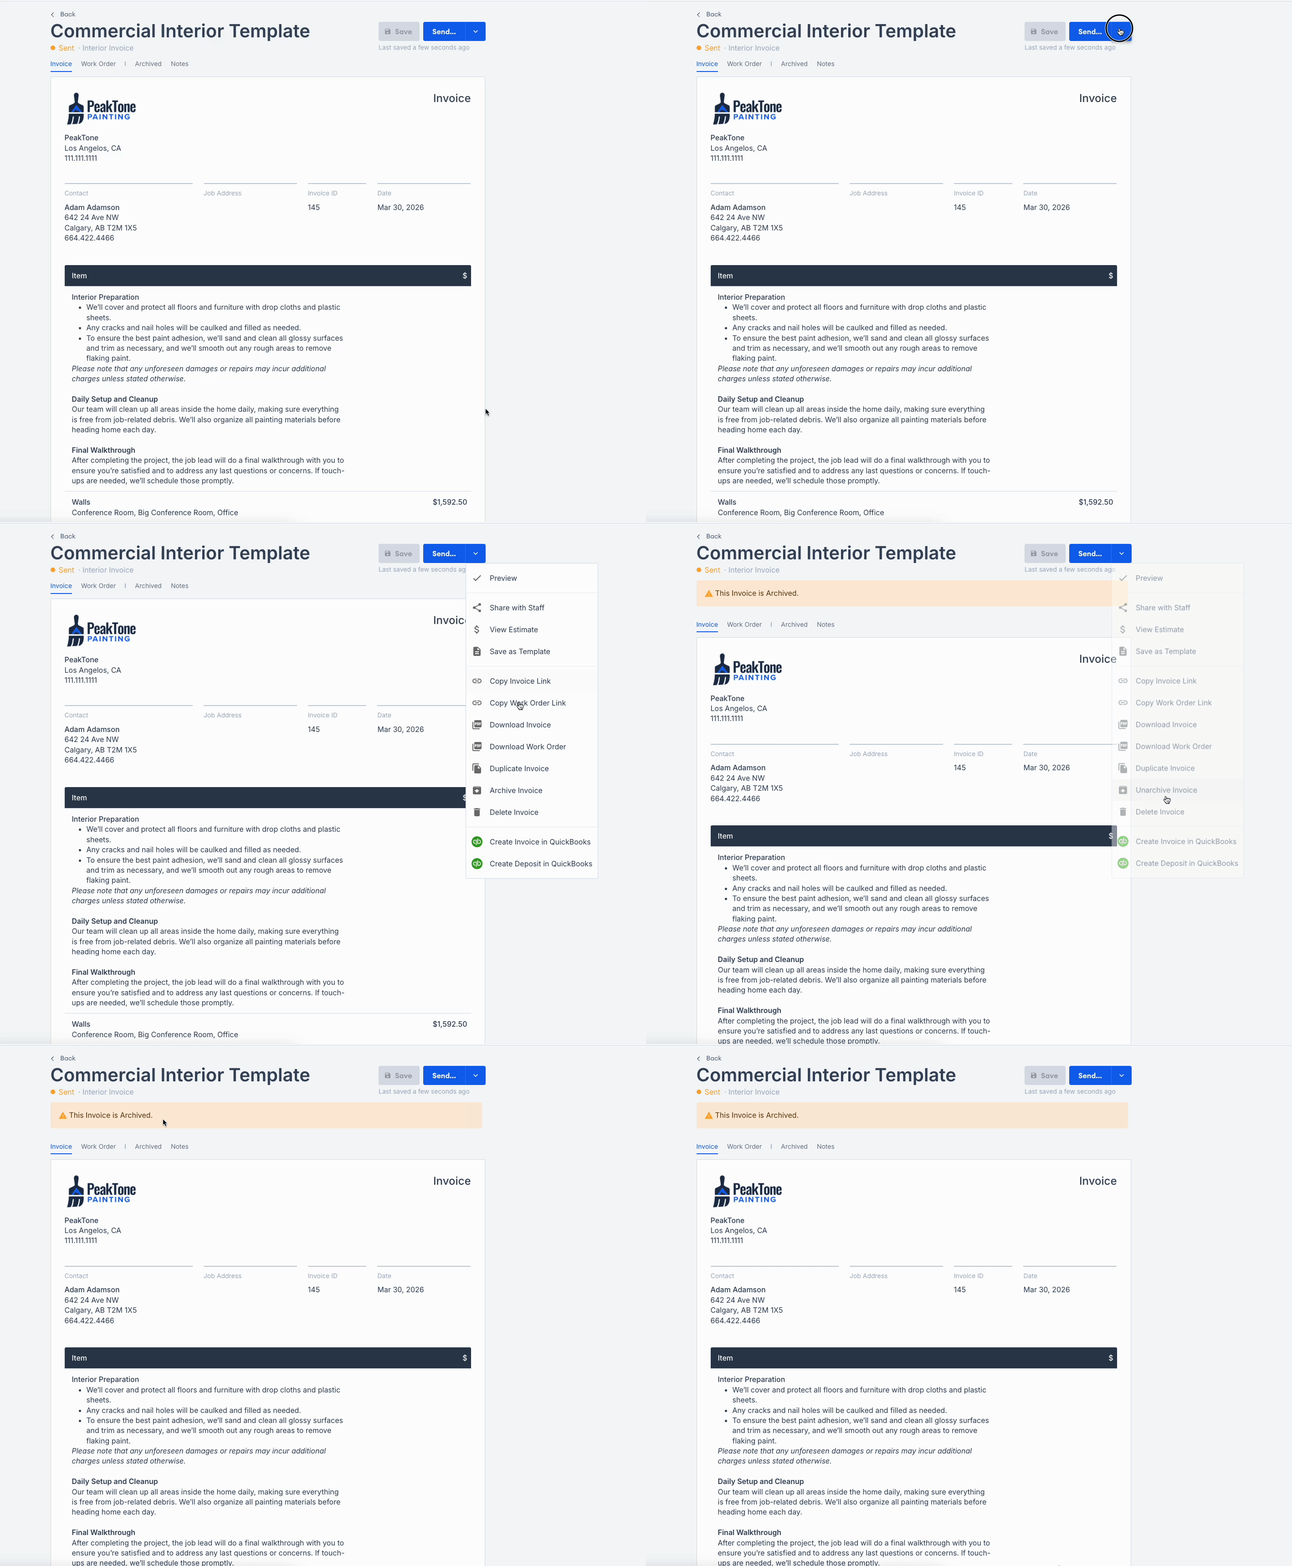
</details>

## Learn more

* [Payments Table Overview](/support/invoicing-and-payments/invoices/payments-table-overview) — Request, record, take, and refund payments.
* [Payment Processing](/support/invoicing-and-payments/payments) — Set up payment processing and payment methods.
* [Payments Report](/support/dashboard-and-reports/reports/payments-collected-report) — Review and export collected payments.

&#x20;&#x20;


# Invoicing FAQ

Answers to common questions about creating, editing, and managing invoices in PaintScout.

## Do I need to accept the estimate first?

Depending on your settings, **Create Invoice** may only appear for accepted estimates.

## Can I edit the invoice after creating it?

Yes. The invoice captures the estimate at creation time. Later changes **do not sync** between documents.

## What if I need to invoice for additional work?

Approved additional work transfers to the invoice. You can also [create additional work](/support/estimating/line-items-and-options/additional-work-change-orders) before creating the invoice.

## Can I create multiple invoices from one estimate?

No. Each estimate creates one invoice. Use [payment requests](/support/invoicing-and-payments/payment-requests/how-to-create-a-payment-request) for deposits or progress payments.

## Can I archive an invoice?

Yes. Archiving removes an invoice from your active list. It remains available in reports and can be reactivated.

1. On the invoice, open the dropdown beside **Send**.
2. Select **Archive Invoice**.
3. Confirm the archive banner appears.

<figure><img src="https://231248629-files.gitbook.io/~/files/v0/b/gitbook-x-prod.appspot.com/o/spaces%2FPyUbJF1GXLjxdJqm89IQ%2Fuploads%2Fgit-blob-e0a52e37e6520bed09cbf0d80652dfa228525e2b%2FZight%20Recording%202026-07-21%20at%2002.27.40%20PM.gif?alt=media" alt="Screenshot showing the Archive Invoice option in the dropdown beside the Send button"><figcaption></figcaption></figure>

&#x20;&#x20;

## Related articles

<table data-view="cards"><thead><tr><th>Article</th><th data-card-target data-type="content-ref">Link</th></tr></thead><tbody><tr><td>Create an invoice from an accepted estimate and email it to your customer.</td><td><a href="/support/invoicing-and-payments/invoices/creating-invoices">Create and Send an Invoice</a></td></tr><tr><td>Configure due dates and automatic invoice generation.</td><td><a href="/support/customization/templates-and-presets/invoice-settings">Invoice Settings</a></td></tr><tr><td>Review invoice status, payments, and cash flow.</td><td><a href="/support/dashboard-and-reports/reports/all-invoices-report">All Invoices Report</a></td></tr></tbody></table>


# Recording Payments

Record and track payments received from customers.

Record payments received outside PaintScout, such as cash, check, or electronic transfer.

## In This Section

* [Record a Manual Payment](/support/invoicing-and-payments/recording-payments/how-to-manually-add-a-payment) — Record cash, check, or transfer payments and keep the invoice balance accurate

&#x20;&#x20;


---

[Next Page](/llms-full.txt/1)