> For the complete documentation index, see [llms.txt](https://help.paintscout.com/llms.txt). Markdown versions of documentation pages are available by appending `.md` to page URLs; this page is available as [Markdown](https://help.paintscout.com/support/integrations/accounting/quickbooks-online-integration.md).
# QuickBooks Online
Connect QuickBooks Online to export invoices, handle deposits, and sync payments automatically
PaintScout's QuickBooks Online integration exports invoices, handles deposits, and syncs payments automatically, eliminating double data entry between your estimating and accounting software.
## What is QuickBooks Online?
QuickBooks Online is an accounting software for tracking payments, creating invoices, managing payroll, and time tracking.
[Learn more about QuickBooks >](https://quickbooks.intuit.com)
***
## Why integrate QuickBooks and PaintScout?
Export invoices directly from PaintScout to QuickBooks, eliminating double entry and keeping your accounting in sync.
***
## How do I integrate with QuickBooks?
1\. Click the person icon in the top right of your page and go to your **Account Settings** > **Integrations** section.
2\. Locate QuickBooks and toggle it on. Log in to your QuickBooks account.
3\. Once you have connected your account, click the settings drop-down to customize the integration.
{% hint style="info" %}
You must have an option selected for each drop-down menu for the integration to work.
{% endhint %}
### Creating Invoices
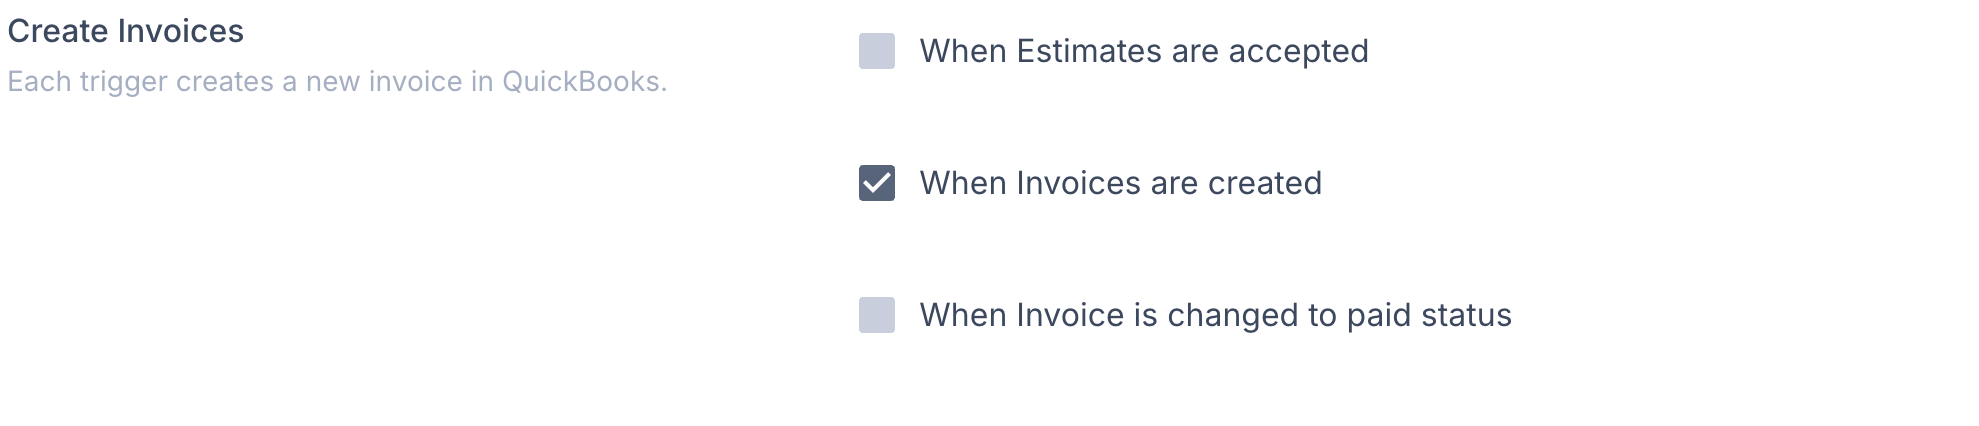
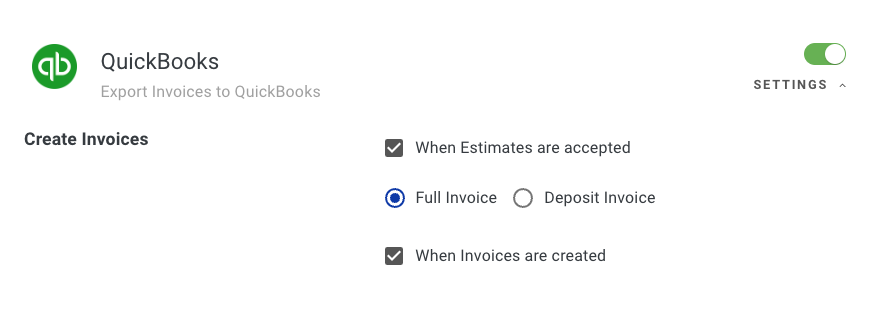
Choose when to create invoices in QuickBooks. Each selected trigger creates a separate QuickBooks invoice.
You can choose to automatically send an invoice to QuickBooks:
1. When an estimate is accepted
* Select if you would like to send a Full Invoice or a Deposit Invoice
2. When invoices are created
3. When an invoice is changed to "Paid"
{% hint style="warning" %}
Select only **one** trigger to prevent multiple QuickBooks invoices for the same work.
Remember that you can also manually send invoices through the "Send" menu on any PaintScout estimate or invoice.
{% endhint %}
### Update Invoices
Choose when invoice updates sync to QuickBooks.
Enable paid-status syncing to update invoices when they reach **Paid** status. You can also choose to **sync invoice to QuickBooks when a partial payment is received**. This optional setting syncs each partial payment for invoices already sent to QuickBooks.
The partial-payment setting is off by default. It only appears when paid-status syncing is enabled. Turning off paid-status syncing also clears the partial-payment setting.
### Canadian Users
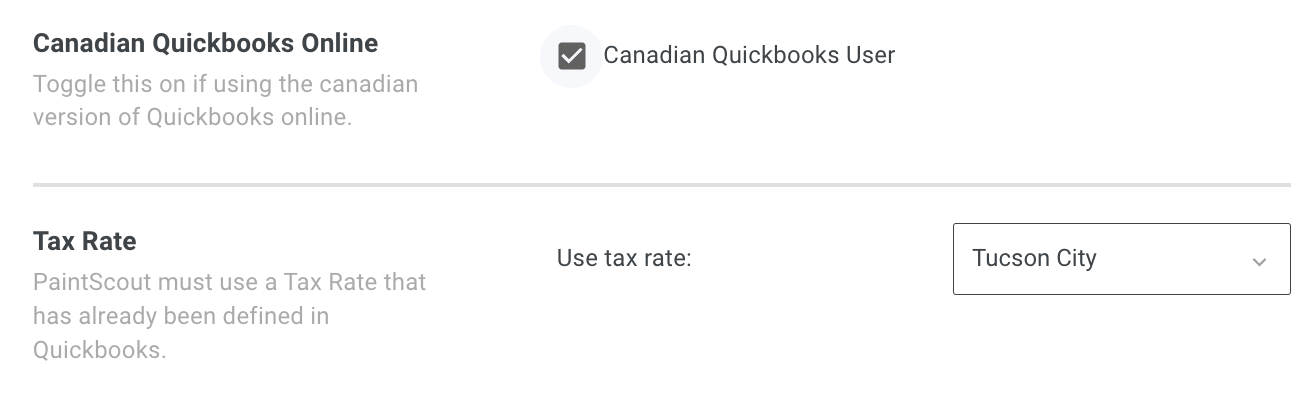
1\. To make sure our Canadian users have the best experience, it's important to toggle on the **Canadian QuickBooks User** button. This ensures that you are directed to the right version of QuickBooks specifically tailored to your needs.
2\. Once you have selected this checkbox, select your tax rate.
### Item Handling
Select if you want the invoice to show one item with the total, or show each individual item's price (Areas/Line Items).
* If **Area/Line Items** is selected, the pre-tax amount will be sent, allowing QuickBooks to handle the calculations line by line.
* Select if you want the invoice to not create descriptions.
### Total Item Value
Choose how you would like discounts to appear on your QuickBooks invoice - whether as a separate line or combined with the invoice total.
### Item Types
Select your item type. These must be set up in QuickBooks beforehand.
### QuickBooks Class
If you track **Classes** in QuickBooks, PaintScout can assign a class to each invoice based on the estimate type. You won’t need to add classes by hand in QuickBooks.
{% hint style="warning" %}
Classes are only available on **QuickBooks Online Plus** and **Advanced**. This section only appears in PaintScout when class tracking is turned on in QuickBooks.
{% endhint %}
**To set up classes:**
1. Choose a **Default class** from your QuickBooks account on PaintScout. Invoices for any estimate type *without* its own mapping get this class.
2. To give an estimate type a different class, click **Add mapping** on your PaintScout integration settings. Choose the estimate type, then the class.
3. Repeat for any other estimate types. Each estimate type can only be mapped once. To remove a mapping, click **✕**.
**How the class is applied** depends on your QuickBooks class tracking setting:
* **One to each transaction:** the class is set on the invoice itself.
* **One to each row in transaction:** the class is set on every line of the invoice, including deposit and total lines.
{% hint style="info" %}
**Additional Work** invoices follow the same rules.
If a mapped class is deleted or made inactive in QuickBooks, PaintScout uses your default class instead, and the invoice still syncs.
{% endhint %}
***
### Deposit Item Types
If you choose to have a Deposit Invoice created after an estimate is accepted - or from an individual invoice - you can select your deposit item type. This is what your deposit invoices will choose for a service item type instead of the one set for your actual items.
### Deposit Invoice Percentage
Choose if you would like PaintScout to create Deposit Invoices with a percentage of the total of your invoices. Feel free to customize this percentage amount.
### Include Surcharge
When surcharging is enabled in your account, you can choose to include surcharge amounts in your payment and deposit totals.
### Real Payments
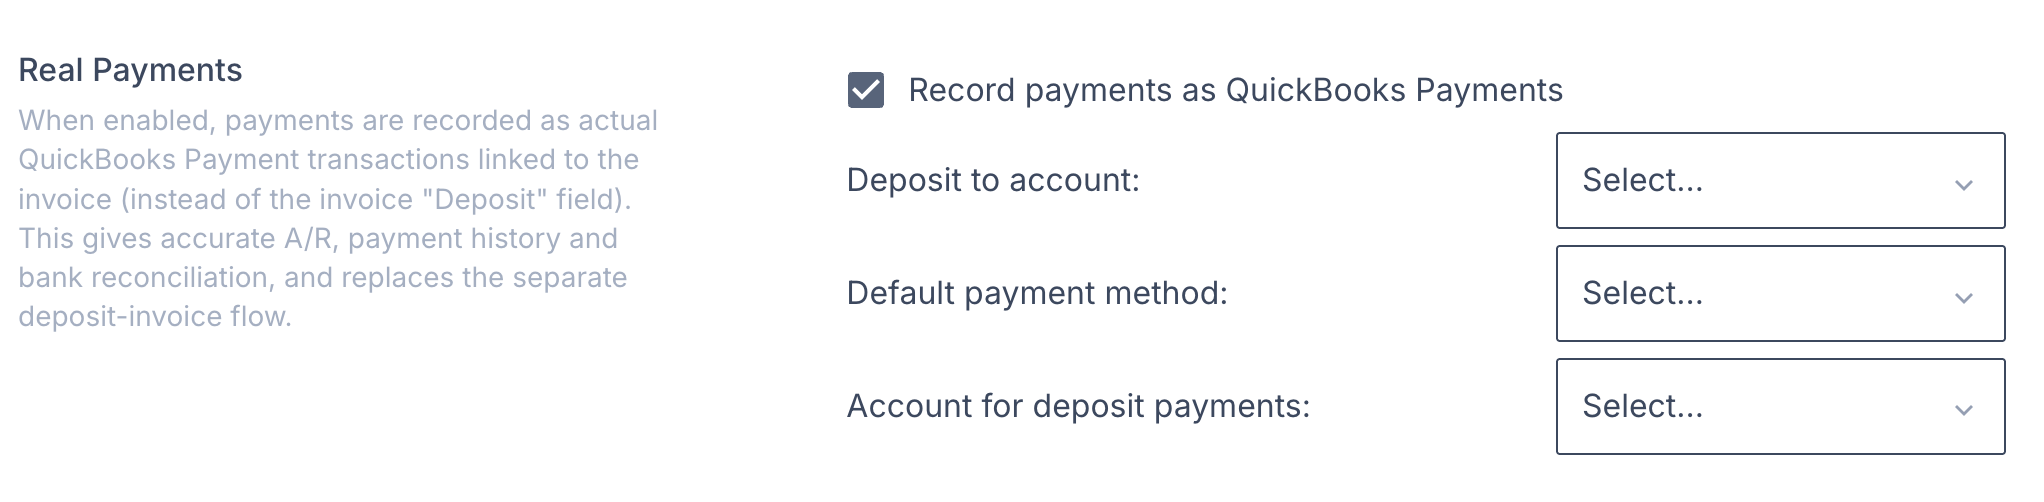
Configure how payment records sync to QuickBooks in the **Real Payments** section. If you choose to record payments as QuickBooks Payments, you can customize:
* Which account to deposit into
* The default payment method
* The account for deposit payments if you prefer to send deposits to a different QuickBooks account than regular payments
### Payment Settings Overrides
By default, invoices created will use the default payment settings from QuickBooks for credit card and ACH payments. You can override to turn these off.
***
## Can I sync my PaintScout invoice numbers to QuickBooks?
PaintScout can send its invoice number to the QuickBooks **Invoice No.** field. Enable custom transaction numbers in QuickBooks before syncing the invoice.
1. In QuickBooks, click the gear icon and select **Account and Settings**.
2. Select **Sales**.
3. Under **Sales form content**, enable **Custom transaction numbers**.
4. Save your changes.
When this setting is enabled, synced invoices use the PaintScout invoice number in QuickBooks. If it is disabled, QuickBooks assigns its own invoice number.
***
## Why don’t I see the QuickBooks Class setting?
{% hint style="warning" %}
Class tracking is only available on QuickBooks Online Plus and Advanced.
{% endhint %}
The **QuickBooks Class** section only appears when class tracking is turned on in your QuickBooks account:
1. In QuickBooks, click the gear icon and select **Account and Settings**.
2. Select **Advanced**.
3. Under **Categories**, turn on **Track classes**.
4. Choose how classes are assigned: **One to each transaction** or **One to each row in transaction**.
5. Save your changes, then refresh your PaintScout integration settings.
***
## How can I send invoices to QuickBooks?
You can adjust the settings below to suit your preferences
**1. When Estimates are Accepted**
* Will automatically create an invoice in QuickBooks when the PaintScout estimate has been accepted.
**2. When Invoices are Created**
* Will automatically create an invoice in QuickBooks when the PaintScout estimate is converted into an invoice.
**3. When an Invoice is marked as "Paid"**
* Will automatically create an invoice in QuickBooks when the PaintScout invoice is changed to "Paid" status.
**4. Manually from the "Send" dropdown**
* Go to your invoice and click the drop-down arrow beside the send button. You can choose to create a full or deposit invoice in QBO.
***
## Create a QuickBooks contact without an invoice
You can manually create a customer contact in QuickBooks from PaintScout without creating an invoice.
1. Open the estimate or invoice in PaintScout.
2. Click the dropdown next to **Send**.
3. Select **Create Contact in QuickBooks**.
This action only creates or updates the customer contact in QuickBooks. It does not create an invoice.
***
## Can I view or update my invoices in QuickBooks from PaintScout?
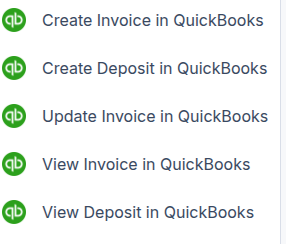
Yes. Easily view your invoices in Quickbooks when you click the "Send" menu dropdown. You can view either the full or deposit invoice in Quickbooks.
There's also an option to manually update your QuickBooks invoice.
***
## How should I send Additional Work to QuickBooks?
When your customer accepts additional work on an invoice, this will automatically send over to QuickBooks.
But you have the option to send these items to QuickBooks manually - for example, when the work is added to the invoice - from the drop-down arrow next to the send button:
***
## What happens when Additional Work has a negative total?
Because QuickBooks rejects invoices with a negative total or balance due, PaintScout will instead create a QuickBooks Online credit memo when Additional Work has a net-negative total.
Credit memos support negative balances on customer accounts. PaintScout automatically uses one for net-negative Additional Work.
## Related articles
Xero
Connect Xero accounting software to export quotes, invoices, and sync payments from PaintScout
---
# Agent Instructions
This documentation is published with GitBook. GitBook is the documentation platform designed so that both humans and AI agents can read, navigate, and reason over technical content effectively. Learn more at gitbook.com.
## Querying This Documentation
If you need additional information that is not directly available in this page, you can query the documentation by asking a question.
Perform an HTTP GET request on the following URL with the `ask` and `goal` query parameters:
```
GET https://help.paintscout.com/support/integrations/accounting/quickbooks-online-integration.md?ask=&goal=
```
`ask` is the immediate question: it should be specific, self-contained, and written in natural language.
`goal` is what the user is ultimately trying to achieve, the reason they need the answer. Sharing it helps GitBook give you a better, more relevant answer. A goal is most helpful when it describes the outcome the user wants rather than restating the question. For example, with `ask=how do I create an API token`, a goal like `automate deployments from our CI pipeline` lets GitBook tailor the answer to that use case.
The response will contain a direct answer to the question and relevant excerpts and sources from the documentation.
Use this mechanism when the answer is not explicitly present in the current page, you need clarification or additional context, or you want to retrieve related documentation sections.











.png?alt=media)