For the complete documentation index, see llms.txt. This page is also available as Markdown.

Create and Send an Invoice

Create invoices from estimates manually or automatically, then send them to customers for payment.

In PaintScout, invoices are created directly from estimates. You can create them manually or have them generated automatically when an estimate is accepted.

Depending on your settings, you can also create an invoice from scratch.


How to Create an Invoice Manually

  1. Open an estimate.

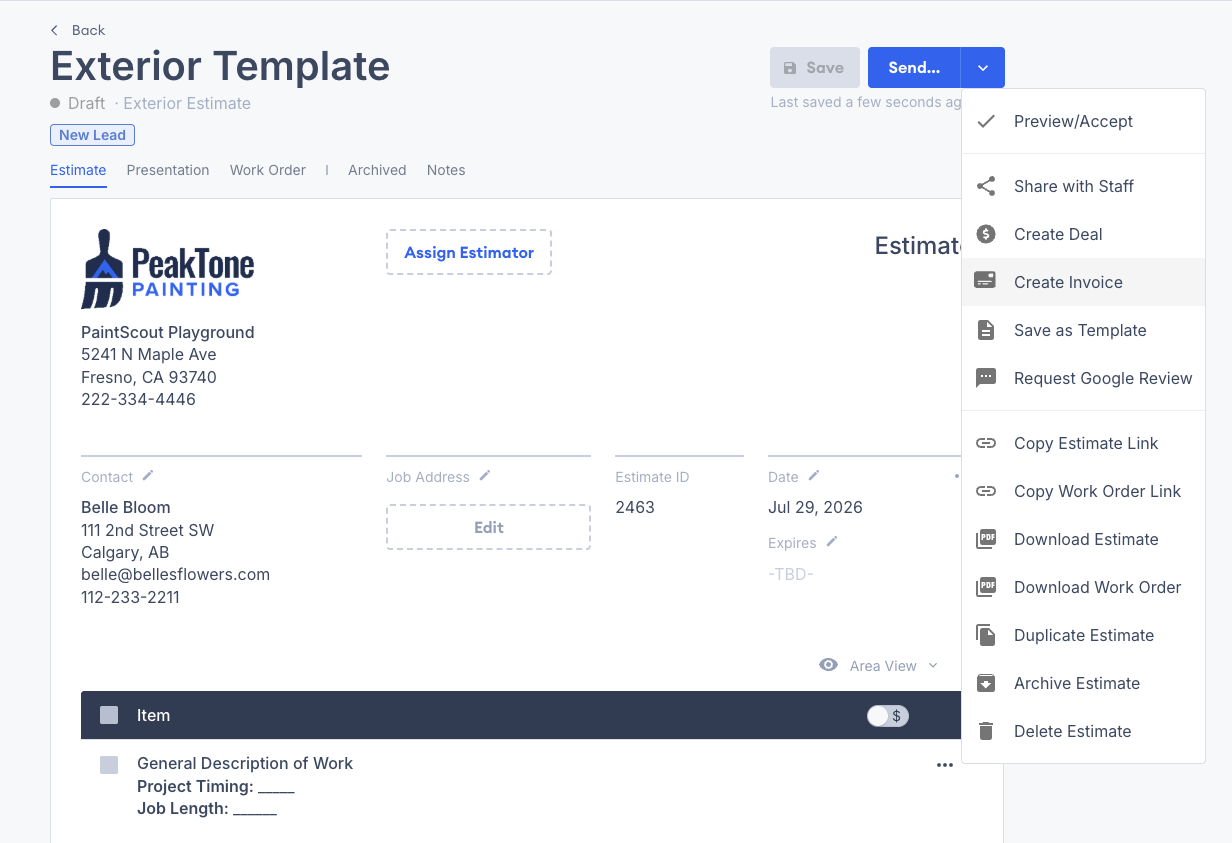
  2. Click the dropdown next to Send.

  3. Select Create Invoice.

Screenshot showing the Create Invoice option in the dropdown menu beside the Send button
  1. PaintScout generates the invoice from the estimate.


Automatic Invoice Generation

PaintScout can automatically create an invoice when an estimate is accepted. This saves a step if you always invoice after acceptance.

To enable this:

  1. Go to Account Settings > Invoices

  2. Toggle on Automatic Invoice Generation

See Invoice Settings for full details.

When deposits are enabled, an invoice also generates automatically after the customer accepts and pays their deposit via credit card. The deposit is recorded on the invoice and the remaining balance is shown.


What Carries Over from the Estimate

When you create an invoice, PaintScout copies the following from the estimate:

  • Contact information — customer name, email, address

  • Accepted line items and areas — all items the customer agreed to

  • Pricing — totals, taxes, and discounts as calculated on the estimate

  • Options — only customer-accepted options are included

  • Additional work — any approved additional work items


Send an Invoice

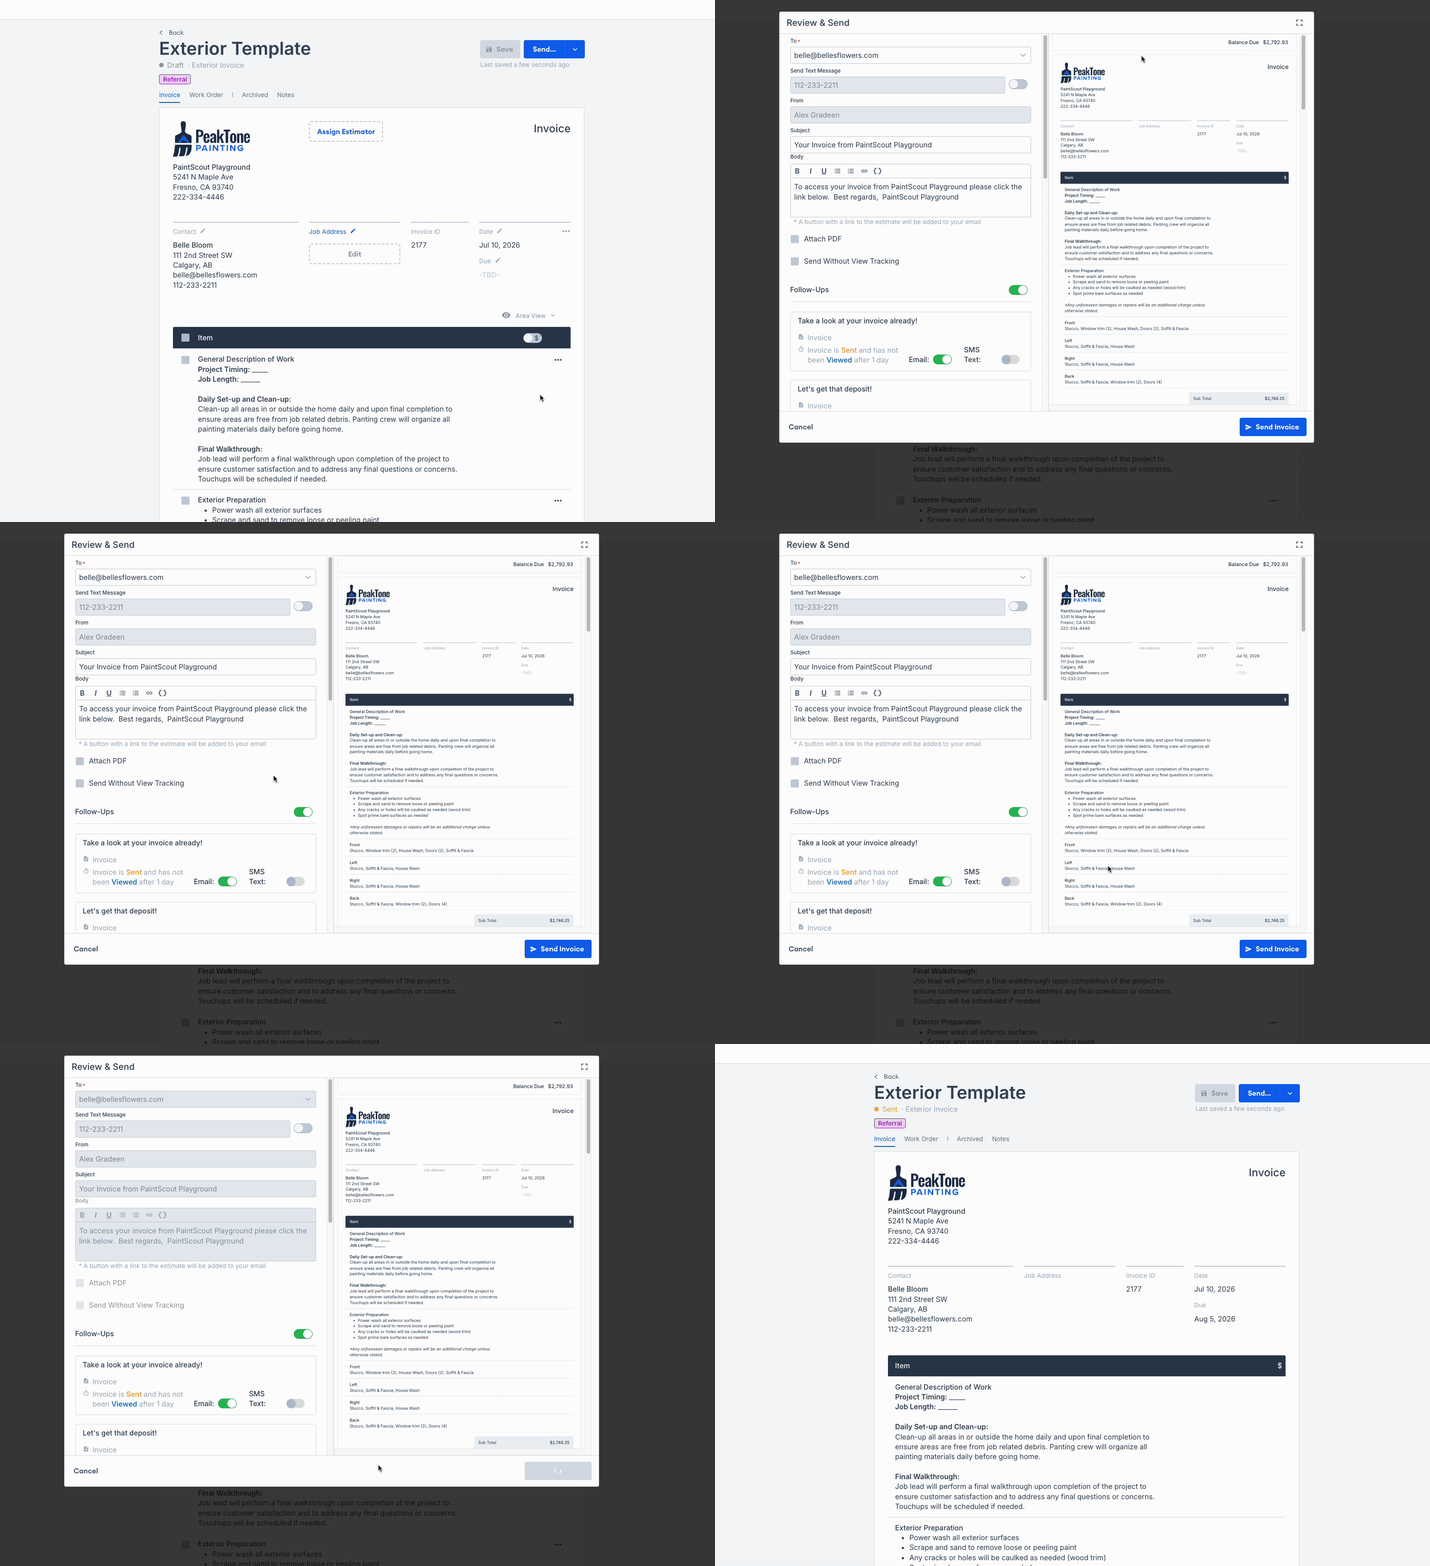
  1. Open the invoice and click Send.

  2. Write or review the email message.

  3. Click Send to email the invoice to your customer.

Animated screenshot showing the process of sending an invoice via email to a customer

Last updated

Was this helpful?